
Ken Cook
Member
- Messages
- 3,798
Thanks Allen, I wish I had a 10th of the talent I've seen in here! Still though, you're making me adjust my hat size a tad 
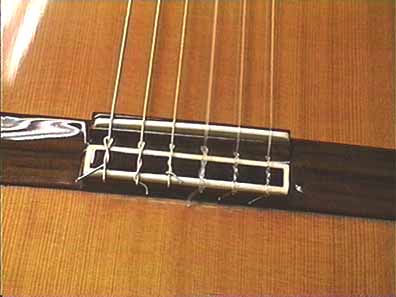
Yeah Darren, I believe I messed up drilling the holes, didn't have a tapering bit thingy-do so drilled to what I thought was close enough and used a tapered round file to finish. Another thing I just found out is that my inside bridge support is a touch on the thick side, the peg tips don't pass thru and so the ball ends don't completely either  .....Thinking I'm going to plug the holes in the body, build a new bridge and find the right bit/dimensions for the pegs.
One positive from this fiasco is, I used tite bonds hide glue which made taking the bridge off a piece of cake...a little heat from a blowdryer and a paint scraper and presto...
Here's a few shots just the same...


That's too bad, can you post a pic of the pin and the bridge. I'm curious how you did them. My Washburn has slots in the peg for the string to slip up through and the ball end usually is outside of that slot between the bottom of the bridge/soundboard and the pin, so not really a way for it to pop out.
Yeah Darren, I believe I messed up drilling the holes, didn't have a tapering bit thingy-do so drilled to what I thought was close enough
and used a tapered round file to finish. Another thing I just found out is that my inside bridge support is a touch on the thick side, the peg tips don't pass thru and so the ball ends don't completely either .....Thinking I'm going to plug the holes in the body, build a new bridge and find the right bit/dimensions for the pegs.One positive from this fiasco is, I used tite bonds hide glue which made taking the bridge off a piece of cake...a little heat from a blowdryer and a paint scraper and presto...
Here's a few shots just the same...
 much better than getting reamed by stewmac


 when Master turn on light switch, student see!

 more floor space...this is why the guitar has been on the back burner{well, that and the honey-do's}....pix to follow when finished.
 the gift came from a guitar God {as well as a guitar hoarder
