You are using an out of date browser. It may not display this or other websites correctly.
You should upgrade or use an alternative browser.
You should upgrade or use an alternative browser.
Online Carving class
- Thread starter Roy Millsaps
- Start date
Roy Millsaps
Member
- Messages
- 399
- Location
- St. Mary's, Georgia
No that's great using light coat until sealed up, glad you did both sides so it will not cup up on you that way 

Roy Millsaps
Member
- Messages
- 399
- Location
- St. Mary's, Georgia
Ok who is doing the carving let me know I will start Friday 3 October an please post a picture of your wood an carving tools please
Roy Millsaps
Member
- Messages
- 399
- Location
- St. Mary's, Georgia
Did you down load the pattern an transfer it to your wood an what size is your wood ???
Carol Reed
In Memoriam
- Messages
- 5,532
- Location
- Coolidge, AZ
Sorry. J-O-B got in the way for me.
- Messages
- 8,565
- Location
- Williamette Valley, Oregon
Still here.
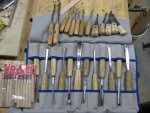
Toolset and the victim board (apologies for the picture quality, the lighting here by the time I get home this time of year is bleh at best and its not getting better!). I'm going to try it with a chunk of alder although I know its fussier than basswood but I don't have much basswood that's easy to get to (there's one piece that _might_ be big enough in the pile if the alder doesn't pan out). Completely willing to redo things though if/when it fails I've managed to do some "ok" carvings in alder before - its sort of a "how good of a job do you do at sharpening" challenge in some ways, more practice there wouldn't hurt either!
edit: wood is 5.5" by more than long enough.

Still need to scale the plan and transfer it, should be able to get to that either tomorrow or sometime this weekend (I'll continue to claim that I'm likely to be one of the laggarts but still playing along so please don't hold up the show for me).
Carol,
Roy did say you have a year to complete so I'm still counting you in as a delayed participant You can't get out of this that easy!!
Toolset and the victim board (apologies for the picture quality, the lighting here by the time I get home this time of year is bleh at best and its not getting better!). I'm going to try it with a chunk of alder although I know its fussier than basswood but I don't have much basswood that's easy to get to (there's one piece that _might_ be big enough in the pile if the alder doesn't pan out). Completely willing to redo things though if/when it fails
edit: wood is 5.5" by more than long enough.


Still need to scale the plan and transfer it, should be able to get to that either tomorrow or sometime this weekend (I'll continue to claim that I'm likely to be one of the laggarts but still playing along so please don't hold up the show for me).
Sorry. J-O-B got in the way for me.
Carol,
Roy did say you have a year to complete so I'm still counting you in as a delayed participant
Last edited:
Carol Reed
In Memoriam
- Messages
- 5,532
- Location
- Coolidge, AZ
Ryan,
J-O-B is a one year contract with an option to renew. Carving comes in so low on the list right now, not worth mentioning. Right after J-O-B comes building the house. Really think I will be too busy.
This is me learning how to say 'no' to more things. It would be fun, but going crazy is not!
J-O-B is a one year contract with an option to renew. Carving comes in so low on the list right now, not worth mentioning. Right after J-O-B comes building the house. Really think I will be too busy.
This is me learning how to say 'no' to more things. It would be fun, but going crazy is not!
- Messages
- 8,565
- Location
- Williamette Valley, Oregon
This is me learning how to say 'no' to more things. It would be fun, but going crazy is not!
Roy Millsaps
Member
- Messages
- 399
- Location
- St. Mary's, Georgia
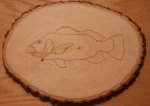
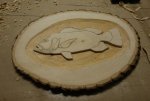
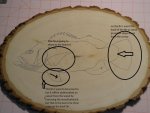
Use a sharp knife or excoto blade an cut into the wood around the pattern at a 90 degree angle . You are going to cut a groove around the outside of the pattern as you can see in the picture I'm going to do something different I going to give my fish some movement as it is swimming I'll explain it after the picture
Here is 1 of 2, I am doing
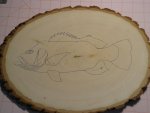
Here in this picture is what I'm talking about giving the fish the look of movement
Here is a picture of the outlining an removal of the material of the outline of the bass do this all the way around the bass , take your time an yes you can come off the pattern some if you want
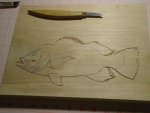
Picture above is an Example as you can see the center fin was done also but not deep at all
Important Note : You do not have to cut in between the spines yet you can cut above them an when you are at depth an we slope the top fin then we can do the splines then

Here is 1 of 2, I am doing

Here in this picture is what I'm talking about giving the fish the look of movement

Here is a picture of the outlining an removal of the material of the outline of the bass do this all the way around the bass , take your time an yes you can come off the pattern some if you want

Picture above is an Example as you can see the center fin was done also but not deep at all
Important Note : You do not have to cut in between the spines yet you can cut above them an when you are at depth an we slope the top fin then we can do the splines then

Roy Millsaps
Member
- Messages
- 399
- Location
- St. Mary's, Georgia
I took mine down to 1/4" at first then as I do the contouring then it will go deeper for the effects I am wanting
Roy Millsaps
Member
- Messages
- 399
- Location
- St. Mary's, Georgia
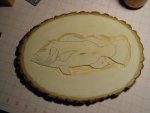
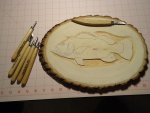
When you have the outline done then you take the outside down for the curvature of the carving you will need to keep up with the fins on the outside. Here is a picture what I'm talking about I am using a gouge to take the outside down before I shape the Bass. When you are getting ready to start the shaping of the Bass this helps I will even go deeper when I start the shaping of the bass Just be careful around the spines of the Bass


Roy Millsaps
Member
- Messages
- 399
- Location
- St. Mary's, Georgia
LOL Doing outstanding you can always add to the pattern by drawing in a few Lilly pads above the Bass to give the Bass some dimension, the smaller the pad the bigger the Bass an draw a stem down some to the body an remember don't be afraid to go deep, also add some river bed below the Bass now you have made your own pattern
Here is where I'm at now on mine, I haven't added the Lilly pads yet but I will an I'm thinking a frog to
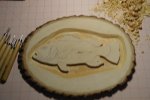
Now in the next picture I start with the main body behind the head
Important Note Don't do the head yet
To help me with the depth I start from the middle
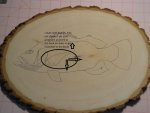
Here is where I'm at right now
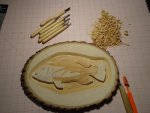
As you can see I left some of the fins proud I'm going to give the Bass some movement by doing this, I do not undercut theses yet until have reached my max depth with this carving an you want to do all the undercuts as the last thing to do so I don't break it by accident working on an other area
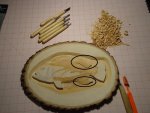
Here is where I'm at now on mine, I haven't added the Lilly pads yet but I will an I'm thinking a frog to

Now in the next picture I start with the main body behind the head
Important Note Don't do the head yet
To help me with the depth I start from the middle

Here is where I'm at right now

As you can see I left some of the fins proud I'm going to give the Bass some movement by doing this, I do not undercut theses yet until have reached my max depth with this carving an you want to do all the undercuts as the last thing to do so I don't break it by accident working on an other area

Paul Douglass
Member
- Messages
- 5,197
- Location
- S E Washington State
Just wanted to say, although I am not carving right now, I am really enjoying following. Hope to be able to give it a try a little latter in the year. Thanks for doing this, Roy.

