Here's our shop

Nancy Laird

Member
Messages
1,417
Location
Rio Rancho, NM
Here's our shop. This is a 24x36 building that started life as a 3-car garage (the real reason we bought this property). There is an 8x8' side room which I'll show later. We'll enter the shop from the 36" door on the north side 24' wall:

IMG_0071 (600 x 450).jpg
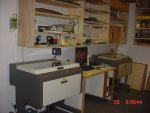
Sharpening station, tool wall (just 3/4" ply), and two Woodtek edge sanders. The one in the back is the new oscillating unit; the one in front is for sale!!
IMG_0072 (600 x 450).jpg
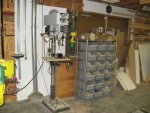
Continuing clockwise, the floor sweep for the DC, the Delta 16-1/2" VS drill press fitted with crosshair laser, and my rolling cart which holds all of my turning stock at the moment (found it at Sam's--great for holding pen and stopper blanks). Behind the cart you see the double doors (recycled from a hospital) for bringing in the big stuff. (We removed a double overhead garage door from this location; the ply tool wall had a single garage door where the wall is now.) Also the stand with the mortiser sitting on top.
IMG_0073 (600 x 450).jpg
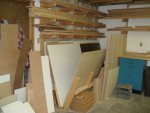
Wood storage in the corner, sheet goods standing on edge and lumber above (don't worry, there's more lumber!!).
IMG_0074 (600 x 450).jpg
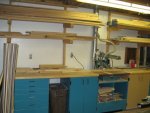
Left end of the RS bench. Drawers down the left side, oscillating spindle sander in the next cabinet on a pop-up mechanism, RS, and CMS in the next cabinet on another pop-up. Note more lumber above.
IMG_0075 (600 x 450).jpg
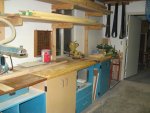
Right end of the RS bench. Cabinet for jig and template storage, PM power feeder sitting on the bench, and MatchMaker tucked into the corner.
IMG_0076 (450 x 600).jpg
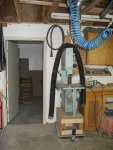
Looking into the finishing room, with the monster Hitachi resawing bandsaw and the DC hose hanging off it.
IMG_0077 (600 x 450).jpg
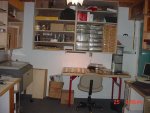
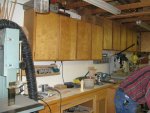
Shot down the west wall, showing the overhead cabinets (purchased on clearance at Home Base) and the shop-built cabinets below. Between the first two cabinets lives a rolling assembly/storage cart built to fit. (That's hubby working on a job).
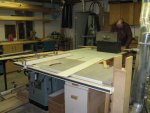
IMG_0078 (600 x 450).jpg
The Delta Unisaw with Bies fence, Excalibur sliding table, and home-built outfeed table with storage beneath (which needs to be closed in to keep the dust out). (Hubby again with the ROS in hand.)

IMG_0079 (600 x 450).jpg
Another shot of the cabinet/workbench wall. Middle opening holds the router table, right opening holds the midi-lathe stand, and 24" Woodtek dual-drum sander.
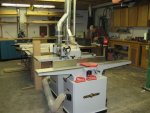
IMG_0080 (600 x 450).jpg
The two newest toyls, Steel City 6" wedge-bed jointer and 15" planer. Both of these and the Unisaw are hooked into the same DC pipe with blast gates for each one.
 
More of the shop:

IMG_0081 (600 x 450).jpg
In the corner is an Atlas lathe that was Dave's dad's, and the Atlas bandsaw that we also inherited. Both were purchased in the early 50s, for a grand total of about $75 at the time. Both are in good working condition and are used. In front is the shop-built scroll-saw stand, holding a DeWalt 20" scroll-saw and a Delta 1x42"belt/8"disk sander.

IMG_0082 (600 x 450).jpg
Tool wall (pegboard) above the lathe.

IMG_0083 (600 x 450).jpg
Another shot of the dual-drum. On the counter behind are a Delta 13-pin boring machine and a hinge-boring machine. (My little midi-lathe tucked underneath.)

IMG_0084 (600 x 450).jpg
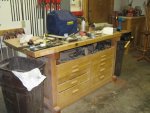
Shop-built workbench with the new Tormek sitting on it (along with a lot of other junk that needs to be put away. The drawers will slide out both ways, so we can reach whatever is in the drawers from either side of the bench.

IMG_0085 (600 x 450).jpg
Clamp wall - does anyone ever have enough clamps? No!!

IMG_0088 (450 x 600).jpg
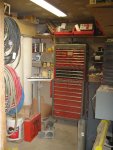
The little 8x8' add-on holding the DC (Oneida cyclone), rolling tool cabinet, and a 5hp 60 gallon compressor.


You may have noticed that everything but the Unisaw, jointer, planer, and workbench are on mobile bases so we can move things around as we need them.

We sure like our little shop!

Thanks for looking.

Nancy
 
WOW! :eek: What a beautiful setup nancy.
I will be sending the shop specs to Penn State IND. tomorrow for my DC designing and I have a guy ready to set it up. One day I'll have a set of pictures for you.
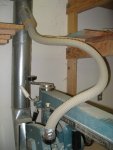
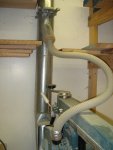
Would you mind posting a couple of closeups of that DC setup you have there for the Radial Armsaw?

Great shop! :clap:

DT
 
Last edited:
Great looking shop Nancy!!!

I'm GREEN with envy over all the space you have, not to mention the nice set of tools!!

Great tour, thanks for taking the time to show us, you guys should be real proud of that shop!! :clap:
 
Terrific shop, Nancy! I like the flor around the table saw, planer, and jointer. Well done!

Of course, the rest is also great. And you even have permanent DC, a huge plus. I think we are ready to install permanent DC soon, as time is available.

Thanks for sharing.


.
 
WOW! :eek: What a beautiful setup nancy.
I will be sending the shop specs to Penn State IND. tomorrow for my DC designing and I have a guy ready to set it up. One day I'll have a set of pictures for you.
Would you mind posting a couple of closeups of that DC setup you have there for the Radial Armsaw?

Great shop! :clap:

DT

Don, I'll take some pictures tonight after work and post them for you.

Nancy
 
I hadn't even thought about adding the pics of the laser shop, but I'll do it if anyone wants to see them. Not many laserheads on this forum, I don't think.

Nancy

just `cause most of us here don`t or can`t laser doesn`t mean we`re not interested;) .....i think the laser/computer side of woodworking is pretty cool. but something tells me that untill i master the caps key, figuring out how to make a computer cut boards isn`t in my future...i just left a friends shop who cuts cabinet boxes on a single head komo router and it`s cool to watch! a full sheet of veneered ply cut/dadoed/shelf-holed and labled while you stand around and wait......
 
Thanks, Tyler. Yes, that BS IS a beast. It has a 3" blade on it and cuts like a hot knife through butter on anything we throw at it.

But don't let anyone ever tell you that you can't get kickback from a BS. LOML was resawing some quilted maple and lost his concentration for just a moment, and the BS threw the stuff back right into his mouth!! Fortunately it wasn't a very hard hit because he saw it coming, but it loosened a front tooth!

It was a not-so-gentle reminder to keep his head and his body in the same place at the same time!!

Nancy
 
This is for Don:

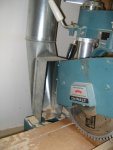
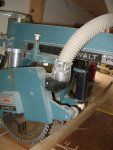
Don, here are the pictures promised of the setup for the RAS on our DC system:

IMG_0089 (600 x 450).jpg

IMG_0090 (450 x 600).jpg

IMG_0091 (450 x 600).jpg

IMG_0092 (450 x 600).jpg

IMG_0093 (450 x 600).jpg

IMG_0094 (450 x 600).jpg

If you have any questions about how this is done, PM me and I'll have David answer them, as he set up the system.

Nancy
 
Laser shop

And for those of you who are interested, here's the laser shop. It is a separate building next door to the workshop, 12x20'.

Laser shop - east wall - afer redo (600 x 450).jpg
This is the east wall, two computers sitting on shop-built desks with filing between, all our books and magazines on the shelves above. David is sitting at the smaller computer which controls the lasers--my computer on the left is the correspondence and bookkeeping computer. but we are networked, so I can access the Corel files when necessary.

Laser shop - entrance and blaster - after redo (600 x 450).jpg
Looking back at the entrance on the south wall, door and sandblaster sitting on a shop-built table. To [your] right of the door is a counter with a sink and a small hot-water heater beneath, and a potty room (so LOML and I don't track sawdust into the house).

Laser shop - north wall - after redo (600 x 450).jpg
North wall, storage shelving and a work table--very generic.

Laser shop - west wall - after redo (600 x 450).jpg
West wall--the nerve center. Working right to left, the laser in the corner is the ULS M-20 (20W), our first laser, shop-built desk with the "big" computer that also controls the lasers and has all the art and jobs stored on an external hard drive, and the ULS M-360 (40W) that gets the majority of the work. This one has a rotary attachment on which we can engrave glassware, bottles, etc. The rotary attachment is the funny-looking thing sitting on the shelf just above the M-360. Again, shelving above for the scanner/copier/printer/fax (we have replaced those in the picture since these were made) and materials.

Our blower set-up for the lasers (450 x 600).jpg
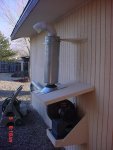
The lasers must be exhausted to the outside to get rid of smoke and any odors, so we ran the exhausts through the wall and set up this blower fan system on the back wall. The blower sits on the opposite side of the wall from the larger laser, with about a 6-7' run from the smaller laser. The blower is under the little "roof" and the thing sticking up is a muffler to keep the noise down a little. You have to get within about 10 feet of it to be able to hear it.

Pen parts box - lasered drawers (450 x 600).jpg Pen parts drawer (600 x 450).jpg
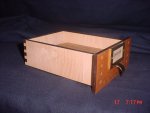
Here are a couple of pictures showing what the laser can do--these boxes are about 4-3/4 x 6-1/2 x 2" deep, and they were totally produced on the laser. The design took about an hour to perfect, and the cutting of 20 drawers took less time than that. They are cut from 1/4" alder. They just snapped together, but we decided to put a little glue on some of the joints - particularly the fronts - so we wouldn't pull a front off when we opened the drawer. The carcase for the drawers is of 1/2" ply. I keep all my pen parts and kits in these drawers, along with a few blanks that I have only a small store of.

So there it is. Comments welcome. Thanks for looking.

Nancy
 
Last edited:
Top