mission coffee table - considering options

Art Mulder

Member
Messages
3,383
Location
London, Ontario
One possible project coming down the pipe for me is to replace our LR coffee table.

So I'm musing about different ideas.

I would go with a general Mission style. (I tend to favour shaker or mission, and I already have a Mission style loveseat that I built 10 years ago.)

Despite the fact that it is mission, I would likely build this out of black cherry.

Here is version one of my sketches... (sorry, the skp file is too big to upload...)

Front: mc-front.jpg
This shows one end with spindles.

Back View: mc-back.jpg
This shows the other end without spindles. We like it fairly open, so I may or may not include the spindles

Overall Dimensions: mc-dimensions.jpg

Drawer Open: mc-draweropen.jpg
Someone is often sitting on the couch with a laptop, so I thought I would incorporate some shallow drawers (about 3-1/4" deep inside) into the table so that we could easily tuck them away. My wife likes the "keep it hidden" idea, so these drawers would have no hardware at all.

And finally, here is the understructure of the top: mc-under.jpg

I would make the top a full 1" thick (ideally). It is spanning about 36" between the legs. There is a rail across the back, but not the front. I think that would be fine, but I'm open to comments.

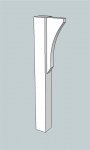
The one thing that I am not at all settled on is the rails... We want the bottom shelf as close to the ground as possible (more on that later). I would be inclined to put a shallow curve on the bottom of the lower rails. However, if we don't end up putting in spindles, I could put the shallow arch in the bottom of the upper rails. I might even play around with the idea of the arch being on the long rail (the drawer fronts) as well

Finally, we want the shelf as close to the floor as possible. It goes like this: we like to put stuff there. But it either needs to be high enough to vacuum under (like 5-6", which kind of kills the usability of the shelf) or as low as possible to minimize stuff getting kicked underneath. So I'd like it like maybe 1" up at most. Instead of resting the shelf on top of the lower rail, I might mortise it into the rail, or use dowels instead of tenons. (love my Dowelmax jig!!!) I do need to be a bit cautious there of allowing for wood movement.
 
okay, alternate 1:
- removed the spindles
- added a 1/2" arch along the top rails.
- bottom shelf unchanged - so it is 1" above the floor.
- added a cherry texture -- DAVE there has got to be an easier way to do this. Every single time the grain is the wrong way, so I have to spin it and to do that I have to zoom WAY out to find the control points to adjust the texture. Grrr.
(first world problems, eh?)

mv-v2-arch-at-top.jpg
 
when i paint a wood texture, i would make 2 textures to use, one for vertical, and the other for horizontal, with the grain oriented that way. my opinion, keep the spindles, and make the corbels lighter, or not use them, they seem a bit heavy.
 
I agree with Dan, the corbels do seem a bit heavy, but perhaps scale them to about 2/3rds the height, they look to be about 3/4 right now. With the drawers you may want some steel support above them, even at 1" thick for the top I'd suspect it will flex without a full rail below if anyone sits on it. For the top, have you considered a breadboard with a tile or contrasting center? Looking at the love seat it looks like it would compliment it with banded top.
 
Art, the legs seem a bit too heavy to me. Maybe lighten them along with the corbels a little?

- added a cherry texture -- DAVE there has got to be an easier way to do this. Every single time the grain is the wrong way, so I have to spin it and to do that I have to zoom WAY out to find the control points to adjust the texture. Grrr.
(first world problems, eh?)

There is an easier way to apply materials. Dan's method works but isn't the most efficient way.

First, make sure you're opening the components for editing before applying the texture. Applying the texture to the outside of a component or group is not a good idea. You can triple click on the geometry to select it all and apply the texture with one click of the paint bucket tool. That cherry material should go onto the legs and the corbels with no need to do more. Open the other components one at a time and apply the texture to them. If the material goes on crosswise, right click on the face and choose Texture>Position. Right click again and choose Rotate>90.

Once you've adjusted the orientation on one face you can sample the material from that face (even if that component isn't open for editing) and apply it to the faces in other components. If I remember correctly, you use a Mac. To sample the material you've already applied, get the Paint Bucket tool and hold Command while you click on the face to be sampled. On the PC, the Alt key converts the Paint Bucket tool to the eye dropper.

I think that the cherry texture image is sized incorrectly. If you switch to the Colors in Model (In Model) library by clicking on the little house icon, you can right click on the material thumbnail and select Edit. Then change the dimensions. In my screen shot the bottom texture is at the default size and the top one is set to 12" square.


If you want I can send you a link to a video that demonstrates applying wood grain materials and getting them arranged correctly.
 
I agree with Dan, the corbels do seem a bit heavy, but perhaps scale them to about 2/3rds the height, they look to be about 3/4 right now. With the drawers you may want some steel support above them, even at 1" thick for the top I'd suspect it will flex without a full rail below if anyone sits on it. For the top, have you considered a breadboard with a tile or contrasting center? Looking at the love seat it looks like it would compliment it with banded top.

Funny, I kind of like the corbels as large... I'll try some smaller sizes and see what I think.

How would you do steel? On the flat or on edge?
I could maybe do a 1" rail (in wood) which would only push the drawers down a bit. It does have the full height rail along the other side, behind the drawers, of course.

Not sure what you mean by the tile... tile in the centre of the breadboard, or in the centre of the top?

Dave Richards said:
There is an easier way to apply materials. Dan's method works but isn't the most efficient way.
Thanks, Dave, I'll give that a careful read and try it out.
 
Funny, I kind of like the corbels as large... I'll try some smaller sizes and see what I think.

How would you do steel? On the flat or on edge?
I could maybe do a 1" rail (in wood) which would only push the drawers down a bit. It does have the full height rail along the other side, behind the drawers, of course.

Not sure what you mean by the tile... tile in the centre of the breadboard, or in the centre of the top?

Perhaps some 1" square tubing above the drawers, but hidden by some wood trim and supported by the sides maybe, might have to go up to a 3/32" - 1/8" thick wall on the tubing for strength.

For the top I was thinking something like this, where the wood edges mimicked the width of the arm rests on the love seat. Tile size/color or what ever you wish to put in the middle could vary to your taste. Just looking at your love seat it didn't have a lot of wood like a full wood top would be, it was more of a trim and the black covering was the main thing you saw about it. The wood was an accent to it in my eyes...YMMV.

Rookwood-Table.jpg
 
Version 3
- narrowed the legs to 1-3/4" square (from 2-1/4 -- the love seat has 2-1/4" legs, and our current coffee table also has 2-1/4" spindles)
- Darren I checked and the corbels were 2/3 of the height. I like the height, but what I did is make them narrower. (not the thickness of the wood, but the width of the pattern)
- messed around with some of the patterns -- the stock pattern is set to 72", Dave, I scaled that down to 12". And figured out how to do the eye-dropper thing to grab patterns so I only need to rotate it once. That right-click to bring up a menu which gives a rotate option is nice also, and not at all obvious.

I haven't done anything yet about a rail above/below/whatever the drawer fronts. That might be the next experiment.

...art

mc-v3-flatfront.jpg mc-v3-back.jpg mc-v3-dims.jpg
 
Art, that looks better. I would raise the shelf a couple of inches, though. It looks like it is sitting on the floor.

Glad you got the texture thing sorted. It helps.
 
i was just thinking along the same lines dave, remembering that mrs. art will be the one to have to dust the floor under it (don't want you catching any flak over that one art).
 
Finally, we want the shelf as close to the floor as possible. It goes like this: we like to put stuff there. But it either needs to be high enough to vacuum under (like 5-6", which kind of kills the usability of the shelf) or as low as possible to minimize stuff getting kicked underneath. So I'd like it like maybe 1" up at most. Instead of resting the shelf on top of the lower rail, I might mortise it into the rail, or use dowels instead of tenons. (love my Dowelmax jig!!!) I do need to be a bit cautious there of allowing for wood movement.

I would raise the shelf a couple of inches, though. It looks like it is sitting on the floor.

i was just thinking along the same lines dave, remembering that mrs. art will be the one to have to dust the floor under it (don't want you catching any flak over that one art).

Gentlemen, Gentlemen... thank you, but I think you misread the last paragraph in my original post. (see above). Or maybe I wasn't clear. My beloved wife is the one who set those rules. It either needs to be high enough to vacuum under, which I think would drastically reduce it's usability, or low enough that clutter does not find it's way underneath. And of the two, LOML prefers it close to the floor. ;)

couldn't sleep art, so i thought i'd bounce this corbel idea your way.

I actually like that quite a bit, Dan. But I already have two pieces in the LR with corbels on them, and both have curved bottoms, not that flat angle. I can see I need to work on the corbel in the sketchup file. I treat it more like a rough guideline, and finesse the final product when I'm building it. But I think I should work on an exact template for accuracy. I think I'll start by tracing the one from my loveseat and then scale it down to fit.

If your planning on someone using the table as a part time work station I kinda like the way the top works in this design.View attachment 86684

I've seen those, but I wonder how sturdy they are. I recently got a movable arm on my computer at work, so I can work standing or sitting, but I'm not entirely happy with it, as it tends to bounce. I want something locked down and solid. I'd like to chat with someone who has a coffee table like that, Don, as I bet you have to clear it off while raising/lowering. Interesting idea, but I don't think it's for us.

thanks all, it's fun to work together like this on it.

...art
 
Corbel test...

As I said, there are two pieces of furniture in the LR already with corbels, the Love Seat, and the Small Bookcase. (those corbels are very understated)

So I did some tweaking and took measurements off of those actual corbels and used the love seat one to redo the one for the planned coffee table. I think I like it -- more regular looking, and lighter on the top with a more pronounced curve. Also, I can now use the skp to take dimensions from when I actually build one.

corbel-test-v1.jpg corbel-test-v1-flat.jpg

So the one on the far right is the new one that I have now drawn up.
 
Art, I did see the last paragraph of your original post. I was just thinking that aesthetically, it needs to come up. I do understand your bride's concern but I wonder if instead, you might want to try out enclosing that space entirely with rails down on the floor all the way around.

Edit, I like the newest corbel better. :thumb:
 
v4.

Well I like the new corbels.

Mindful of Darren's comments, I dropped the drawers by 1-1/2", so that I could add a front rail above the drawers of 1-3/8" to ensure against flex. I then had to increase the height by 1-1/2" of all the top rails. I'm really not sure I like this. It seems to make the top look heavy/hulking... More pondering needed!

mc-v4-back.jpg mc-v4-flat.jpg
mc-v4-dims.jpg mc-v4-notop.jpg
 
I like the look of the new corbels Art. I agree that the drawers looked better before. I see you have a partition between them in the last pic, which I wasn't thinking of before. Can that support you put in be under the drawers instead and supporting that center partition? Could go narrower and conceal a piece of 3/4" x 3/4" x 1/8" angle behind it to reinforce it all.

And it may not be needed, others can chime in on if they think the top will get any movement, but was just a concern.
 
Art, if you don't want a rail to show above or below the drawers, you could set them behind the drawer fronts. It would for the drawers to be shallower but I think you'd get enough stiffness with them and an apron on the opposite side. Drawers that small could have sides and back at 1/2 in. thick and the bottom 3/8 or 1/2 in. thick. They won't be very heavy and you won't be storing all your gold in them--I'm sure it wouldn't fit anyway.
 
Last edited:
Top