Twistie Stick Snake Cane Tutorial

Good afternoon!

Today we will be creating the path and twist in the sassafras branch.

A twisted sassafras stick is caused by honeysuckle vine curling around the trunk when the tree is still a year or two-year sapling. As the tree grows, so does the vine, reaching higher into the tree and thickening the width of the vine. Over the years that vine begins to straggle the sassafras trunk, forcing the tree to grow around the imbedded vine.

You will see in the two photos that this process affects both plants. The sample is a wild cherry sapling that is already developing a deep, spiral scar. The honeysuckle develops a flattened side where it directly contacts the sapling.

Sassafras, wild cherry, dogwoods, and even young black walnuts are common twistie sticks as they share the same environment as honeysuckle - abandoned road sides and old fence rows.

The third photo shared here is a very old piece of wild grape vine - approximately 1 1/2" thick. The vine has been dead for several years because of tree trimming by the power company, so it was ready to harvest. You can see the power and strength of the twist in this grapevine as it literally brought down the farm fence on which it grew.

A side note here, and just my personal preferences. I don't cut twistie sticks in the wild, All of the common twistie stick trees are also the same trees that are so important to our local wildlife. Dogwood and cherry are major food sources for birds, rabbits, and deer. Black walnuts, of course, help feed our grey squirrel population throughout the year. And most importantly, sassafras is the only food source for the swallowtail butterfly during its egg, larva, and caterpillar stages of life.

Because I especially want those butterflies in my perennial flower gardens I am extremely protective of any sassafras that graces our fence lines and forest edge. - Irish_sassafras_001.jpg, and - Irish_sassafras_002.jpg, Irish_sassafras_003.jpg
 

Attachments

  • Irish_sassafras_003.jpg
    Irish_sassafras_003.jpg
    62.1 KB · Views: 11
  • Irish_sassafras_002.jpg
    Irish_sassafras_002.jpg
    54 KB · Views: 12
  • Irish_sassafras_001.jpg
    Irish_sassafras_001.jpg
    44.5 KB · Views: 8
Last edited:
Step 7: Using a marking pen or pencil draw a line in the center of the area between the snake's body twists. This will be the path of the top edge of the twisted stick curls. On my cane I had one area between the snake body curls that allows for two twists. Draw a second guideline 1/4" below the first. This 1/4" area, between the two guidelines, will become the honeysuckle vine area on the twist. - Irish_twistie_cane_025.jpg

Work a stop cut, using your bench knife, along the top twistie guideline, in the background wood area. In the photo, my cane is held upside down. - Irish_twistie_cane_026.jpg

The second stroke of the stop cut lowers the background area at the top edge of the twist. - Irish_twistie_cane_027.jpg
 

Attachments

  • Irish_twistie_cane_0025.jpg
    Irish_twistie_cane_0025.jpg
    49.2 KB · Views: 9
  • Irish_twistie_cane_0026.jpg
    Irish_twistie_cane_0026.jpg
    64.9 KB · Views: 10
  • Irish_twistie_cane_0027.jpg
    Irish_twistie_cane_0027.jpg
    56.2 KB · Views: 8
Step 8: Everything between the snake's body twists is sassafras wood. So the stop cuts in step 7 tapers that wood area into a cone shape that points down and into the top edge of the twist below it. Irish_twistie_cane_028.jpg

To emphasize the tape of the twist you can also use your large or small round gouge for the second stroke of the stop cut, instead of the bench knife. - Irish_twistie_cane_029.jpg and
- Irish_twistie_cane_030.jpg
 

Attachments

  • Irish_twistie_cane_0028.jpg
    Irish_twistie_cane_0028.jpg
    61 KB · Views: 6
  • Irish_twistie_cane_0029.jpg
    Irish_twistie_cane_0029.jpg
    59.1 KB · Views: 6
  • Irish_twistie_cane_0030.jpg
    Irish_twistie_cane_0030.jpg
    54.3 KB · Views: 7
Step 9: Using the bench knife, round over the top edge of the twistie curls - rolling the edge over to reach the second guideline mark. Irish_twistie_cane_032.jpg

The honeysuckle sits down and into the sassafras wood, so create a half-circle trough using your small round gouge along the rounded-over top edge of the twist. - Irish_twistie_cane_033.jpg

Cut this trough several times, slowly lowering it into the wood. In the photo you can see the depth of the round gouge cuts in the second, right hand twist. - Irish_twistie_cane_034.jpg
 

Attachments

  • Irish_twistie_cane_0032.jpg
    Irish_twistie_cane_0032.jpg
    75.7 KB · Views: 7
  • Irish_twistie_cane_0033.jpg
    Irish_twistie_cane_0033.jpg
    59.3 KB · Views: 8
  • Irish_twistie_cane_0034.jpg
    Irish_twistie_cane_0034.jpg
    44.1 KB · Views: 9
Step 10: With your bench knife return to tapering the bottom section of each twist. Smooth each area of twist so that the taper moves evenly from thick at the top edge of the twist to thin at the bottom. - Irish_twistie_cane_035.jpg

As I am working my tapering I have begun undercutting the bottom edge of each twist. This is done by angling the first stroke of the stop cut behind the inside edge of the top of the next twist. When you make the second stroke, it will pop out a small v-shaped chip, leaving a narrow cut behind the twist's inside edge. Irish_twistie_cane_036.jpg

I'm sorry! The photo of the undercut on the cane came out lousy! But our Canada Goose, Part 2, page 4, on our blog has more in-depth instructions of the undercut .... and, better photos! - undercut.jpg
 

Attachments

  • Irish_twistie_cane_0035.jpg
    Irish_twistie_cane_0035.jpg
    59.6 KB · Views: 7
  • Irish_twistie_cane_0036.jpg
    Irish_twistie_cane_0036.jpg
    61 KB · Views: 7
  • undercut.jpg
    undercut.jpg
    70.8 KB · Views: 8
Step 11: Begin shaping the snake's body, head, and tail, using your bench knife to roll-over the sides.

When the body has been shaped, the rough-out stage of this cane carving is complete. At this point you have established the curve and shape of the snake and the curve, tapering, and shape of the sassafras twisties. - Irish_twistie_cane_0038.jpg and - Irish_twistie_cane_0039.jpg
 

Attachments

  • Irish_twistie_cane_0037.jpg
    Irish_twistie_cane_0037.jpg
    77 KB · Views: 4
  • Irish_twistie_cane_0038.jpg
    Irish_twistie_cane_0038.jpg
    68.8 KB · Views: 5
  • Irish_twistie_cane_0039.jpg
    Irish_twistie_cane_0039.jpg
    57.9 KB · Views: 6
Step 12: After the rough-out stage is done I like to do a general smoothing to any project, whether relief or 3-D. This is done by re-cutting all of the areas you have worked with your bench knife. Drop the angle of the knife blade low to the wood - the blunt or back side of the blade is just 5 or 6 sheets of paper high off the wood. Lightly glide the knife across the wood, taking very small, shallow strokes. - Irish_twistie_cane_0040.jpg

Irish_twistie_cane_0041.jpg shows the cane's surface before the shaving step and Irish_twistie_cane_0042.jpg shows the shaving step completed. You can see that very fine, small cuts that smooth out the shape of the cane.

OK ... Tomorrow we will work on texturing the wood bark, working the honeysuckle indent, and carving the little frog that sits on top of this stick. In the mean time if you have any questions, please post them now!

Thank you for reading today and for spending time with me at my carving table !!!!
 

Attachments

  • Irish_twistie_cane_0040.jpg
    Irish_twistie_cane_0040.jpg
    61.1 KB · Views: 8
  • Irish_twistie_cane_0041.jpg
    Irish_twistie_cane_0041.jpg
    57.1 KB · Views: 8
  • Irish_twistie_cane_0042.jpg
    Irish_twistie_cane_0042.jpg
    69 KB · Views: 8
Good Morning!

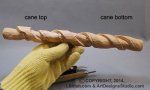
I am running late this morning. So while I get the next batch of photos cropped and the text written, I thought I would share a free cane pattern we have posted on the blog, LSIrish.com, and a few links to how to create your own walking stick.

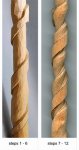
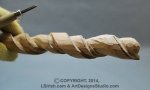
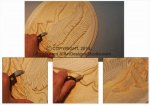
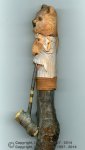
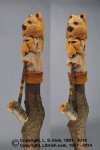
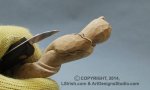
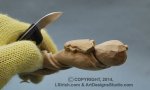
Mountain Man Cane Carving Pattern - On this page you will find a free, 4 view pattern of my latest cane carving as well as a few ideas on how to anchor extra elements to a cane.

You will find links to all these new articles on our post, Wood Carved Walking Sticks.

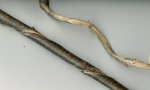
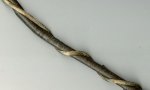
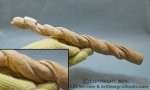
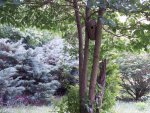
Harvesting Walking Sticks – Learn how to harvest, store, and dry your tree saplings and branches for cane carving.

Cane Carving, Common Tree Species – Take a look around your own backyard to discover which tree species you can use for walking stick and cane carving.

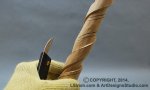
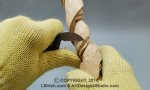
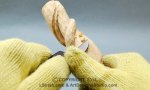
Adding Extras to Your Walking Stick– Make your walking stick stand out by adding a small ‘What If’ bag to your staff.

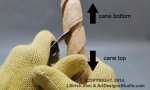
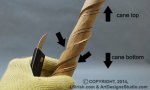
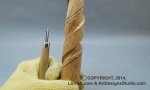
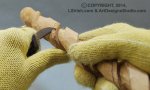
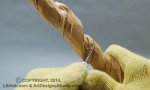
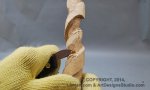
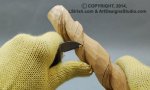
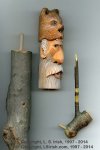
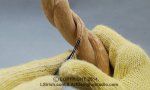
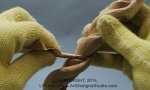
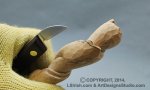
Wood Carving Walking Sticks, Gluing Your Joint – A quick look at the basic steps in gluing a cane topper to your walking stick.

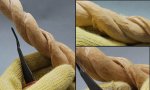
Wood Carving Walking Sticks, How to Join Your Cane Handle - Explore seven ways to join your cane topper to your stick

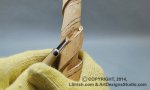
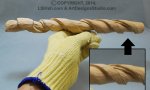
Wood Carving Walking Sticks, How to Clamp Your Cane Handle - Learn how you can use tape as a gluing clamp.

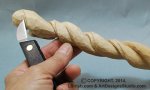
Wood Carving Walking Sticks, Working with Bamboo – Special technique for attaching your cane topper to your bamboo walking stick.

OK ... that should keep you busy for a little while and give me time to get your next lesson ready.

Thanks! - Lora
 

Attachments

  • mountainman_cane_sm03.jpg
    mountainman_cane_sm03.jpg
    82.1 KB · Views: 11
  • mountainman_cane_sm04.jpg
    mountainman_cane_sm04.jpg
    85.9 KB · Views: 12
  • mountainman_cane_sm06.jpg
    mountainman_cane_sm06.jpg
    92.8 KB · Views: 11
Last edited:
Someone PMed me about the Sassafras and Swallowtail Butterfly connection and I thought I would post my reply here.

Maryland Wild Acres Program

Back in the 70's when Mike and I purchased our little bit of scrub ground - three acres of half woods and half abandoned farm field - we joined up with our state's agricultural program, called Wild Acres - please see the link above. Wild Acres literally promotes allowing large sections of your land to go back to nature. Today, that old abandoned field that was nothing more than worn-out, over used clay and mud, is stuffed full of golden rod, milkweed, meadow rue, sedge grass, and anything else that wants to grow there. Last year we had one full month where you could not see one speck of green because it was a floating sea of white Queen Anne's lace!

The program, itself, is very simple - we allow areas of our land to go natural or undisturbed so that our wildlife can share our land. And we section that land area off into three pieces, mowing just one section each year to prevent the hardwood from taking over.

We have two ponds, one large 4' x 8' that the white tail deer visit each night, and one that is a 5 gallon bucket, set into the garden under the drain spout for the opossums, squirrels, and raccoons. My house is surrounded by perennial flower beds where once planted I don't have to do anything, but for years the butterflies have blossoms waiting for them. At the edges of the yard I let my fence lines go wild. The grape vine in yesterday's photos came from that old fence. Plus there are small and medium sized piles of fallen branches throughout the yard that our wildlife - a wonderful family of chipmunks - use for shelter.

So, go check out your state and county programs as they have lots of great info on things like ... the more sassafras trees you have the more black and yellow swallowtail butterflies you get!

Oh ... my beloved hubby is mentioning in the background, "Tell them that your lawn tractor has a bumper sticker which reads "I brake for earthworms!" The photo is one of our Sassafras clumps and is at least 40 years old.
 

Attachments

  • 100_3089.jpg
    100_3089.jpg
    150.4 KB · Views: 7
When I click on "Wood Carved Walking Sticks."

I get a new window that only states this, "You do not have permission to preview drafts."

By the way, only saw this thread today, have a few sticks in storage and actually showed this to one of my turning students who most likely in the future will use this info to create his own stick. Thank you for all of the time spent so far.
 
Today we will deepen the honeysuckle twine area, shape and detail the snake's head, add texture to the Sassafras bark, and do a general clean-up of the cane work. So, let's begin having more fun!

Step 13: Very small, tight-arced round gouges are called veining tools. This tiny round gouge makes straight-walled, round bottomed troughs, which are perfect for deepening our honeysuckle stem area. - Irish_twistie_cane_0043.jpg

Similar to the veining tool is the checkering tool used in gun stock carving. The checkering tool comes with either a small round gouge or v-gouge, plus it has an adjustable L-shaped arm. You make your first cut line in your checkering pattern. Then adjust the L-shaped arm to the distance you want between the rows. Drop the arm into the first cut row, and it controls the distance between the rows as you cut the next. I note the checkering tool here because while you may not ever try gun stock carving, those checkering tools make wonderful backgrounds for your relief work.

Tear a small square of 220-grit sandpaper from the large sheet and roll it tightly into a tube. Use the tube to sand the honeysuckle trough area along the top of each Sassafras twist. - -Irish_twistie_cane_0044.jpg
 

Attachments

  • Irish_twistie_cane_0043.jpg
    Irish_twistie_cane_0043.jpg
    50.7 KB · Views: 4
  • Irish_twistie_cane_0044.jpg
    Irish_twistie_cane_0044.jpg
    64.4 KB · Views: 4
Last edited:
Step 14: It's time to shape the snake's head. To begin this area, I re-marked the outline and eye placement of the snake with permanent marking pen. Since we will carve this area, any pen markers will quickly be worked away. - Irish_twistie_cane_0045.jpg

Cut along the outer edges to reduce any excess wood from the head. - Irish_twistie_cane_0046.jpg

Cut along the edge of the eye area with a stop cut to lower the eye slightly on the head. - Irish_twistie_cane_0047.jpg
 

Attachments

  • Irish_twistie_cane_0045.jpg
    Irish_twistie_cane_0045.jpg
    54.4 KB · Views: 5
  • Irish_twistie_cane_0046.jpg
    Irish_twistie_cane_0046.jpg
    50.5 KB · Views: 5
  • Irish_twistie_cane_0047.jpg
    Irish_twistie_cane_0047.jpg
    51.9 KB · Views: 6
Top