Scoops, a micro howto

Ryan Mooney

Moderator
Staff member
Messages
8,140
Location
The Gorge Area, Oregon
There are a bunch of ways to make turned scoops. Some seem to work better than others, and some are more aesthetically pleasing to some folks than others.

Figured I'd go ahead and document a few ways to make them as I go along and have a chance to do them, certainly haven't tried them all yet :D

Here's method one, it requires a couple of turning tools and a chuck.

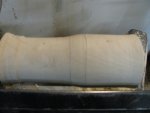
Make it round with a tennon on the end.
IMG_3529.jpg

Chuck it up and bore out the bulk of the material.
IMG_3533.jpg

Its a lot easier if you can bore it close to size, otherwise you'll need to open it up some. I tried a square ended scraper but that wasn't happy, a round nose got in a bit deeper but in the end a little crook necked carbide doodad dd the job best (this is the only carbide tool I currently have, well worth it for stuff like this).
IMG_3537.jpg

In the end you'll want something like this either way..
IMG_3539.jpg

Turn the handle, this one is probably to thick, but works ok, just doesn't look as nice as it might.
IMG_3542.jpg

I like to sand the bulk of the thing here since its the last chance you'll have to have the whole thing nice and round.

Mark and cut the side off, I just used a coping saw which seems to work pretty well and makes it easy to put a little curve on it.
IMG_3544.jpg

All cut out.
IMG_3545.jpg

Cut off the chucked up end and clean up the edges with some rasps and files and a little sanding on the details and there you go!
IMG_3546.jpg
 

Attachments

  • IMG_3540.jpg
    IMG_3540.jpg
    32.3 KB · Views: 27
  • IMG_3543.jpg
    IMG_3543.jpg
    57 KB · Views: 28
A minor variation on the base theme is to offset the handle.

First turn the piece to where you're ready to turn the handle.

Then make a plug that fits snuggly into the open end.
IMG_3547.jpg

Put it back between centers, I marked a center line down it and then through the center. This is offset by about 20% of the radius. I think you could go more like 30% or maybe even closer to 40% and it might look even better.
IMG_3549.jpg

Cut the top of the scoop off as above and finish it.

On this one I also left a little bit of a bulb at the end and then shaved the top of it off after turning to give the handle a bit of a drop.
IMG_4158.jpg

I like the idea of this one better, but don't think my execution was all that great. Will definitely explore this idea more later.
 
Several moons ago, I attempted that feat. Actually managed to get one decent scoop made. You make it almost look easy, Ryan. I used pretty much your first method. I got sidetracked and have not tried to do another one. Now that you do this, I just might have to. Nice tutorials. Very glad you did them, and looks like you have this scoop business down pat. Nice, nice, nice.
 
Its a lot easier if you can bore it close to size, otherwise you'll need to open it up some. I tried a square ended scraper but that wasn't happy, a round nose got in a bit deeper but in the end a little crook necked carbide doodad dd the job best (this is the only carbide tool I currently have, well worth it for stuff like this).

Ryan,
The best tool I've found for hollowing goblets and such as the scoop is the Termite tool... it has a round cutter on the end of it and it's just a matter of dragging it out as it cuts... I use one all the time to hollow the stems of my wine glasses. Also when I turn wood goblets.
 
Thanks Chuck, you're undoubtedly correct that a ring tool like the termite is would be much easier. It's been on my to check out list for a while.

I'm sure not saying what I'm doing here is the only or best way to do any of this, just laying out what I did, so if y'all have suggestions on different methods would be interested to hear them.

I've also been eyeballing some of the hook tools, pretty sure I can make those and for some reason the traditional feel appeals to me :D. It looks like the termite might be a bit easier to control though.
 
I haven't made any scoops yet, but did a couple of bells and several wooden goblets that I used the termite to hollow... it works great, until you get the angle off, then if it grabs you get a fun ride as the handle kicks up... one of the directions on using it said something to the effect that you need to pretend your belly button is looking through the hole... I've gotten the angle off and wound up with some pretty spectacular gouges on the inside of my turnings. I use it mostly now to shape the ends of my wood wine glass stems to fit the base of the globes.
 
Bells and goblets seem about the same as scoops, just subtle details in the curvature as desired and change the shape of the base/handle. If anything I find scoops to be a smidge easier personally because you can cheat and clean up the bottom with a bench gouge after taking off the top (my next set in planning is a take off on that theory :D).

From what I can tell the termite and hook tools are used basically the same (although I haven't used either so this is just based on instructions and videos). They do look like a good way to get into the end grain. The little carbide tool likes a similar "sideways" approach to cutting although perhaps not quite as extreme as I'm seeing the termite/hook tools.

At least one turner (Richard Raffan) basically made a living turning scoops and turned literally thousands of them. He has a tutorial here: http://www.ghwg.ca/techniques/scoopsraffan.pdf
You'll note that his are substantially more refined and pretty than mine, but hey I've done a few dozen and he's done thousands so there's still room to improve. His back hollowing technique is interesting, but just a little terrifying.

Here's a video of the back hollowing technique, I suspect that the termite and hook tool would be a bit easier to master to start with:

 
Gonna give this a go myself soon, thanks for sharing! :thumb:

I've used a broken drill bit shaped a bit into a hook tool before that works great on end grain.
 
Top