TNNW - The Next "Next" Workbench

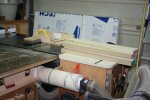
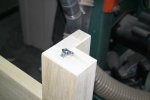
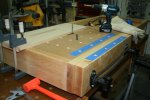
All the trim is on and planed down flush with the top.
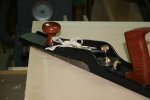
TNNW (30).jpg

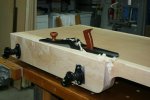
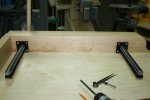
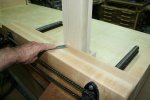
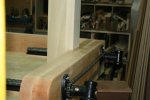
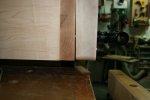
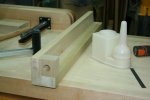
The recommended angle for the chop is about 2 degrees per the manual. I went a little lees than that and it is still too much. There's no way I could get these jaws to close once the thrust plates were fastened down. This pic is at the maximum pressure that I would ever use. Trying to clamp a test board was a failure ;-(
TNNW (31).jpg

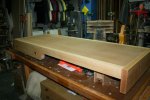
I backed it off to about 1 degree. I'll re-check after the first BLO treatment sets for awhile.
TNNW (33).jpg
 
Last edited:
First a word from our sponsors . . .

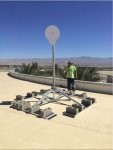
I do a lot of desk sitting, number crunching and protocol analysis at work. Every now and then a coworker and I will schedule ourselves to do some field work that nobody else wants; we're just happy to do something basic and rewarding in the short term. So, we left at 3 am this morning so we could get this wireless bridge stand and antenna mounted before the sun got very high. The site is in Palm Desert and it was 107 today. It had barely broke 90 by the time we got this up. A lot of it was too heavy as delivered so we had to disassemble it, haul it from the truck area to the elevator, to the second floor, down the hall to the equipment room and up a vertical ladder to the roof through a hatch. Then we put it all back together again, cabled it up and let 'er rip.

Tim and AF24.jpg

Now back to your regularly scheduled program . . .

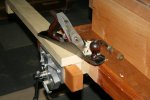
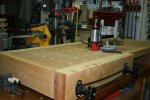
The chop adjustment worked fine at about a half a degree. I use my jointer plane to level it with the table top.

TNNW (36).jpg

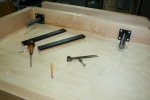
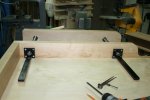
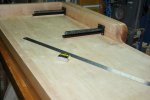
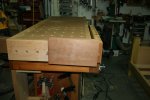
The instructions call for some rub plates. I used some UHMW that came as packing material for some equipment at work screwed through some maple scrap and into the bottom of the benchtop:

TNNW (37).jpg . TNNW (38).jpg . TNNW (39).jpg

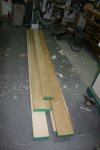
I also hauled in the material for the base.

TNNW (40).jpg

I'd like to finish this in the next couple weeks but, have a couple items to get out the door; I'll "get 'er done" pretty soon :thumb:
 
Last edited:
Those full length rub plates look pretty nice!

Looks like a real nice job on the vice install. Are you going to face the jaws? I have some leather scraps that are destined to go there but haven't gotten to it..

I also drilled dog holes in the front jaw, which has proven rather useful. Actually messed then up pretty badly when I first installed and drilled them to large, but found a piece of soft copper pipe that has a 3/4" interior that just fit in the holes and epoxied it in place, which is actually better in the end, now I could claim it was intentional (but don't, but it might be next time :D)
 
Those full length rub plates look pretty nice!

Looks like a real nice job on the vice install. Are you going to face the jaws? I have some leather scraps that are destined to go there but haven't gotten to it..

I thought I was ready but, turns out none of the leather I have is large enough to go on in one piece. Experience tells me I could patch-work it but, I am going to wait. My previous vises were leather lined and this was always to my advantage.

I also drilled dog holes in the front jaw, which has proven rather useful. Actually messed then up pretty badly when I first installed and drilled them to large, but found a piece of soft copper pipe that has a 3/4" interior that just fit in the holes and epoxied it in place, which is actually better in the end, now I could claim it was intentional (but don't, but it might be next time :D)

I'm sure that was a subconscious design element. You thought you were wrong but, it turns out you were right!
 
I thought I was ready but, turns out none of the leather I have is large enough to go on in one piece. Experience tells me I could patch-work it but, I am going to wait. My previous vises were leather lined and this was always to my advantage.

Where do you get your leather from? I've been getting some stuff from https://www.theleatherguy.org/ - its NOT consistent quality as he pretty much sells seconds, but its cheap enough I don't feel bad cutting around issues and he's been pretty good about detailing flaws that actually matter. If you were closer I'd just give you a piece but I suspect that shipping is enough to make it moot.

I'm sure that was a subconscious design element. You thought you were wrong but, it turns out you were right!

:rofl: I'll have to remember to use that one.
 
Wow that leather guys prices for what he is selling are very good by my experience at a local leather store.

Sent from my SGH-I337M using Tapatalk

Yeah, do be aware it's mostly seconds, so you might be getting better stuff local (maybe not to), but for the price I've been willing to deal with a few small flaws (and honestly most of them don't matter for most of what I do).
 
Stopped for a snack and so thought I would post things so far today. First let me gloat over a Porter Cable 314 that I picked up from another woodworker. Great for cutting off stock up to about 1-1/4", also great for sheet goods. Not made for heavy work but, within its designed use, its a little beast.

TNNW (41).jpg

Mostly a lot of measuring and marking this morning. I try to plan it so I can have some of this work to do first thing as the rest of the neighbors don't start bumping around until after 7am. Here I have marked the approximate dog hole locations on the underside. Despite my use of SketchUp, I like confirmation that the base will interfere as little as possible with my intended use of the bench.

TNNW (42).jpg

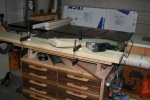
For thicker stock I rely on the jigsaw for cut-offs. Its quick, easy to handle and small enough to keep handy without tripping over it :D. BTW I am lovin' the new outfeed/clamping/assembly table/drawer unit. Glad I finally stopped procrastinating on making it.

TNNW (43).jpg

Here are some of the leg parts, mostly milled and ready to be cut to width and length

TNNW (44).jpg

Snack time . . . .
 
Last edited:
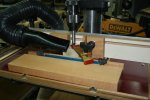
Sure seems like I did more today than this shows :huh:. The small parts holder for the drill press comes in handy. These blocks will hold the bullet dowels that the top will set on.
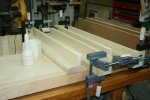
TNNW (46).jpg . TNNW (45).jpg . TNNW (47).jpg
 
Last edited:
I cut some smaller parts a bit oversize so I can flush them up with a hand plane. I double-triple-quadruple check the leg positions versus the dog hole pattern.

TNNW (48).jpg . TNNW (49).jpg

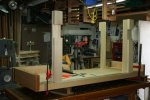
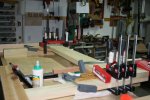
Gluing up one leg and stretcher assembly.

TNNW (50).jpg

I recess screw-on T-nuts so that the legs can touch the floor if desired. There is a hole to accept the elevator bolts that is size so that the bolt thread into the wood. This is not so much for holding power as to provide support for the shaft when shifting the bench position. I never moved my old bench but, this one may not be so static. I have used the same elevator bolt foot design for years on other heavy weight fixtures that get moved with good success.

TNNW (51).jpg

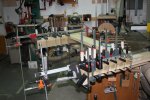
The leg assemblies are not that complex but, still seems to empty the smaller clamp racks pretty well.

TNNW (52).jpg . TNNW (53).jpg

Ever onward . . .
 
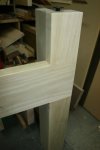
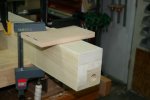
You can see the general idea of the base joinery here. Like my first bench this base is taken from the bench in ShopNotes #89. I use a palm router with a chamfer bit to knock the corners off after assembly. This built-up joinery has proven to be rock solid and trouble free through years of abuse.

TNNW (54).jpg

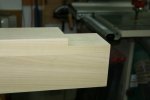
The front left leg requires a large rabbet due to the rear jaw of the vise which hangs an additional 4" below the top thickness. I reference off the rear jaw itself and use a bench chisel as a sort of over-sized marking knife.

TNNW (55).jpg

I have enjoyed using hand tools for a lot of things on this build but, it is dragging out a bit so I will skip the handsaw and use a router to hog away the waste for this rabbet.

TNNW (56).jpg

And I end up here.

TNNW (57).jpg

These shots give you the idea of what the rabbet is doing for me.

TNNW (58).jpg . TNNW (59).jpg

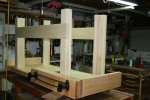
Pretty soon I will be able to take pictures with it right side up :thumb:.
 
Last edited:
Hey who is going to help get that sucker turned right side up?

Heh-heh. . . . I talked the poor soul who worked with me out in the desert in post #22 into an unlimited number of "top flip" visits :D:D:D. He's been a big help so far.

If all goes as planned, the base should be complete and on the floor so all we have to do is flip the top onto it, align it and drive the bullet dowels home.
 
Sorry to mention it Glenn, but knowing your liking for G&G designs I can't understant how you didn't make any ebony accents on it or other characteristic G&G features. That would have been the icing on the cake.

Apart from that I truly believe that even greater projects are meant to come out from that bench given the caring and precision that you've put on the making. Thanks a lot for taking us along. Making a new bench is on my "to do "list as well and your post will be used a a reference if not copied directly. :);)
 
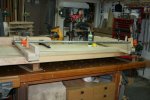
I had a goal for this weekend and I made it :). The bottom shelf is done and the dog holes (so far) are drilled.

TNNW (61).jpg . TNNW (62).jpg . TNNW (63).jpg

I have been struggling with the base dimensions versus dog hole positions desired throughout the design and build. I found myself in a "cake and eat it too" situation and finally accepted that the dog hole position was more important to me than some pass-through interference in two positions. I like to have full clearance through the dog holes and in the area surrounding them on the bottom. In two cases near the left legs I will not get that but, I drilled some access notches to at least allow any spoil to pass out of the holes.

TNNW (64).jpg

The side gripping area would have come in handy a few times in the past. I am ready for the next time now.

TNNW (65).jpg . TNNW (66).jpg

I will get some help moving the top onto the base tomorrow.
 
Last edited:
Top