
- Messages
- 8,472
- Location
- Yorktown, Virginia
BTDT...lots of rest. You can still work, but it ain't fun. Take care of yourself, Stu.
Thank you TedBTDT...lots of rest. You can still work, but it ain't fun. Take care of yourself, Stu.


Heal quickly, Stu. I hope you get good news from the doc today.
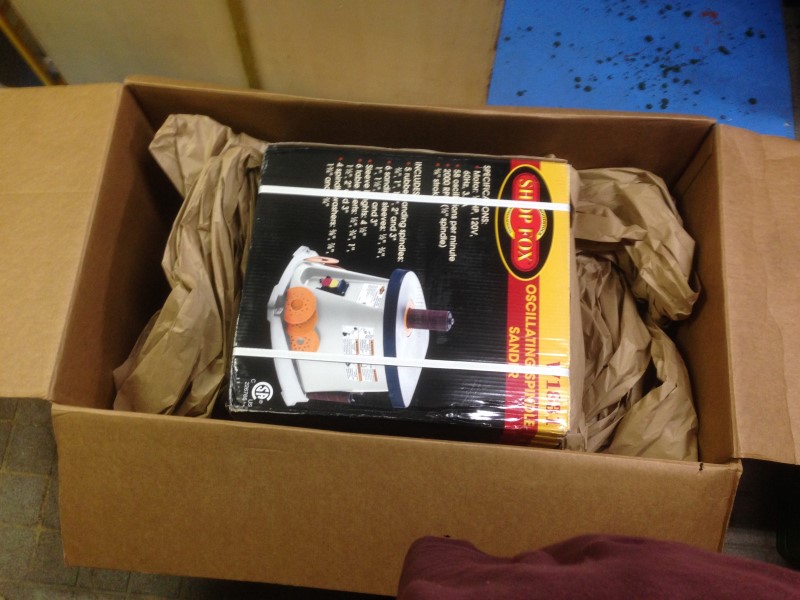
And congrats on the sander. I see the Japanese delivery drivers pay about as much attention to the 'This End Up' arrows on a box as the American ones do.

Stu, pneumonia could have come from the dust created in your shop. If you aren't wearing at least a mask, I suggest you do so upon return to the shop. Good luck on healing those lungs.

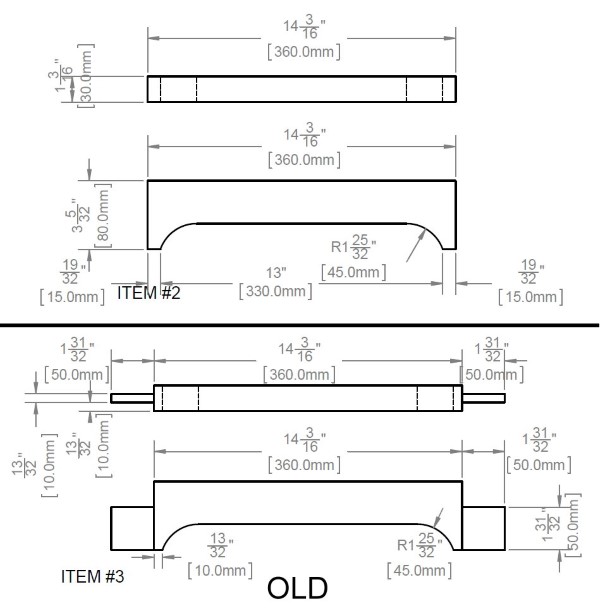

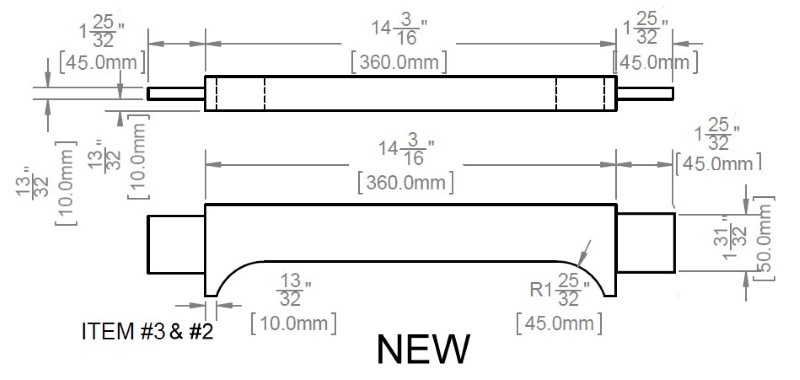
Stu the one thing that comes to mind for me each time i have seen u mention these chairs, being somewhat aware of how they used is the issue of just how rigid do they want/ need them versus them having some flex not give? The previous version may have been imperfect but to what degree has this been used or gotten used by the artist in their act.
So my point is you go make them a perfect solid strong chair and it takes out a parameter that that has empirically been relied on in the act. There may be some "wobble" for want of a better word that they make use of. I dunno just a thought that has struck me given they have made use of chairs which on the face it are not up to scratch in some ways but have served the purpose.
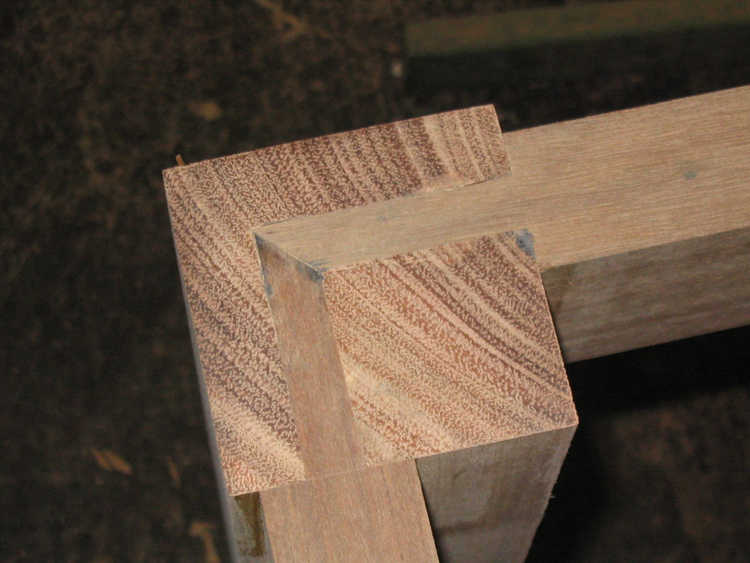
Looking at the tenon in that is shown it don't look like they have much continuity of the grain through the tenon in relation to the thickness/width of the rail in fact it looks like a great place to fail. So your view of moving it up makes sense to me. But that's only my logic.
Sent from my SGH-I337M using Tapatalk

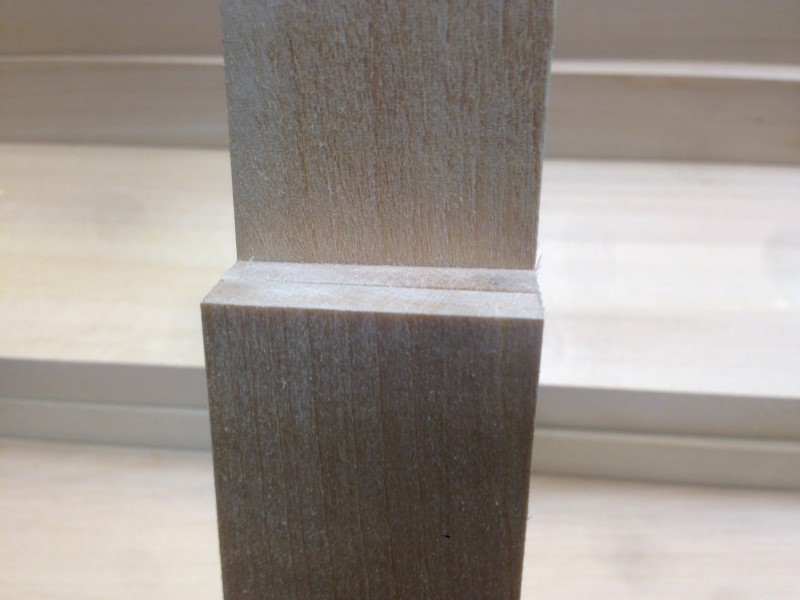
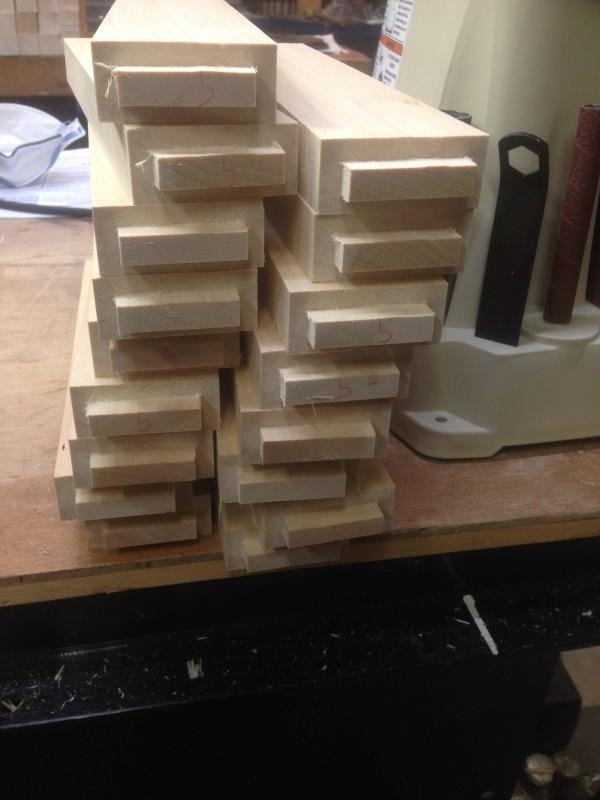
One of the big fears of cutting all the parts before assembly on a big job is that you will somehow get one of the parts wrong and won't catch it until you start putting things together. You got lucky and were able to correct it this time. I think you have definitely improved on the seat rail design. Have you had a chance to get a hands on look at the jello chairs to see if there were any obvious stress cracks anywhere?
If this is for the chairs that get stacked 12 high, with someone balanced on the top chair, then I bet your correction of the tenon will be significant. If I had the guts and strength to be on the top of that, I would not want 12 times 0.4mm error/tip/wobble.
Charlie Plesums said:I think the chairs would be stronger if the tenon on the rails were in fact shorter. At this point you have a slot at least 50 mm (2 inches) high through the leg, separating the inside of the leg from the outside. If the tenons were slightly shorter - perhaps only 35-40 mm long, and the mortises not through from one to the other, I expect the strength of the two sides of the leg would be far greater because the inside of the leg would be connected to the outside.
So you are saying the mortise/tenon would not be as deep or as tall?
Which would leave more meat in the top of the leg?
Good idea, I'll do a mock-up and see how it looks.
Thanks