bathroom towel cabinet

back to work on the cabinet yesterday. while the cnc machine was doing embroidery, i was busy sanding all of the parts from 80 to 120 grit. tomorrow, it is on to 150 and 220, then the boiled linseed oil.
 

Attachments

  • 026 sanded to 120.jpg
    026 sanded to 120.jpg
    114.2 KB · Views: 20
over the last couple of days got one side of the sides varnished. when set, a coat of paste wax, and on to varnishing the other side.
 

Attachments

  • 028 one side varnished.jpg
    028 one side varnished.jpg
    99.1 KB · Views: 17
  • 029 one side detail varnished.jpg
    029 one side detail varnished.jpg
    115.8 KB · Views: 21
got more done today, yesterday (thursday) was just a wash, as a very rough night at work (month end, running 2 laser printers all night long). hit the outsides of the sides with a coat of paste wax, and set up off to the side. gave the insides of the sides, and the top, and edges of the shelves, and top with the first 2 of 3 coats of varnish. one more coat of varnish and wax, then its flip them over, and varnish the other sides. after that, final assembly.
 

Attachments

  • 030 varnished shelves and top.jpg
    030 varnished shelves and top.jpg
    99.6 KB · Views: 13
  • 031 varnished inside of sides.jpg
    031 varnished inside of sides.jpg
    123.4 KB · Views: 14
assembled the case today. now i have to measure for the plywood back, cut it, finish it, and tack it in place. then add the figure 8 irons for attaching the top, and the top's front part, and its all over but bringing it home.
 

Attachments

  • 033 assembly 2.jpg
    033 assembly 2.jpg
    127.5 KB · Views: 19
  • 032 assembly 1.jpg
    032 assembly 1.jpg
    113.6 KB · Views: 21
had my first jesus wept moment in woodworking. after using what i thought was sufficient glue, lots of clamps, and time, i took the clamps off the top, went to take the ones from under, and the whole thing came apart! shades of gilligan's island!
it seems that little or none of the glue actually touched the ends of the shelves. now i have to sand down the glue in the dadoes, and glue it up again.
 
Sorry to hear the bad news Dan, especially when u looking to close up for the year. Maybe try get some cauls across the width of the side next glue up so clamps are not just pulling at the edges dunno if that's possible just a thought.

Sent from my SGH-I337M using Tapatalk
 
today i finished the sanding of the dadoes down to bare wood, and reglued and clamped using pop's new straps as clamps. used a lot more glue on both the dadoes, and the edges of the shelves. then on went the straps, nice and tight. i'll leave it like that for a day or so, then see what happens. i may fire up the compressor and send in a couple of inch and a half nails in from the sides. then, its wait until friday to get the plywood for the back.
 

Attachments

  • 034 sanded to bare wood.jpg
    034 sanded to bare wood.jpg
    108 KB · Views: 15
  • 035 reglued and strapped in.jpg
    035 reglued and strapped in.jpg
    124.3 KB · Views: 14
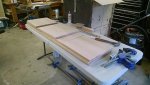
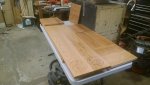
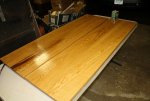
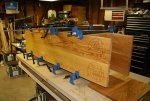
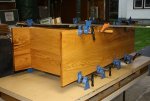
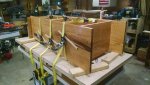
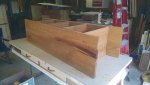
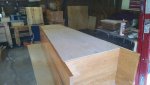
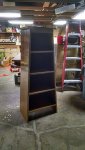
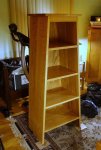
got it out of the clamps the other day, and amazingly enough, it held together this time. then i fitted out the back, and finished the back plywood. today installed the back, and in fitting out the top's table irons, got a nasty surprise. there was glue smeared all over the front edges. so, with a smile on my face, and a song in my heart, starting with 60 grit, and finishing up with 220, sanded it down to bare wood again. after fitting the top, and taking a pic of it on it's feet for the first time, tipped
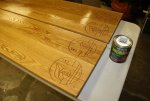
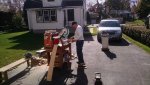
it back on the table, and pop and i got it into the back of the element, with no room to spare lengthwise (now that is proper planning!). while i was working on the back the other day, i let pop use the good miter saw to cut up some odd scrap wood
for my brother. i think he likes it when i let him use the good tools every now and then....
 

Attachments

  • 036 out of clamps again.jpg
    036 out of clamps again.jpg
    97.8 KB · Views: 14
  • 037 fitting the back.jpg
    037 fitting the back.jpg
    95.1 KB · Views: 14
  • 038 ready to go home.jpg
    038 ready to go home.jpg
    107.2 KB · Views: 14
  • 039 at home.jpg
    039 at home.jpg
    118.4 KB · Views: 15
  • pop having fun with the miter saw.jpg
    pop having fun with the miter saw.jpg
    127.9 KB · Views: 16
Top