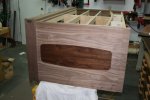
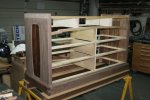
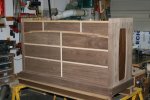
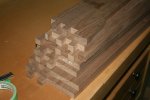
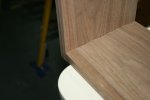
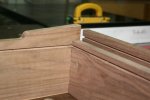
G&G Inspired Dresser

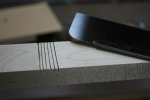
Thanks for posting Glenn. I will bank that trim technique for future use. What a good way to get even coverage on edge of something and if it were ply it would add strength to help prevent sagging. Definitely going to try this out. Have a couple of carcasses in the shop that need trim. I will try using a router to make the groove as they already glued up.
Thanks.

Sent from my SGH-I337M using Tapatalk
 
Glenn, continues to look great. Just curious, do you find the trim method you use better/easier/etc. than simple splines or biscuits? What do you use for web frames ... solid wood or ply? Thanks.

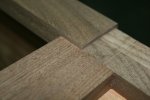
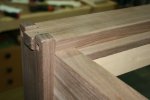
I tend to overbuild certain things. It must be something leftover from a childhood trauma that I don't recall or something like that. A spline would work as would biscuits, this is just a method that I have become comfortable with. I make the frames 3/4" and make the trim 15/16" with the tongue and groove centered along the length. This leaves the trim just a bit proud so as to assuredly hide the frame which, being maple is quite light colored. I had a biscuit joiner and used it once or twice. In my space constrained shop I found having a special tool and the things that go along with it didn't gain me enough to give up the space for it. We all make these decisions based on our own circumstances and often one way is just as good as another ;-)

As mentioned, I use hard or soft maple for frames, whichever happens to be more readily available. They are priced within just a few cents of each other around here.

Thanks for posting Glenn. I will bank that trim technique for future use. What a good way to get even coverage on edge of something and if it were ply it would add strength to help prevent sagging. Definitely going to try this out. Have a couple of carcasses in the shop that need trim. I will try using a router to make the groove as they already glued up.
Thanks.

Sent from my SGH-I337M using Tapatalk

Great Rob. It is always rewarding when a thread helps out another member. For 3/4" material I will often use an 1/8" kerf and just rip thin strips of tempered hardboard for the spines; super easy.
 
Last edited:
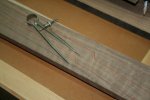
Grandpa's dividers come in handy for laying out the cloud lift trim.

GnG Low CoD (99).jpg

I mentioned using maple for frames but, I had some sappy walnut that I can "use up" on the supporting framework for the cloud lift trim. It is laminated in two layers and then bandsawn to rough shape, template routed and then faired in like the trim, just a bit thinner top to bottom; all pieces of trim are a bit proud of their supporting structure.

GnG Low CoD (100).jpg

Since some parts of this piece are a bit freeform, I measure off the piece once the main carcass is assembled. I clamp the support in place and reference off of the installed frames to position the vertical divider dado.

GnG Low CoD (101).jpg

I just quickly cut this dado by hand.

GnG Low CoD (102).jpg . GnG Low CoD (103).jpg

And this is as far as I got for tonight.

GnG Low CoD (104).jpg
 
Last edited:
Got a little more time on this yesterday. I've reached one of those phases where the number of hours spent is not necessarily reflected in the pics :rolleyes:.
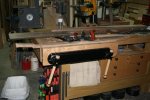
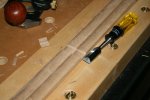
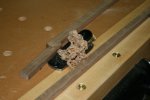
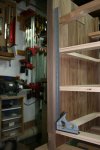
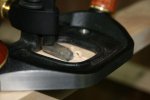
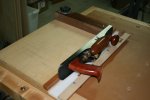
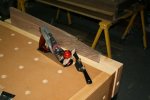
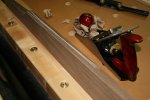
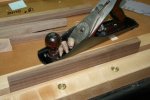
My little apron plane smooths out the trim pieces. they all get tucked somewhere safe until after the drawers get built. A 24" blade or a combo square isn't used often but, it stores safely out of the way in my recently built wall mounted tool cabinet and I'm glad to have it.

GnG Low CoD (105).jpg . GnG Low CoD (106).jpg

The slight change in scale for this piece versus his cousins means some drawer proportion changes.A little more drawer divider dado work with a Dozuki and a router plane.

GnG Low CoD (107).jpg . GnG Low CoD (108).jpg . GnG Low CoD (109).jpg

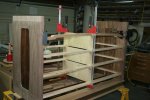
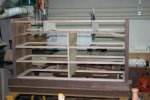
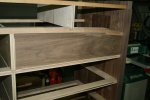
Here's the additional internal structure in place.

GnG Low CoD (110).jpg

For the larger fingers I just use the tablesaw.

GnG Low CoD (111).jpg . GnG Low CoD (112).jpg

Here's the lower trim pieces roughed out and ready for some hand work.

GnG Low CoD (113).jpg
 
Last edited:
I got these Darrell Peart designed square punches for my last birthday. I had used standard chisel mortiser bits up till now and they work fine. These are just a little more refined; they do seem to cut cleaner in softer woods like mahogany but, that could be subjective.

GnG Low CoD (114).jpg

Here is the beginning of the hand work on the fingers.

GnG Low CoD (115).jpg

Once I get to this point I hold off as the parts are still being handled. I do a near-finish effort just prior to assembly.

GnG Low CoD (116).jpg

Its just a whole lot more of these steps for awhile now. I'll post again when something interesting happens ;).
 
Last edited:
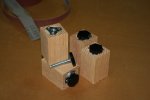
I've been distracted with a couple of medicine chests for a repeat client (they seem to get priority) so I have been neglecting this guy. Any of you who have followed my threads know I make my own levelers. I think this is finally the last of that old red oak front door scrap . . . have I said that before? :dunno:

GnG Low CoD (117).jpg . GnG Low CoD (118).jpg

These get fully glued into a corner joint and (belt and suspenders) also get two screws. There is some additional internal structure that ends up right on top of them. With this installation method I have never had a failure even though some of my pieces get quite heavy.
 
No one needs a reason to love their shooting board but, getting a perfect fit is certainly one of my main reasons :)

GnG Low CoD (119).jpg . GnG Low CoD (120).jpg

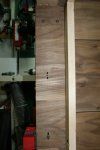
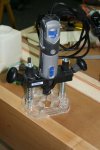
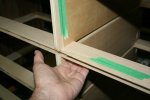
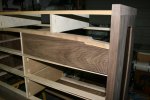
The bottom trim pieces are going on. There is a structural piece that dresses in the area between the drawer front "field" and the large lower trim. By design it also acts as a supporting mechanism in that it is laminated to the long trim during assembly. I find that this approximately 1-3/4" laminated thickness requires no additional support along the long front span. You can see this "backer" trim piece in the last picture between the maple web frame and the long lower trim piece. The side trim pieces need to allow the sides to move throughout the year so they are attached at the front (glued and screwed) but, attach via slotted screw holes at the middle and rear (no glue). I cut the slots with a Dremel because it is light but any method would do.

GnG Low CoD (121).jpg . GnG Low CoD (122).jpg . GnG Low CoD (123).jpg

At least these simple steps make it look like I am making progress :D. The last picture kind of shows off the exaggerated joinery and multiple elevations that I am drawn to.

GnG Low CoD (124).jpg . GnG Low CoD (125).jpg

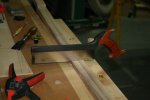
The cheeks from the lap joints on the web frames get to live on as clamping cauls to help me clear the proud fingers.

GnG Low CoD (126).jpg . GnG Low CoD (127).jpg . GnG Low CoD (128).jpg

Finally time for some drawers.
 
Last edited:
I fit the shaped drawers by roughing them out on the bandsaw and finishing them up with a plane and shave.

GnG Low CoD (129).jpg

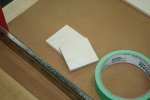
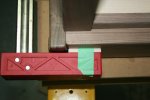
I tape 1/16" strips into corner that happens to be the best fit after roughing out the shape. I then place the front in as well as it will go and make witness marks where it needs attention.

GnG Low CoD (130).jpg . GnG Low CoD (131).jpg

The witness marks guide me and keep me from getting too enthusiastic :). It goes pretty quick and if I do it right I end up with a good fit that doesn't quite leave 1/16" all around. This allows some material for final smoothing.

GnG Low CoD (132).jpg . GnG Low CoD (133).jpg

It can be a little nerve racking knowing that as soon as I get all these well fit I am going to chop big ole finger joints into all of them :eek:.
 
Getting comfortable with hand tools has been a boon to me. A hand plane to fit a too-snug drawer front is the quickest and safest way I can think of to do this sort of thing.

GnG Low CoD (134).jpg

And there you go . . .

GnG Low CoD (135).jpg

Finally time for some drawer boxes :)

GnG Low CoD (136).jpg
 
I really like the ribbon effect on the first layer of draws, i know it makes things super more work and complicated but looking at it now that the first draws are in, i think it would have been nice to see it carried on down to the bottom for each rung of draws. I think practicality has overruled design in your design. Would like to hear what Toni would say. NOT that i would be in a position to pull off even the first run of draws never mind the sides. Just trying to offer some input.;):eek:
 
Thanks Rob,

I did a chest-on-chest for a couple that had the cloud lift for the upper and lower row of drawers creating a tsuba shape for the middle row of drawers. I wish I had a picture of it. They were thrilled but, it looked very Asian. By that I mean it had gone beyond "influence" and moved into something that gave me the "feeling" of a Chinese lacquer box.

It is interesting how design is so subjective since I do use that tsuba shape rather boldly on the sides although in a vertical orientation and feel fine about it. Its like the quandary of why something is funny, I hear a joke and its . . . meh. I hear a similar joke and laugh hysterically. I see a style and its just OK, then a very similar piece will really grab me.

You bring to light the fact that so many people like so many different things. It helps me when folks here make such observations; it wakes me up and keeps me from drowning in my own style/preferences pond. If we are only making things for ourselves, we can do whatever we want. If we hope to catch someone else's eye, we have to keep experimenting. Thanks for the reminder :thumb:.

I get to gang two pairs of drawer front for cutting the fingers. The rest are done alone. This is the virgin run for a DeWalt dado stack I picked up at a too-low-to-pass-up price on amazon a while back.
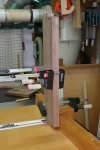
GnG Low CoD (138).jpg . GnG Low CoD (137).jpg

I will use the fronts as a guide to mark the finger locations on the sides of the drawer boxes similar to marking out dovetails.
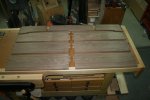
GnG Low CoD (139).jpg

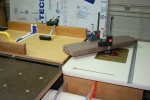
My bench-on-bench makes this easy. I have added jigs and fixtures over the years and now have a pretty decent way of getting through these operations. I mark the opposite fingers with a knife, transfer the marks through a piece of tape on the edge of the material. I have loads of white pencils as I use a bit of walnut but, the tape system seems to work even better for this sort of thing.
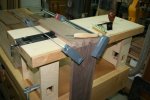
GnG Low CoD (140).jpg . GnG Low CoD (141).jpg

I remove the waste (I try to cut it just a bit fat), remove a too-tight area hear and there with a chisel and it looks like so.
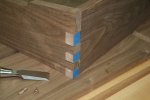
GnG Low CoD (142).jpg

I'll be gone for awhile now since I have about a gazillion more of these to do :)
 
Last edited:
Fingers, fingers everywhere . . .

GnG Low CoD (143).jpg

and I mean everywhere . . .

GnG Low CoD (144).jpg

When I make the grooves for the bottoms, witness lines keep me from doing anything . . .. unfortunate.

GnG Low CoD (145).jpg

In a piece like this many drawer parts get a unique groove.

GnG Low CoD (146).jpg

As long as they line up and don't pop out where they're not supposed to, everything's great.

GnG Low CoD (147).jpg

Now for the rest.
 
Top