Rob Keeble
Member
- Messages
- 12,633
- Location
- GTA Ontario Canada
Well i spent all the time i can trying to find the very old post I am sure i did where i originally hacked this bench.
The reason is relevant is i took a very wide steel bench i brought with me all the way from SA and few years ago I cut about a third of the width and overlapped it and bolted the two halves together. It was a real make do crappy job given i had no welder. Then rattle can sprayed the whole lot including my green craftex lathe Canuck RED.
Well this was one project that added to my justifying list to buy a welder and get into welding. So with the welding table out the way i got stuck into this during the week.
Here are some pics


Sorry i was so busy having fun i never got to take pics during the process earlier in the week or yesterday. I find i really dont take any electronics into the shop lately that way phone text or browsing does not get in the way and distract from doing something.
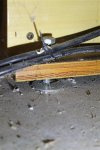
So to give you a run through, if you look at the bench side you can see green where the two pieces were overlapped previously. I cut the cross members and welded the two halves together such that the bench now does NOT ROCK as it did before on casters.
Then put a new deck on it. Underneath the BB ply top skin is the last of the crappy SA pine that came with it. Oh boy talk about crap wood.
Then i found some metal casters on sale $8 bucks at our Princess Auto and made up a few plates for them yesterday making use of my Harbor Freight portable bandsaw. Man I know there are many crappy tools those guys sell but if you ever cut metal of any kind with a hacksaw and want to change that experience, then buy one of these new HF Portable Bandsaws when they on sale for $99. You have to buy a Milwaukee or Lennox blade set for it but when the two parts come together you will not be sorry....Brent take note this is a tool on your spread i can see you loving to bits.
I cut 3/16 plate squares from a larger piece of plate yesterday and it was an unbelievable experience. The noise and mess that would have been there and the time had i wanted to do that with my grinder and cut off wheel , well this took literally less than 5 minutes to cut out these rectangles of steel.
Then drilled and tapped 16 holes and found old bolts from the bolting together and used them to install new casters.
So at this stage the bench is flat on top and on the ground ..phew i am delighted.
Welded the caster plates on and voila all set.
Now while i am at it, this thing is way too mobile and there are no brakes on these casters so i am engineering a bracket this is the prototype


What i have done is taken a piece of the offcut angle iron from the bench and crafted a bracket to support a 1 Inch bolt.
I added to gussets to the side of the angle iron but before that i took it got it in the vice and used my oxy set to do the very first cutting i have ever done of steel.
What an experience.
 Yeah i did it with absolutely no training just my version of common sense.
I had thought long and hard about the tools i had to cut a 1 inch hole in 1/4 inch steel and figured the only thing that i could do was give it a go. Believe me fire extinguisher was readily on hand. After with a rat tail file i cleaned up the hole and bolt fitted.
Not at all happy with the overall job as i say this was more of a lets see if this would even work prototype.
I plan on welding this bracket to side of bench (note side, not front) if anyone has alternative suggestions would love to hear them.
The large NUT will be welded to the bracket underneath and i hope that by adjusting the bolt i can crank it up enough that with 4 of these on each corner i can stand the whole bench on the bolt head.
Thinking of increasing the footprint of the bolt head by welding some more steel to it but need to think about that.
As you can see my welding is not the greatest but its coming along. Keep in mind this is 1/4 inch steel way above the limit for my welder.
But you can see my weld on the caster brackets is a lot better, in that case the surface was prepped and better positioning and grounding all round.
Hopefully by end of today i got these sorted out, fitted and lathe is once again back in business mounted and running. Hold thumbs
The reason is relevant is i took a very wide steel bench i brought with me all the way from SA and few years ago I cut about a third of the width and overlapped it and bolted the two halves together. It was a real make do crappy job given i had no welder. Then rattle can sprayed the whole lot including my green craftex lathe Canuck RED.
Well this was one project that added to my justifying list to buy a welder and get into welding. So with the welding table out the way i got stuck into this during the week.
Here are some pics
Sorry i was so busy having fun i never got to take pics during the process earlier in the week or yesterday. I find i really dont take any electronics into the shop lately that way phone text or browsing does not get in the way and distract from doing something.
So to give you a run through, if you look at the bench side you can see green where the two pieces were overlapped previously. I cut the cross members and welded the two halves together such that the bench now does NOT ROCK as it did before on casters.
Then put a new deck on it. Underneath the BB ply top skin is the last of the crappy SA pine that came with it. Oh boy talk about crap wood.
Then i found some metal casters on sale $8 bucks at our Princess Auto and made up a few plates for them yesterday making use of my Harbor Freight portable bandsaw. Man I know there are many crappy tools those guys sell but if you ever cut metal of any kind with a hacksaw and want to change that experience, then buy one of these new HF Portable Bandsaws when they on sale for $99. You have to buy a Milwaukee or Lennox blade set for it but when the two parts come together you will not be sorry....Brent take note this is a tool on your spread i can see you loving to bits.
I cut 3/16 plate squares from a larger piece of plate yesterday and it was an unbelievable experience. The noise and mess that would have been there and the time had i wanted to do that with my grinder and cut off wheel , well this took literally less than 5 minutes to cut out these rectangles of steel.
Then drilled and tapped 16 holes and found old bolts from the bolting together and used them to install new casters.
So at this stage the bench is flat on top and on the ground ..phew i am delighted.
Welded the caster plates on and voila all set.
Now while i am at it, this thing is way too mobile and there are no brakes on these casters so i am engineering a bracket this is the prototype
What i have done is taken a piece of the offcut angle iron from the bench and crafted a bracket to support a 1 Inch bolt.
I added to gussets to the side of the angle iron but before that i took it got it in the vice and used my oxy set to do the very first cutting i have ever done of steel.
What an experience.
Yeah i did it with absolutely no training just my version of common sense. I had thought long and hard about the tools i had to cut a 1 inch hole in 1/4 inch steel and figured the only thing that i could do was give it a go. Believe me fire extinguisher was readily on hand. After with a rat tail file i cleaned up the hole and bolt fitted.
Not at all happy with the overall job as i say this was more of a lets see if this would even work prototype.
I plan on welding this bracket to side of bench (note side, not front) if anyone has alternative suggestions would love to hear them.
The large NUT will be welded to the bracket underneath and i hope that by adjusting the bolt i can crank it up enough that with 4 of these on each corner i can stand the whole bench on the bolt head.
Thinking of increasing the footprint of the bolt head by welding some more steel to it but need to think about that.
As you can see my welding is not the greatest but its coming along. Keep in mind this is 1/4 inch steel way above the limit for my welder.
But you can see my weld on the caster brackets is a lot better, in that case the surface was prepped and better positioning and grounding all round.
Hopefully by end of today i got these sorted out, fitted and lathe is once again back in business mounted and running. Hold thumbs