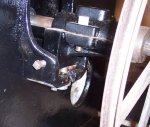
The New Bandsaw...............

Stuart Ablett

Member
Messages
15,917
Location
Tokyo Japan
Some assembly required.....................

some_assembly_required.jpg

:rofl::rofl::rofl:

So it begins...... :thumb:

I was making cuts, I have to get the 45s right on the money...........

right_on_45.jpg
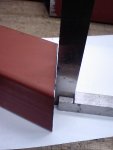
Good 45 cut

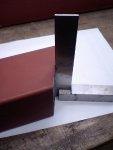
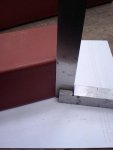
not_quite_90.jpg
......... but the cut is not straight up and down, it is out by about 1mm over 75 mm (3" tubing).

This is the thickest steel tubes that my saw can cut.

I think it will be good and stout.

More pics thate!!
 
Stuart Ablett said:
So it begins...... :thumb:
I was making cuts, I have to get the 45s right on the money...........

View attachment 8597
......... but the cut is not straight up and down, it is out by about 1mm over 75 mm (3" tubing).
This is the thickest steel tubes that my saw can cut.

Aaaaaah, but a little selective tweaking with a 4 1/2" angle grinder can correct that little error.:D

Good Start.:thumb:
 
Last edited by a moderator:
Aaaaaah, but a little selective tweaking with a 4 1/2" angle grinder can correct that little error.:D

Good Start.:thumb:
I've found that if I spend the time getting the parts to fit together the best I can to start, there is a lot of time saved in the tweaking and such. When it comes to welding, they parts should sit together, before they are welded, but yes, you are right, the angle grinder is a good thing to have, I have four :thumb:

Things have to be straight and square on this frame, or the whole deal will be out of whack.

Hope to get more done tomorrow in the AM, so I'm off to bed!

Cheers!
 
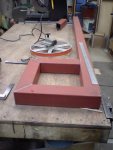
Well, I got a bit of the frame cut up........

phoenix_top_part.JPG
.....With the use of the angle grinder, I was able to get the pieces lining up, for the welding.

Now I need to think about the bottom portion.

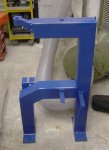
I'm thinking of not a 90 leg on the bottom, but a bottom much like the frame on Big Blue............

blue_framed.jpg

This would give me an area to build and mount the trunnion etc.

I really think this frame will be strong enough, anyone wanna bet :D

Cheers!
 
And the Phoenix is starting to rise.....................:thumb: :D
 
The New Bandsaw.

Stu,
Nice job on the bandsaw frame. A question or two:
1. What is the welder you are going to use?(115V or 220V? I've seen a wire feed welder in the background of your lathe pictures)
2. What is the wall thickness of the tube?
3. Are you beveling the edges of those joints? (That's 3, oh well, more to come) :rolleyes:
Don't be afraid to clamp that sucker down real good, tack it up, and weld it so you don't get too much shrinkage, which will pull it all out of shape. (DAMHIKT):doh:

Aloha, Tony
 
The welder is a Hobart Handler 175, which is a 200V welder.

I'm not sure, but it is fairly thick, this is structural steel for buildings, the steel on these tubes is thicker than the steel on the tubes of my other bandsaw, Big Blue.

The edges will have a very slight bevel, but by running straight CO2, I get good penetration.

Yeah, I'll be putting a piece of sacrificial plywood on my bench and clamping the frame down good, then tacking it well on one side, then flipping it over to do the other side, I know how stuff moves when welding :doh:

Cheers!
 
Last edited:
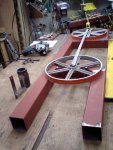
Well then, I guess I should do an update :D

frame_layout1.jpg
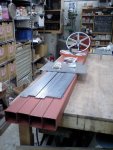
Here is a look at the frame done so far

frame_layout2.jpg
Just sitting there, nothing welded up.

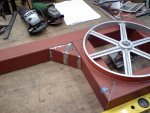
frame_possible_gusset.jpg
I had to cut offs that I just set there on the frame, I could possibly put a corner gusset there.......:dunno:

Trimming to Square


out_by_a_bit.jpg
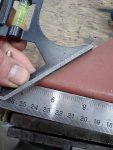
Just a little FYI here, it is all too common when cutting steel that the angle are not exactly right on the money, for various reasons, so more often than not, you end up trimming the ends of cuts to get them square. You can see in the pic above that this one is out just a bit, maybe on millimeter.
I need to trim it up, so everything will line up later.

grinding_bevel_line.jpg
Well, how do you trim it? You use an angle grinder, and a sanding wheel, but how do you keep it straight and not take off too much material?
This was taught to me a LONG time ago, when I worked in a steel fabrication shop. You can in the photo above that I've ground a slight bevel on the edge of the tube. It is maybe 1mm wide, now I grind this until that shinny part is no longer there. Works like a charm, much better and faster than trying to mark it with a pencil or sharpie.

dead_on_face.jpg
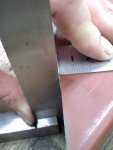
Now you can see the part is dead on square

dead_on_edge.jpg
Yep, that will do nicely! :thumb:

The Bearing Saddle

bearing_saddle_mock_up.jpg
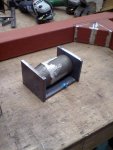
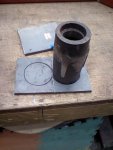
Honestly, this is the part of the build that I was most concerned about, the bottom wheel is mounted on a shaft that was held in place in two bearings, in a chunk of cast iron on Steve's saw. Steve smashed out this bearing holder and sent it with the other parts. I need to mount this cast bearing holder somehow, this is what I came up with, I call it a bearing saddle.
One piece of 9mm thick plate on the bottom of the bearing holder and then two pieces of 9mm thick plate to make a saddle of sorts.


bearing_saddle_lay_out.jpg
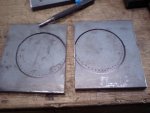
I marked out the holes I'll have to make on each bearing saddle.........

drilling_circle_punched.jpg
........and then I'll have to drill this hole out........................ (cont)
 
.......... back at it.....

drilling_circle_punched.jpg
OK, now that the circle is on there, I punch a bunch of center punch marks for the drill to ride in.

drilling_circle_frontside.jpg
Using a fairly small bit, maybe 1/8", I drill a series of holes around the circle.
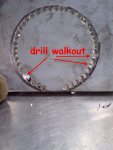
drill_walk_out.jpg
It does not seem to matter how much time you take, you always seem to have a few times when the drill bit does not want to go straight down, but wants to wonder sideways...........
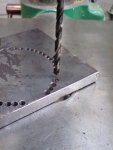
drilling_circle_backside.jpg
.........when this happens, flip the thing over and start another hole on the back side. :thumb:

kermit_catch_pan.jpg
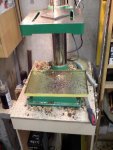
Something else I do, is put a catch pan of sorts under the drill press table, to catch the pieces of metal, it does not get them all, but it it might at the very least keep the clean up down.
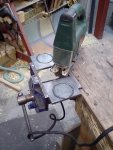
bearing_saddle_ready_2_cut_out.jpg
OK, my holes are drilled, so now I clamp the pieces in the vice, and get out my Jigsaw with the metal cutting blade on it............
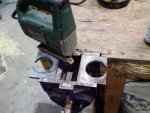
bearing_saddle_cut_out.jpg
.....and in no time at all, I have two holes in the saddle pieces!:thumb:

bearing_saddle3.jpg
I put a round grinding stone that can be chucked up in Kermit to make the inside edge somewhat smooth (forgot to take pics of it :eek:) and I also ground the bearing holder a bit, as I needed to remove the paint etc if I am going to weld it.
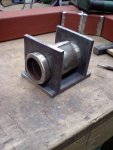
bearing_saddle4.jpg
here are some pics of the round idea.
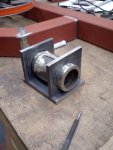
bearing_saddle5.jpg
The thing is, the shaft will have to be straight and level in this, so what I'm going to do is to re-install the old bearings into the bearing holder, with the shaft in there too, then I'll check for level and square and weld away, once done, I'll take the old bearings out (as they will get cooked in the welding process, just from the near by heat, and replace them with the new bearings. Yes, I'm going to weld the cast iron bearing holder to the bearing saddle, I'll use my Mig, it worked well enough on Kermit's table...?

I'm actually waiting to weld up the frame on finishing the bearing saddle, as I need to know the clearance I need for the bearing saddle under the bottom section of the frame.

Well, what do you think?

BTW, can some one check my math for me?

Blade length = 267 cm (105")
Wheel Diameter = 35 cm
Wheel Circumference = 110 cm


Now, at anytime, the blade is only touching half of each wheel, so the circumference of the blade, minus the circumference of one wheel (the top half of the top wheel, and the bottom half of the bottom wheel) which is 157 cm

267 - 110 = 157

This is the length of the straight portions of the blade, of which there are two, the front and the back side of the blade.

Divide 157 cm by 2 and you get 78.5 cm, which would be the distance between the center of the two wheels........... right? :huh:

Hope so......:rolleyes: :eek:

Cheers!
 
stu, i`m waiting on the coffee.......so ain`t about to tackle the math!...got a new blade? or even a piece of string the correct length.....
 
stu, i`m waiting on the coffee.......so ain`t about to tackle the math!...got a new blade? or even a piece of string the correct length.....

Hey I'm on my 4th cup and I'm still falling asleep :rolleyes:

Yeah, I could do that, but that's cheating :D :rofl:

I'll get out my inches ruler too! :thumb:

Coffee done yet? :huh:

:)
 
Oh yeah, funny story about bearings. :D

I sold my Honda VTR1000F Firestorm (Super Hawk to you Yanks) to a buddy, he was by the other day so we could install some bit on it, and change the jetting, as he put some stupid ear-bleed pipes on it :rolleyes:.

He says to me that when he got new tires the other day, the guy at the tire shop said "his rear wheel bearing on one side was going, and it should be replaced". He asks me to look at it, so off comes the wheel, and holy cow, the bearing was just about falling apart! :eek:

I call the Local BIG TIME Honda bike shop, this is a MAJOR dealership, do they have the bearings in stock.............? Nope take three days to get them....:huh:

Now that is weird, as this bike and a host of other bikes all use the same wheels, and they all have the same bearings in them :dunno:

OK, I say, how much per bearing? they want about $22 each, a little steep, I think.......

As we are talking about what the heck to do, I clean up the outside of the bearing and I notice it says "6204LLU" well that sparks something in my memory, and I think that maybe, this is a bearing I ordered for the bandsaw rebuild........... :huh:

Go over to the Dungeon, dig in the box, and guess what.......?

:D ......... yep, same bearing :headbang: and I have two of them!!

So we get the old ones out (the bad one was really really bad, the carrier had fallen apart!) and replace them with new ones.

Now the kicker, these bearing I bought online at Monotaro.com for $2.39 each :thumb:

Just some food for thought, these bearings last a long time on a bike, this bike has about 105 RWHP and GOBS of torque, so it would be harder on bearings than say a small 2-smoke bike. To think that the same bearings are used in the bandsaw gives me a lot of confidence in the build of such saws.

Just a little FYI! :wave:

Cheers!
 
Last edited:
Probably a little late for you since your welding the frame. But when putting 'No Name' bandsaw together I was a little surprised to discover that the lower bearing assembly was adjustable as well as the upper Assembly. Obviously the lower was intended to be set and and left alone, but you can and adjust the angle up and down and left to right. The bearing box can be moved in and out to make the wheels coplanar. I had not noticed that till I put it together and saw the shaft was at a 10 degree angle! After some head scratching I realized why the extra screw holes and why the casting feet were rounded.

Obviously all that adjustability could be very nice. Could complicate the set up too! Will be a while before I know. I am stalled till I get some 3 phase in the shop.

Jeff
 
Actually Jeff, I had thought of that. Big Blue's lower bearing assembly has elongated holes in it, so the whole assembly can be shifted in or out by about a 1/2", the top only tilts. As it was, to get the two wheels on Big Blue coplanar, I had to shim the front of the lower bearing assembly just a bit, and it is right on the money now.

Adding some additional threaded holes to the lower bearing assembly is a good idea, I'll do that, then if I need to tweak it, just a bit, I can.

Thanks for the suggestion! :thumb:
 
I ran down to the Lab and grabbed these photos. It might give you some ideas. Then again it might not. ;)

This is the blade side. Cast is fixed in place but there it curve on the bottom of the bearing box that I had wondered why it was there.

stu_bs1.jpg

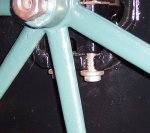
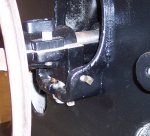
These are from the driven side. The bearing box is aligned between 4 bolts. Two on the bottom for the shaft angle. Two one the sides for the for aligning the two wheels. Pretty basic but it appears to be good solid design.

stu_bs2.jpg stu_bs3.jpg stu_bs4.jpg

There you go. Do with what you want, if anything.

Jeff
 
Top