2017 small cupboard project

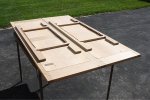
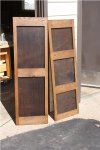
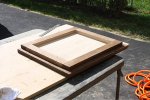
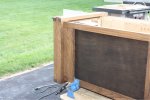
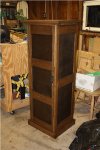
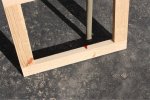
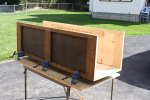
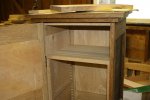
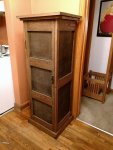
almost done with this one! got the adjustable shelf brackets in place. then sanded and stained the sides, back, and door. stained the top frame and top. with all of that out of the way, attached the sides to the back, attached the riser to the bottom. added the bottom shelf and frame, and the top frame. took a little dinger, not sure on what, but took one for the project (don't worry, sanded the evidence off). then, added the door (i highly recommend throwing out the screws with rockler hinges, pure junk). then wheeled it into the shop, to await more finishing.
 

Attachments

  • 026 shelf brackets in place.JPG
    026 shelf brackets in place.JPG
    120.7 KB · Views: 6
  • 027 sides stained.JPG
    027 sides stained.JPG
    110.6 KB · Views: 5
  • 028 back and door stained.JPG
    028 back and door stained.JPG
    109.4 KB · Views: 6
  • 029 top and top frame stained.JPG
    029 top and top frame stained.JPG
    122.9 KB · Views: 6
  • 030 top frame attached to top.JPG
    030 top frame attached to top.JPG
    121.1 KB · Views: 6
  • 031 riser attached.JPG
    031 riser attached.JPG
    95 KB · Views: 5
more pics...
 

Attachments

  • 036 pretty much done.JPG
    036 pretty much done.JPG
    111.7 KB · Views: 14
  • 035 door in place.JPG
    035 door in place.JPG
    113.9 KB · Views: 8
  • 034 top frame in place.JPG
    034 top frame in place.JPG
    103 KB · Views: 8
  • 033 took a dinger.jpg
    033 took a dinger.jpg
    69.1 KB · Views: 8
  • 032 bottom shelf in place.JPG
    032 bottom shelf in place.JPG
    96.6 KB · Views: 8
  • 031 sides attached to back.JPG
    031 sides attached to back.JPG
    120.7 KB · Views: 8
got the fixed shelf in place, now working on the adjustable ones. i figure to use small odds and ends for those.
 

Attachments

  • 037 fixed shelf in place.jpg
    037 fixed shelf in place.jpg
    55.7 KB · Views: 8
touched up the last of the stained stuff. added the door catch hardware. planed, jointed, and glued up the parts for the adjustable shelves. a bit of trimming up of the shelves, and it will be ready to bring home.
 

Attachments

  • 040 door clasp installed.JPG
    040 door clasp installed.JPG
    48.1 KB · Views: 7
  • 039 adjustable shelves glued up.JPG
    039 adjustable shelves glued up.JPG
    78.2 KB · Views: 6
  • 038 parts for planed.JPG
    038 parts for planed.JPG
    62.9 KB · Views: 7
sanded and notched the adjustable shelves. should be able to bring it home tomorrow.
 

Attachments

  • 041 adjustable shelves cut and sanded.JPG
    041 adjustable shelves cut and sanded.JPG
    65.7 KB · Views: 7
  • 042 adjustable shelves in place.JPG
    042 adjustable shelves in place.JPG
    60.8 KB · Views: 8
Top