2017 project f

Dan Noren

Moderator
Staff member
Messages
7,985
Location
falcon heights, minnesota
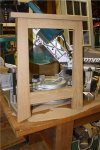
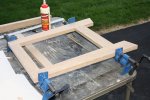
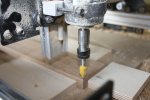
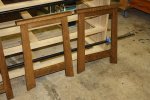
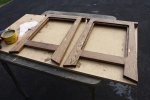
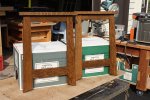
well, lets see, i've had a project c, a project w, why not a project f? as the 22nd rule of acquisition states, 'a wise man can hear profit in the wind'. well, this wind was whispering, project f. then i got the idea in my head, and it kept churning around, and around, until project f was finalized. figuring that it would be a good way to use some of the off cuts, i decided to go with 2 copies. with all of the parts ripped to width, and cut to length, and angles, all that is left, is to plane them to smooth, and proper thicknesses. but, getting towards the end of the day, i was hit with the three too's, too late, too hot, and too tired, to do the planing. if you have figured out what project f is, after looking at the pictures (no pics, didn't happen ya know), you will have a happy day!
 

Attachments

  • 001 parts.JPG
    001 parts.JPG
    115.3 KB · Views: 15
  • 002 long parts first cut.JPG
    002 long parts first cut.JPG
    125.5 KB · Views: 14
  • 003 long parts second cut.JPG
    003 long parts second cut.JPG
    102.4 KB · Views: 14
  • 004 first test assembly.JPG
    004 first test assembly.JPG
    104.6 KB · Views: 24
more done with these today. planed all of the parts to thickness. last night at work, i came up with an idea for some fancy work on it (looked a little plain to me). used the mackintosh rose i drew, and added some rectangles and squares. set up the cnc, and carved the fancy work. then marked off where to cut for the biscuits, and glued them both up. hopefully tomorrow, cut the rabbets for the glass, backer, and framing material.
 

Attachments

  • 010 second one in clamps.JPG
    010 second one in clamps.JPG
    63.1 KB · Views: 10
  • 009 first one with top on it.JPG
    009 first one with top on it.JPG
    77.3 KB · Views: 16
  • 008 first one in clamps.JPG
    008 first one in clamps.JPG
    72.2 KB · Views: 11
  • 007 first one with designwork.JPG
    007 first one with designwork.JPG
    70.1 KB · Views: 10
  • 006 start of carving designwork.JPG
    006 start of carving designwork.JPG
    57.1 KB · Views: 10
  • 005 all parts planed.JPG
    005 all parts planed.JPG
    71.3 KB · Views: 10
got them ready for routing of the rabbets, and routed them. then added the top board, and gave them both a coat of the stain.
 

Attachments

  • 016 both frames stained.JPG
    016 both frames stained.JPG
    81.9 KB · Views: 8
  • 015 both completed.JPG
    015 both completed.JPG
    74.8 KB · Views: 6
  • 014 second one in clamps.JPG
    014 second one in clamps.JPG
    72.5 KB · Views: 6
  • 013 first one assembled.JPG
    013 first one assembled.JPG
    73.3 KB · Views: 6
  • 012 rabbets routed.JPG
    012 rabbets routed.JPG
    59.4 KB · Views: 6
  • 011 ready to rout rabbets.JPG
    011 ready to rout rabbets.JPG
    73.7 KB · Views: 6
got both sides done with their proper coats of shellac tonight. all that is left, is paste wax, and turn buttons, and this one will be done.
 

Attachments

  • 017 backs shellaced.JPG
    017 backs shellaced.JPG
    75 KB · Views: 8
  • 018 fronts shellaced.JPG
    018 fronts shellaced.JPG
    72.7 KB · Views: 9
Top