Tom Bussey
Member
- Messages
- 145
- Location
- Nashua Iowa
I posted a while back in the design section about laying out for my new bench, I have been busy building so I haven't posted much. I did post in the jigs and fixture section on a couple things I had to build just to build the bench.
My new bench is 34 1/2 inches high, just under 8 foot long. I wanted to be able to get the top in my pick up truck, And the split top with a tool tray is 36 inches wide. My bench was inspired by a picture that was taken of a 12 foot long shaker bench found in a museum at Hancock Village in Hancock Ma.
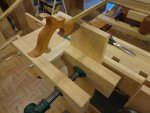
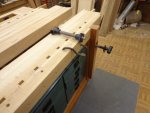
I prefer a tail and a shoulder vise verses a leg vise, and that is what I made on the front side of my bench. Since my bench is wide I decided to do a wagon vise and a leg vise on the back side. I prefer to work all around my benches and there are times that a left handed bench would come in handy so what I have pictured is a leg vise on the right side and the wagon vise hardware in setting on top.
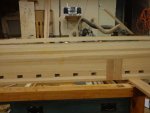
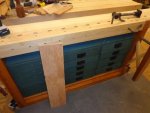
I have found it harder and harder to bend over or get down on my hands and knees to get things that drop on or roll under the bench. I have also found that things tend to go under the bench and can end up with a big layer of dust after a while so I put in drawers all the way to the floor, just like the shaker bench. Although my bench was inspired by the shaker bench I made the drawers the sizes that fit my needs. I like to keep the tools I use at the bench, and things I do not use as often at the bench I put on the back side. There is some duplication though like hammers and chisels.
Anyway the leg screw hardware, although I can spin it with a finger, does not spin like the vise hardware from Bench Crafted, the cost to me of $2 at an auction off set that inconvenience. I don't remember the cost of the three long bolts I used for pins. I got them long enough to cut the heads and threads off. . The wagon vise hardware is actually a vise screw for a shoulder vise and it came from Lee Valley. I waited for a free Shipping deal. If I remember correctly it was about $29.
Anyway pictures, the first two are when I did my research and development on the cris-cross.

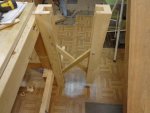
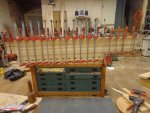
And the rest at of the present. I want to note that the leg vise does not go all the way to the floor and that a broom fits under it nicely. Also the vise hardware is not yet fastened to the chop. and the piece of cherry leaning against the bench is for the sliding board jack.


My new bench is 34 1/2 inches high, just under 8 foot long. I wanted to be able to get the top in my pick up truck, And the split top with a tool tray is 36 inches wide. My bench was inspired by a picture that was taken of a 12 foot long shaker bench found in a museum at Hancock Village in Hancock Ma.
I prefer a tail and a shoulder vise verses a leg vise, and that is what I made on the front side of my bench. Since my bench is wide I decided to do a wagon vise and a leg vise on the back side. I prefer to work all around my benches and there are times that a left handed bench would come in handy so what I have pictured is a leg vise on the right side and the wagon vise hardware in setting on top.
I have found it harder and harder to bend over or get down on my hands and knees to get things that drop on or roll under the bench. I have also found that things tend to go under the bench and can end up with a big layer of dust after a while so I put in drawers all the way to the floor, just like the shaker bench. Although my bench was inspired by the shaker bench I made the drawers the sizes that fit my needs. I like to keep the tools I use at the bench, and things I do not use as often at the bench I put on the back side. There is some duplication though like hammers and chisels.
Anyway the leg screw hardware, although I can spin it with a finger, does not spin like the vise hardware from Bench Crafted, the cost to me of $2 at an auction off set that inconvenience. I don't remember the cost of the three long bolts I used for pins. I got them long enough to cut the heads and threads off. . The wagon vise hardware is actually a vise screw for a shoulder vise and it came from Lee Valley. I waited for a free Shipping deal. If I remember correctly it was about $29.
Anyway pictures, the first two are when I did my research and development on the cris-cross.


And the rest at of the present. I want to note that the leg vise does not go all the way to the floor and that a broom fits under it nicely. Also the vise hardware is not yet fastened to the chop. and the piece of cherry leaning against the bench is for the sliding board jack.


