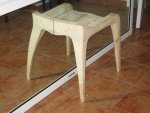
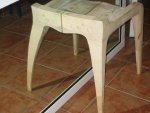
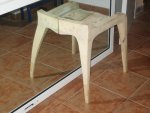
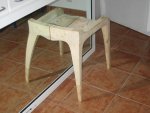
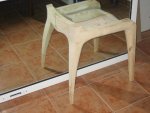
Backless chair/stool with sculpted seat

The mirror idea is also just simply brilliant. I never would have thought of that in a month of sundays!

Hi Ian.

I'm glad that you like the design we'll see how it comes out with all your help.

The mirror idea...:huh: well I'm a sort of lazy person:zzz: so why make a complete seat if making only half of it and letting the mirror doing the other half saves me time, wood and effort?

Unfortunately,;) the final chair will have to be made fully:rofl:
 
how is your supply of Japanese Chisels, looks like they will get a lot of use! :thumb:

Hi Stu.

I'm glad that you dropped in!.

To be honest only one of my chisels is a japanese one; but if what you say on your signature of being a clamp purveyor is true I may order some from you (at special friend's discount of course!:))
 
Hi Stu.

I'm glad that you dropped in!.

To be honest only one of my chisels is a Japanese one; but if what you say on your signature of being a clamp purveyor is true I may order some from you (at special friend's discount of course!:))

I'm always around here somewhere :rolleyes:

Only ONE Japanese chisel?

What size is it (you can tell me in mm, just ignore them Yanks;) :D :rofl:)

I'd give you a great deal on clamps, but, the shipping would be killer!
 
I'm always around here somewhere :rolleyes:

Only ONE Japanese chisel?

What size is it (you can tell me in mm, just ignore them Yanks;) :D :rofl:)

I think it is about 18mm, all the others I have are either vintage from my dad and grand dad's toolbox or just pure cromoly crap. In total I they may add up to 7 or 8 not more.

As far as gouges are concerned I've got somthing like 25 different ones all same brand ( spanish one, not bad not high end though).

But we are getting out of thread here. aren't we? What sort of moderator are you man?:rofl:
 
Hi Tony.
Thanks for sharing the progress pictures. The plaster is a great idea for mocking up - what a time saver!!

On the joinery, for chairs I usually use floating tenons (you make a mortise in each piece and an independent tenon that glues into both mortises). They are strong as its relatively easy to get the angles right. Your spline looks very good though.:huh:

Maple is a good choice for the chair. Its handsome and very strong. I would select straight grained maple, though. Don't want a lot of figure interfering with the clean lines and highly figured maple is very difficult to shape and smooth.:eek:
 
Hi Tony.

On the joinery, for chairs I usually use floating tenons (you make a mortise in each piece and an independent tenon that glues into both mortises).

Hi Jesse.

Yes, using floating tenons is a wise decision and less time consuming than cutting them from the leg, besides I agreee completely with what you say about getting the angles right.
I'll problably use them on the joinery of the back and back legs
 
Last edited by a moderator:
Part III final tweaks or so I think :huh:

This is for you Tod.:)

As I said yesterday I went home and gave a second, a third and some more toughts at your comment and I think that you are completely right, with your comment, thanks again for it.
This is how I proceeded.

I drew the area that was going to removed, carved it off and evaluated it, checking the overal appearance with the mirror trick.
Part 3_1868 16.jpg Part 3_1870 17.jpg Part 3_1872 18.jpg Part 3_1873 19.jpg

Not bad as a start but there were a couple of curves that didn't please me, the one on the back leg of the reflected image and the pointed tip of the central seam. The back curve obtained matches somehow the on the front so I think that's good.
Part 3_1874 20.jpg Part 3_1877 23.jpg
Some tweaking with a gouge and a rasp and more checking. Still not right:huh: The central one maybe.
Part 3_1880 26.jpg
Some more tweaks and pics and there you go GOTCHA!:thumb:
Part 3_1884 30.jpg Part 3_1885 15.jpg
Still I'll let it ripe for a few days without looking at it, and come back and check again, this refining stage is the most dangerous one for me, the fine line between getting it right or spoiling the whole thing is so thin:(.

Thanks again for your wise input and to all the others that contributed as well. I've got the lumber already and I hope to start soon.
 
Thanks Vaughn.

Just one administrative question. Should I continue posting in this same thread? Or start a new one when I have more pics of the process?,I'm asking because it may take me a couple of weeks.
 
Thanks Vaughn.

Just one administrative question. Should I continue posting in this same thread? Or start a new one when I have more pics of the process?,I'm asking because it may take me a couple of weeks.
You're very welcome, Toni. :wave:

As far as the posting question, it's really whatever is your preference. We've had both kinds of project threads here, and however they are displayed, a fun project is a fun project. If you do continue posting in this thread, even if it goes weeks or months with nothing added, each time you or someone else adds a post to it, it will go back to the top of the listing, just as a new thread would. So...it's really your choice. We'll all read it regardless of your decision. :)
 
toni,

great thread and great design. i really like the look of the stool and i also like the latest change with the curve in the back. the mirror trick was very nice, good way to do half the work and get the total finished look. can't wait to see the real thing.

chris
 
My personal preference on this one is that you keep posting on the same thread, the reason why is that at some future date, if someone is looking at the thread, then it is all in one place.

Just my opinion.
 
This is for you Tod.:)

As I said yesterday I went home and gave a second, a third and some more toughts at your comment and I think that you are completely right, with your comment, thanks again for it.
This is how I proceeded.

I drew the area that was going to removed, carved it off and evaluated it, checking the overal appearance with the mirror trick.
View attachment 11815 View attachment 11816 View attachment 11817 View attachment 11818

Not bad as a start but there were a couple of curves that didn't please me, the one on the back leg of the reflected image and the pointed tip of the central seam. The back curve obtained matches somehow the on the front so I think that's good.
View attachment 11819 View attachment 11820
Some tweaking with a gouge and a rasp and more checking. Still not right:huh: The central one maybe.
View attachment 11821
Some more tweaks and pics and there you go GOTCHA!:thumb:
View attachment 11822 View attachment 11823
Still I'll let it ripe for a few days without looking at it, and come back and check again, this refining stage is the most dangerous one for me, the fine line between getting it right or spoiling the whole thing is so thin:(.

Thanks again for your wise input and to all the others that contributed as well. I've got the lumber already and I hope to start soon.


that looks better toni! let me look a few times too and if i have any brainstorms i`ll spout off.......heck i`ll spout off anyway;)
tod
 
Hi Toni! This is becoming a fun thread. Sorry for dropping in late, but it looks like a really neat project! The curves are looking really good. I'm looking forward to keeping up with the progress!
 
After a second thought, more tweaks....

I always put aside a project for a few days when I think I'm finished in order to forget about it and have a later look with fresh mind.
This has proved me so many times that we get so used to our own designs that it is very difficult to tell what is wrong or not completely right after a while that by doing this I've been able to see other things that didn't please me with the prototype I built.

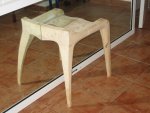
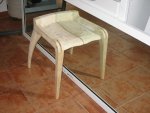
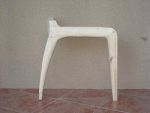
Looking at it from the side I found that the base looked too long in proportion to the length of the seat, while this may be a wanted feature sometimes to prevent people from leaning back and rock on the back legs dismantling the chair, here I found it rather disturbing as far as the proportions of the sea are concerned.

Part 4_1886.JPG
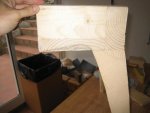
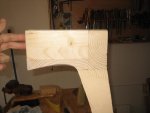
So withouth changing the seat itself, I sawed off the back leg and put it back again about an inch shorter torwards the front leg.
Part 4_1910.JPG

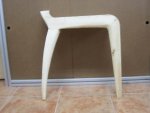
Then I reshaped the short back rest and now I believe it looks better.
Part 4_1949.JPG
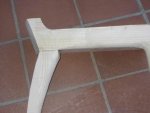
The resulting kink on the joint of the leg with the back is due to having sawn the leg and trying to get the curve right without using plaster as before or adding more wood.
As I think that now the proportions are better I will make a proper smoother curve as before on the final chair. Excuse me for the poor craftmanship and the even poorer focus on the last picture:(
 
Top