Keith Starosta
Member
- Messages
- 161
- Location
- Fredericksburg, VA
About a month ago, my 11 year old son and I were flipping through a couple of catalogs I had received that day. At one point, I got to a page that had a couple of "games" on it, and Nick flipped! He saw the following picture...

It's a tabletop shuffleboard game. He really like it, as did I. What I didn't like was the price, which was over $100. Later that night, I studied the picture some more, and told myself, "...you can do that!"
So, that's what I'm doing.
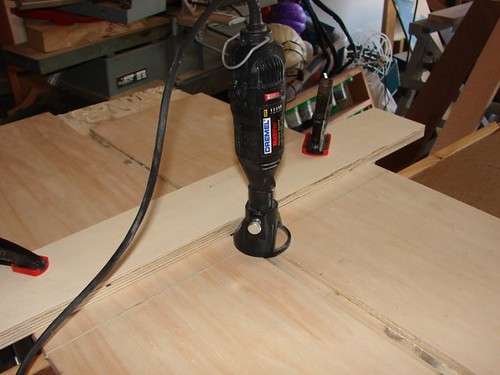
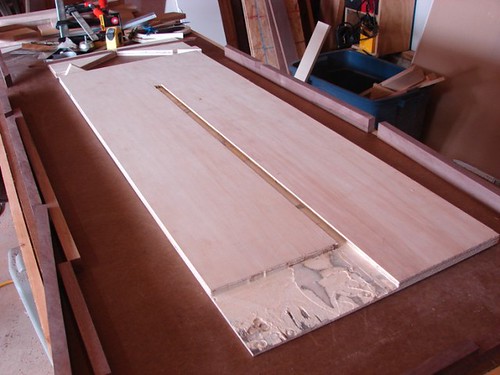
The overall dimensions for the game are 48"L x 18"W. I liked the way the darker wood looked as trim and accents, so I decided to use some of the walnut I had on hand. For the shuffleboard itself, I started with a 48"x18" piece of birch ply. I laid out dimensions for a groove down the middle of the board for the center bumper, and for the "gutter" at the end of the scoring area. At that point, I slapped a straight bit in the router, and went to work. Here is the result of that bit of work...
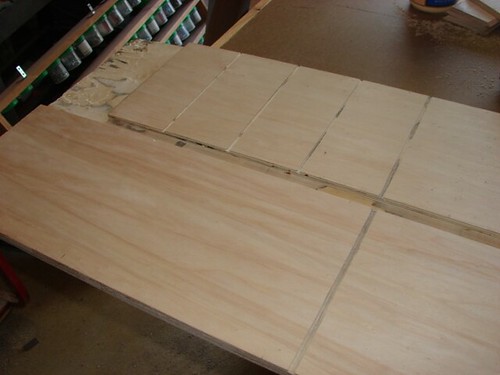
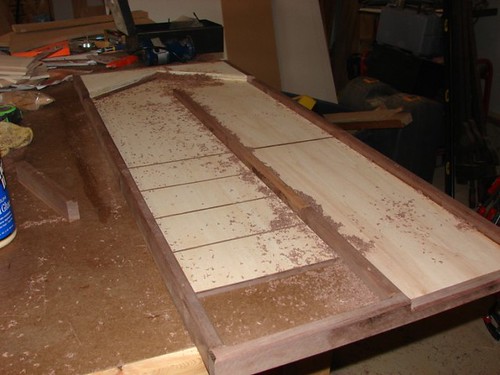
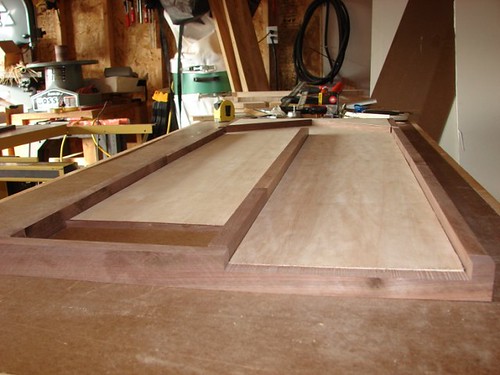
Now that the initial routering was done, I started looking at the trim details. I figured that I'd go with a 3/4" wide trim piece around the perimeter of the board, as well as the center bumper. A couple of much thinner pieces of walnut are going to be used at the far end of board, and the facing of the gutter. Here is the collective molding and trim, all ready for final sanding...

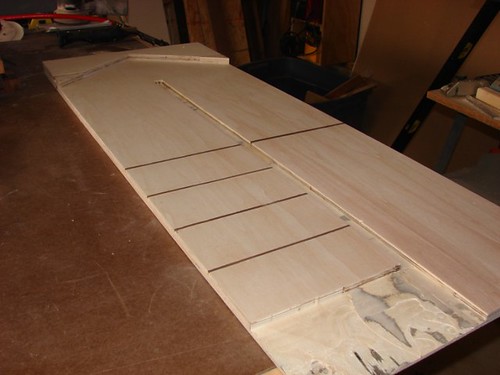
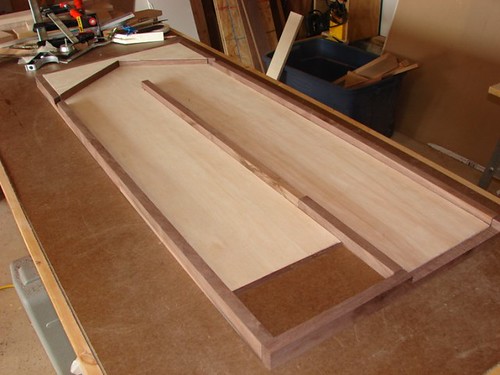
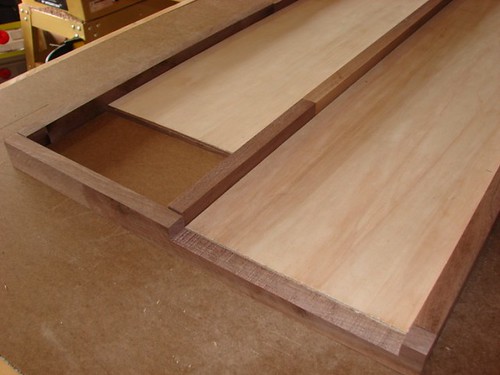
So at that point, I had all of the major components of this shuffleboard table ready to go. Here is a picture of the dry-fit. Ultimately, I'm going to use a piece of green felt in the gutter. I didn't like the way the straight bit left the rough gutter, feeling that you would see the humps and bumps after the felt was applied. So I'm going to use a piece of 1/4" hardboard as a substrate for the felt. Even though it raises the gutter 1/4", it should look pretty good...
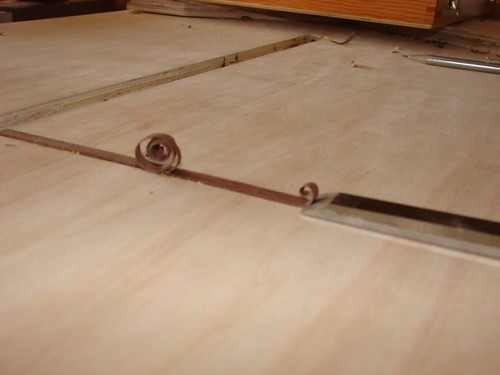
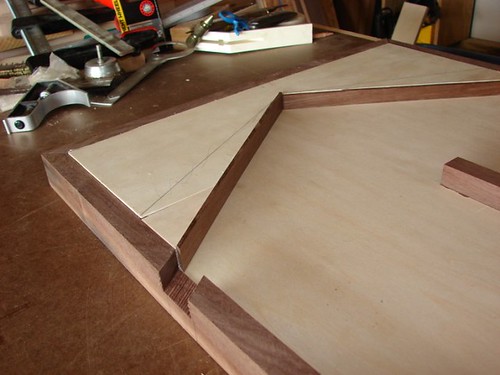
Here are a few other pictures, showing some of the details of the board. Keep in mind...at this point, I've done no sanding, so you still see the saw marks where I nibbled away at the walnut trim...
Another...
...and finally...
The pucks for this game are actually what almost stopped me from tackling this project. I had no idea what I was going to use, or where I was going to get them. The problem was solved with the very first stop I made on the 'net. I found these at everybody's favorite online auction site...
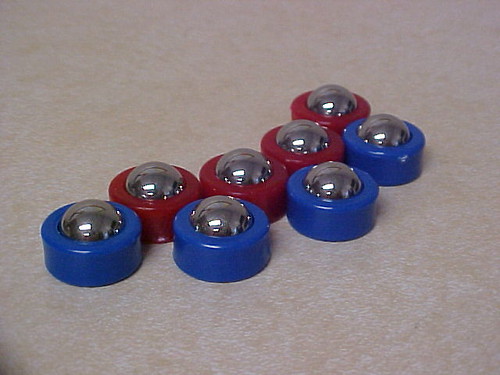
They are 3/4" wide, and 1/2" high. They're perfect for this application, and at $5.99/set, a decent deal. I bought two sets, because what are the chances an 11 year old and his buddies aren't going to lose a puck or two?
I will definitely keep this up to date as I progress. I've got a bunch of finishing questions to ask, but will save them until I am ready. At this point, I am most likely going to make another of these boards for my nephew. He'll love it....
Thanks!!
Keith
It's a tabletop shuffleboard game. He really like it, as did I. What I didn't like was the price, which was over $100. Later that night, I studied the picture some more, and told myself, "...you can do that!"
So, that's what I'm doing.
The overall dimensions for the game are 48"L x 18"W. I liked the way the darker wood looked as trim and accents, so I decided to use some of the walnut I had on hand. For the shuffleboard itself, I started with a 48"x18" piece of birch ply. I laid out dimensions for a groove down the middle of the board for the center bumper, and for the "gutter" at the end of the scoring area. At that point, I slapped a straight bit in the router, and went to work. Here is the result of that bit of work...
Now that the initial routering was done, I started looking at the trim details. I figured that I'd go with a 3/4" wide trim piece around the perimeter of the board, as well as the center bumper. A couple of much thinner pieces of walnut are going to be used at the far end of board, and the facing of the gutter. Here is the collective molding and trim, all ready for final sanding...
So at that point, I had all of the major components of this shuffleboard table ready to go. Here is a picture of the dry-fit. Ultimately, I'm going to use a piece of green felt in the gutter. I didn't like the way the straight bit left the rough gutter, feeling that you would see the humps and bumps after the felt was applied. So I'm going to use a piece of 1/4" hardboard as a substrate for the felt. Even though it raises the gutter 1/4", it should look pretty good...
Here are a few other pictures, showing some of the details of the board. Keep in mind...at this point, I've done no sanding, so you still see the saw marks where I nibbled away at the walnut trim...
Another...
...and finally...
The pucks for this game are actually what almost stopped me from tackling this project. I had no idea what I was going to use, or where I was going to get them. The problem was solved with the very first stop I made on the 'net. I found these at everybody's favorite online auction site...
They are 3/4" wide, and 1/2" high. They're perfect for this application, and at $5.99/set, a decent deal. I bought two sets, because what are the chances an 11 year old and his buddies aren't going to lose a puck or two?
I will definitely keep this up to date as I progress. I've got a bunch of finishing questions to ask, but will save them until I am ready. At this point, I am most likely going to make another of these boards for my nephew. He'll love it....
Thanks!!
Keith