PROJECT: Tabletop Shuffleboard Game

Hey Drew, don't feel bad. There were probably a half dozen people out there who are glad you asked, because they wouldn't. You did them a favor. And you did us one as well. We can't give unless someone is willing to receive. So thank you. And that makes us all more willing to ask about something we don't know.

So there, good job!
 
Sorry about that, I try not to use acronyms, but sometime I do :eek:

Don't worry about asking, I had to ask too, at some point, I remember also asking why everyone was calling these beautiful vases and such they were making "Harbor Freights" (HF) :rofl: :rofl: :rofl:

I get in real trouble here in Japan, as I've been here now over 17 years, and most of my non-Japanese friends are also long term guys, so when we speak, we often use some common words from Japanese, so we speak a kind of Engrish, or Janglish, funny, when you think you have been speaking English, but when you realize that the third person in the conversation just arrived in Japan and cannot understand some of what you are saying, you kind of do a :doh: to reset the "English" part of your brain, and get back to the conversation, leaving out the Japanese :D :wave:

Cheers!
 
Update

UPDATE: December 21, 2007

---------------------------------------

Howdy, Folks!! I took some time last night to put together a rough SketchUp drawing of the Tabletop Shuffleboard. Here are some snaps from that drawing...


Here are the overall dimensions of the board. I forgot to place the dimension of the center rail. It is 36 3/4"L x 1"H x 3/4"W. It is centered in the board, placed in a groove that was routed 3/8" deep. It is butted up to the trim at the foot of the board.
2126251509_5c7e92461f.jpg


Spacing out the placing of the inlays took a little trial and error. I finally got it set the way I liked it...based on nothing more than what I thought looked appropriate.
2127028494_7d5619d278.jpg


The gutter was hogged out using a 1/2" straight bit in my hand-held router. I will ulimately use 3M spray adhesive to apply a piece of green felt.
2127028480_2230a4dc84.jpg


The notches cut into the walnut trim were nibbled away one pass at a time, using my shaky miter guage on the table saw. The dowels are centered in the notch.
2126251517_064ed42b75.jpg


If anybody has has any questions about anything, please don't hesitate to ask. I'm really looking forward to starting the rubbing-out process this weekend. Wish me luck... :eek: :eek:

- Keith
 
FINISHED!!

************************
Update: December 23, 2007
************************

Well, I've got this thing about as done as I can get it.....without screwing it up, anyway. :D

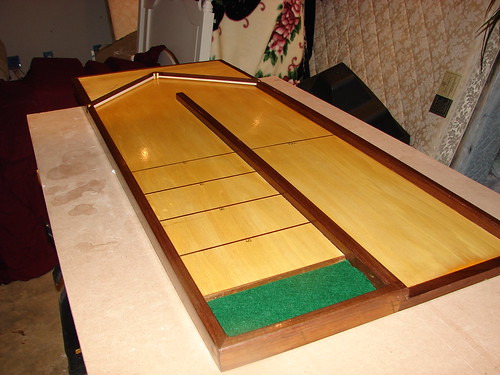
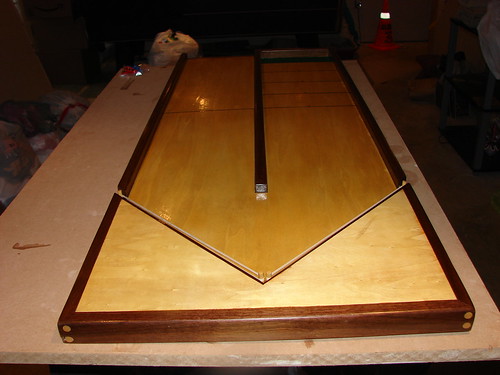
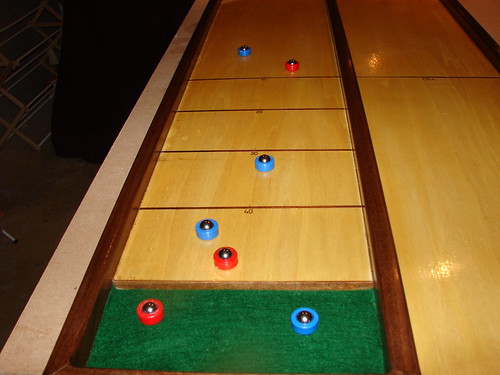
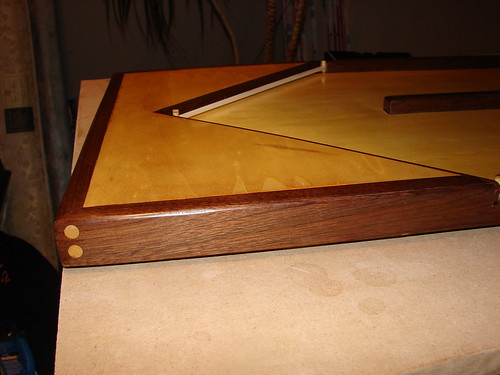
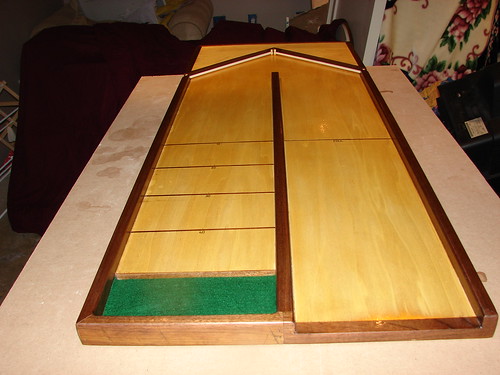
Here are some pictures of the final product. My photography skills are...well, they're not good. Suffice it to say that the board looks a bit better in person.

After letting it sit for about 10 days after applying the Rock Hard, I rubbed it out using successive grits of 400, 600, 800, and 1200. Having never used paper with grits that high, I wasn't exactly sure what to expect. Halfway through 800, I was getting pretty concerned that I had done something wrong, because I wasn't seeing any discernable difference in the surface. But after I finished with the 1200, and then rubbed it out with a gray Scotch Brite pad, I was happy to see and feel that I had a very smooth, satiny surface. I applied three coats of Johnson's Paste Wax, which brought it too a satin finish...which is what I was hoping for. I have to admit, there is a bit of orange peel throughout the board, which sorta sucks. But my wife gave me the slap to the back of the head, and said that it looked awesome...which was good enough for me!! :D

Anyway, Here are some pictures...

2131111086_828ebb1b84.jpg


....

2130331215_84df90be6f.jpg


...

2130331401_70d2e9633b.jpg


...

2131111284_007b53983f.jpg


...

2130330769_fcf94c9f0e.jpg


And, as promised, I made a short YouTube video of the "playability" of the game itself. I think it came out pretty well...

http://www.youtube.com/watch?v=KxY2z_xDsO8


Please let me know what you think. I've got a couple more of these to make now, so If I can make improvements, all the better!

Merry Christmas to everyone!!

- Keith
 
Keith, I'm with your wife. Fantastic.

But I want to know about the bumpers. How did you fabricate them? How do you tension the rubber bands? etc. That is the one thing about this project that I can't figure out.
 
Top