A home theater

I really liked your vertical circle jig (the VertCirc jig), Shaz. It's fun reading through the thought process that got you there, too.

So...you've built a few doors here and there, huh? :p

And pay no attention to Greg. When you're that danged handsome, you can wear whatever the heck you want. :rofl:
 
Tip time...

"Sand my work surface as I want it as smooth as possible."
Afterwards, do you ever use waxed paper on your table where you do glue ups, to keep the glue from sticking?

Hi Greg :wave:,
Wax paper is part of my palette if I need it but seldom do I use it....S

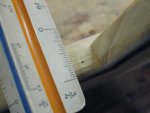
"The thin gauge 5/8" staple type...shot with the grain. ...S"
I don't have a stapler yet, but this will get noted in the manual of the one I get...and maybe on my wall too! :rofl:

(you have wall space?:eek:):D...S These staple guns shoot a max of 3/4". Use as needed.:rolleyes:

View attachment 16434

"The thin gauge 5/8" staple type"
5/8":huh:? Do the ends come out the other side,

(since the staples are 5/8" and the material is 3/4" shy and considering that I filed the driving pin in the staple gun down to 1/16" they seemed to work real well on this project, so well I stapled from both sides...S :rofl:..)

then you nip them off with the clippers in your pic?

That's a cool looking glue bottle top... Special for bisquettes:)p)? Where did you get it?

Cute little tip isn't it!!!!! I believe it was at Cornerstone Hardware, Houston. If you can't find one, and would use one let me know I'll get one to you...S They are made for that very purpose, Bisquequettes :p :rofl:

Wow,

View attachment 16437

Now those are some doors...Cigar Bar? Cabinets to hold the member's stoggies and cognac? (They have "key bottles" in Japan. You buy your favorite spirit and the club puts a tag with your name on it on the bottle and then puts the bottle in a locked, windowed box, for your next visit)

That is a similar and interesting approach..Thanks,...S


Looking forward to seeing those to when you find them...

Ahhhh... A Shazzzzzam from the past!

View attachment 16436

I see you've matured in your selection of shirts...

(ahh, yes. I have evolved...S :rolleyes:)

View attachment 16438

(Eat your heart out, Norm....:rofl:)

I really liked your vertical circle jig (the VertCirc jig), Shaz. It's fun reading through the thought process that got you there, too.

Hi Vaughn :wave:, Thank you kindly...S

So...you've built a few doors here and there, huh? :p

And pay no attention to Greg. When you're that danged handsome, you can wear whatever the heck you want. :rofl:

You are a "sweet talkin' guy" (to music..sweet talkin' sweet talkin' guyyyyyy!). Wish handsome were the case. As it is I think the good Lord blessed me with a gift instead and gave me the desire to share it.:dunno: But by the way... Thanks, Shaz:)

Here are several photos of a cigar bar door updated to jan 2008.:D

One is dirty, one is half dirty, one is of the front and one is of the back...I think. We will find out when I click "insert all"!

Doors green room 2008 001.jpg

Doors green room 2008 003.jpg

Doors green room 2008 005.jpg

Doors green room 2008 006.jpg

Shaz :)
 
Last edited:
Now back to the theater doors.

Time to hinge the doors even though the trim is not run all around yet.
corners glued up (1).jpg

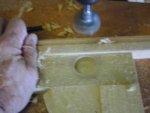
Determining the center point for the 35mm hinge cup on the drill press is first in order.
hinging process 35mm aligning to drill multiples.jpg

Once that is determined I mark the same distance left and right of center.
set with mark left.jpg
set with mark right.jpg

Since those marks don't move I used them for all boring on all the doors.
boring.jpg
bore.jpg

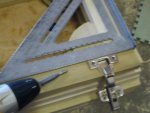
After the boring boring I use this over sized speed square to align my hinges, then use a self centering bit to start a hole for screws.
Align hinge and tools.jpg

One of the nice tools is the magnetic holder of the screw tips. Just can't beat this tool. If you don't have one go get it.
Joy of magnetic tip holder (1).jpg
Joy of magnetic tip holder (2).jpg

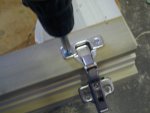
It is now time to set the screws in the door part of the hinge.
set screws in hinge.jpg
Shaz :)
 
I can think of a great idea for a FWW giveaway. I would love to go and work with Shaz for a week as his fetch and hold-it boy just for the experience ;-)
 
Thanks Chris,
That screw poking can get old quick, I bet you have had your share too!:D
Shaz :)

Hi Glenn :wave:,
That fetch and hold it would last about 2 minutes. You would be nailing and cutting and I would be bringing you coffee! :thumb:
You guys would be amazed and possibly unable to work in my conditions with no dust collection and crowded conditions, with make shift jigs and out of date tools :D.
However, you are welcome to come and join in the fun anytime you get to Houston. Sorry at this time I can't provide a room but maybe in time that will change.
Thanks very much for a rather enormous compliment.:eek:
Shaz:)

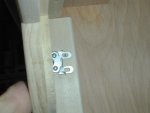
So here we are with hinges on our doors and no where to go.:( I know!! let's mount them!
Fortunately for us they have the big hole on the middle:D.
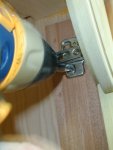
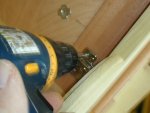
We can set the doors on a 1/8" spacer, mark the correct spot with an awl, then reach through the hole with drill in hand and a screw on the magnetic tip, while holding the door snug against the stile and screw it into the pre punched hole.:rolleyes:
hinging process 35mm (18).jpg

I put one screw in the top and one in the bottom just to secure the hinges.
hinging process 35mm  self centering.jpg

I attached the two smaller doors so I could determine the position of the clip on center panel.
sat. dec. 31 037.jpg
sat. dec. 31 038.jpg
Thanks for coming by.
Shaz :)
 
Last edited:
Shaz,

Still continuing to amaze. I will try and be there at the same time as Glenn so that we can switch between "hold" and "fetch". If nothing else, we could all learn one thing from each other and become better woodworkers.
 
Hi Lee :wave:,
Thank you for your much appreciated input.
Shaz :)

Hi Joe :wave:,
You wanna start as "Fetchit" or "Holdit"?:rofl::rofl: We probably need several others too, "Liftit" and "Thunkit" come to mind. :rofl::rofl: It would be a fun thing to get a sweet project and have you guys come join in. Best case would be to have a job that had a little bit of everything from design then build and install. I can see it now:rolleyes:.

blue period curved.jpg

We all bring something special to the table as you say Joe, and the sharing of those unique and special gifts are a blessing to the others.

Thanks for signing in,
Shaz:)

Hi Ed :wave:,
That is one of those things that cannot always happen as you know, but when it does it is an easier install on the doors.
Since I do alot of audio visual stuff I get this opportunity alot. That is due to the fact that the door needs hung and painted then the cloth on a different frame is inserted.

Sometimes when hanging doors with fixed panels I will try to go in from the top or the back during construction to make the door hanging easier. You can always remove the hinges( and hope the painter does not fill, prime and paint over your screw holes!) :doh:.
Hope this finds you well,
Shaz :)
 
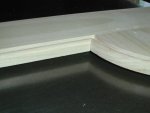
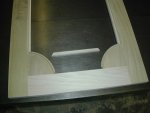
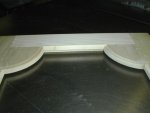
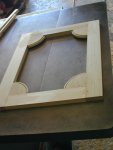
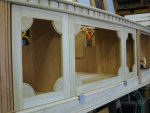
For the doors I needed to insert panels from the back that had corners cut off in a curved fashion. They will get wrapped with cloth and then inserted into the the doors from the back.
To cut the curves, since they were all the same (on purpose! for production in a one of a kind piece..) I needed to figure a way to reproduce the curve any number of times.

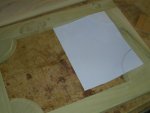
#1 Make a pattern with paper. I did this like we could do at a grave marker, with paper over the engraving and rub with crayon/pencil/ or dirty fingers.:eek:
paper pattern.jpg

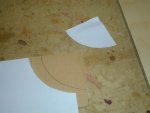
#2 Cut this pattern with scissors and trace it onto a piece of 1/4" ply as shown here.
paper pattern cut.jpg

#3 Cut the 1/4" curve close to but not over the line. Once you cut away a segment of the line you have NO line to follow.Best when making a pattern is to cut between 1/32" and 1/8" outside the line and then sand/file/block plane or what ever needed to get rid of 1/2 of the line all along the mark. Your final objective is to have split the line on your pattern. That should give you what you need.
This is important!
paper pat. to wood and cut.jpg

#4 With our first pattern made we can use it to trace the shape on the corners of our inset panels. (These panels, made of 1/2" baltic birch, have been cut to the size rectangle needed to fill the space of the doors minus about 1/8" shy, to accomodate for the cloth.
wood pat. trace on wood.jpg

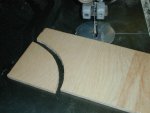
#5 Once drawn on the 1/2" panels we can cut on the strong side of the line with a bandsaw, jig saw or tool of choice.
cut coved corners strong.jpg

#6 This photo shows the pattern screwed to the 1/2" baltic birch, in position to run a router on it with a copying bit. I usually use a bit with the roller on the bottom so I would have to turn this piece over to work it. Since these panels will be painted I am not concerned about the screw holes.
pattern run of finished corners.jpg

Once I have a curve or two cut on the 1/2" ply, I can use that as the pattern for the rest if I so choose.
Understanding the concept of the pattern making for repetitive use is a good thing.
Shaz :)
 
Last edited:
Since the panels that will be wrapped with cloth and then inset into the back of the doors have been cut, it is time to finish trimming out the interior of the doors.

Like Greg always says "divide and conquer".:D Divide that big job into smaller parts.

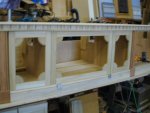
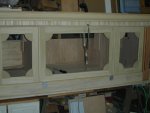
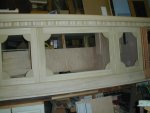
Have a look at the plan. Notice the the three doors left of the center panel and right of it are going to be the same size vertically and horizontally.
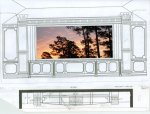
current plan photo best (600 x 453).jpg


Also make note that the center panel and the two doors at the very outside, at the edge of the picture are the same height! :eek: What does that mean to the one of a kind production builder?


#1- 9 doors/panels the same height = 18 stiles all cut at the same time with the same stop block! :thumb:

#2- 6 doors the same width = 12 rails cut the same length.

#3- 2 end doors same width = 4 rails same length

#4- center panel has 2 rails the same length.

Now if that is not good enough there is more!:rolleyes:

When the stiles and rails were glued up, the rails were glued up flush to the top and bottom of the stiles, then the quarter rounds were inserted into the 90° created by the rail and stile.

The quarter rounds were cut at the same time with the same stop block so they too are exactly the same size as each other. Thus we have a "voila".

Question "What "voila" do you think has happened?"


Answer "Due to the stiles, rails and quarter rounds being the same size as each other,

and considering the exactness when glueing the rails to the stiles, the insertion of the quarter round, and compressing them into the corners tightly, we have created.........in theory............

the same setting for a stop block to cut,

18 pieces of trim for the stiles, change stop block and cut

12 pieces of trim for the 12 rails cut the same length, change stop block and cut

4 more pieces of trim for the 2 outside door rails (to be cut after the cabinets have been built), change stop block and cut

2 pieces the same length for the long center clip on panel.

Granted I did have a + or - variance of 1/32" for a snug fit but all in all it does work well.
THINK REPETITIVE/ with accuracy.
Much easier than cutting 36 individual pieces of trim.
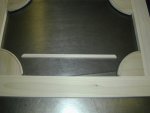
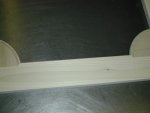
trim to fit 12 times.jpg
trim done.jpg
trim done 2.jpg
trim again.jpg
trim again done 2.jpg
Shaz :)
 
Last edited:
Viola indeed! What method will you use to attach the trim pieces?

Lee

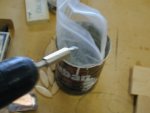
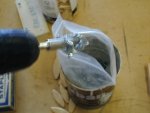
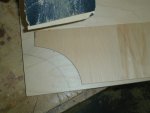
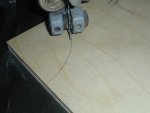
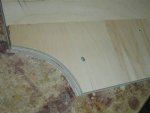
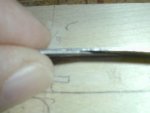
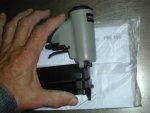
The gun I used is rather new to me however I have similar guns with like sized pins. This gun is a Porter Cable with a very thin gauge wire pin. I have a photo, not too clear, squeezing the the nail clip together with a utility knife blade, another showing the actual hole in the wood. Got it at Home D.
Pins plus Titebond II

gun nails,storypole, soffit 002.jpg

gun nails,storypole, soffit 003.jpg

gun nails,storypole, soffit 011.jpg

gun nails,storypole, soffit 013.jpg
 
Ahhhh. Nice little headless pin nailer. Great for that fine trim work. So, how many times have you put that door together now.....(divide...,right!:rofl:)? On to the the next "round"....:D

:wave:
 
Nice to hear from you Greg and Ed :wave:,

That little nailer shoots max 3/4" (as I recall) and the pieces need glue too, but it is great for appliques. This small thin stuff you will glue and don't want to split or show an obvious nail hole so it is good for what it does. Under a hundred bucks.

Proceeding,
we go to the setting of the center speaker panel which will be a clip on.
The doors left and right were hung and adjusted for the vertical alignment before the center panel was set in place.

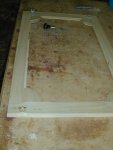
Clip on panel.jpg 1

Maybe you can see the 1/8" x 2" aluminum angle I use for the spacer at the bottom of the panel. As I see it, a 1/16" crack looks better, but let's face facts, with use, kids, people leaning on the knob side when open, slop in the mechanical parts, and whatever, the 1/8" space is the best option.

The panel was set on the aluminum angle pieces (they were left over from a job then cut to size on the radial arm saw to about 2" long, filed the burrs, a great addition if you get the chance) and centered left and right. This an overlay door application so when aligned I reached inside and marked the edges where stiles and rails touched the panel.

Clip on panel (1).jpg 2

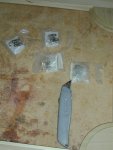
Whenever I have multiple bags of sealed hardware, clips, drawer slides, or whatever I just get out the utility knife and slit them all at one time. No more macho for me. (learning curve, not lack of strength:rofl:)!

Clip on panel (2).jpg 3

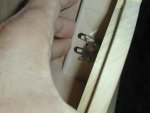
I use the double roller catch on this type application. Since the line has been marked on the panel for the edge of the opening, I figure out where the catch needs be when the rollers are attached to the cabinet walls and affix the catch. The term catch and clip I use inner changeably:dunno:. Sorry.

Clip on panel (3).jpg 4

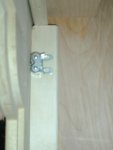
Below is a photo of the panel with the clips screwed on and the rollers engaged in the clip.

Clip on panel (4).jpg 5

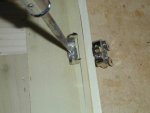
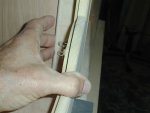
These two photos below give you a view of the rollers, which are connected to the clips (the clip is the part of the assembly that is screwed to the back of the panel). With the clip screwed on and the roller in the clip, and the panel in the hole on the aluminum 1/8" angles I can reach through the panel opening and screw the roller part of the assembly to the side of the cabinet.

Clip on panel (5).jpg

Clip on panel (7).jpg

Here you notice my holding the panel in place during the securing of the lower right roller catch.

Clip on panel (9).jpg

Clip on panel (10).jpg

Finally, you see the panel firmly secured with the 4 roller catches.

Clip on panel (11).jpg

Shaz :)
 
That panel is to cover the center channel speaker. The speaker is about 13" high x 30" wide x 18" deep. If set on a shelf so as to play through the opening in the panel, the sound would hit the listener in the knees. It would be easy to do a flat shelf, who would ever know?:rolleyes:........... I would!:doh:

Okay, so make a slanted shelf.
Requirements;
#1 sound needs come through the opening in the panel
#2 Sound should be aimed at the face of the seated listeners
#3 strength to support heavy speaker

Fortunately I did have a floor plan for seating.

I determined the distance from the front of the speaker to the approximate postion of the viewers head when seated in the extremely comfortable theater seating I am sure they will have. I did this by measuring out the distance horizontally from the speaker 10'6" and then up 40" to where I figured their ears would be when seated.

I erected a simple pole with a nail at the hypothetical position of the ears:D and strung a chalk line from that nail to a point that would be the center of the speaker from front to back when set on the shelf.

This determined my angle.

I then measured down 6 1/2" and ran a parallel line for the surface of the shelf.
Here are some photos of the process, with a drawing of the shelf profile on the cabinet wall.

shelf story on side of cab.jpg

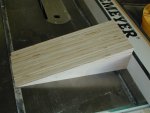
It was time to cut a triangle to match the drawing, just part of the research and development.

triangle 2.jpg

Then with a piece of plywood the same as I intended using for the actual shelf several measurements were made to assure me that the speaker would fit.

measure to be sure of fit (1).jpg

measure to be sure of fit (2).jpg

All good for now.
Shaz :)
 
Figuring 8 triangles would suffice it was the next thing to do.
Let us suppose I needed the triangles to be 3" tall x14" wide cut on an angle. This is my method for reproducing straight line cuts on odd shaped pieces.

(Disclaimer; being this is merely my method which works for me, don't do any procedure you are unsure of unless you are willing to accept the responsibilities for the results, good or bad. Shaz)

#1 I cut 4 rectangles 3 1/8" x 14" long. (cut diagonally this will give me the 8 pieces)

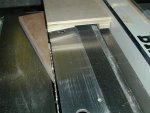
#2 Cut a thin ripping about 1" wide x 3/4" thick. Reset the TS fence to about 5" (adequate for my needs here) and rip a 3/4" piece 5" x ...Oh :rolleyes:, say 32" long.

#3 Screw the 3/4" ripping along the edge of the 5" wide board. Don't move the fence!

Front cabinet friday 11 jan 020.jpg

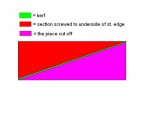
#4 Measure down from the corner(where the 3 /18" edge meets the 14" long side) of the rectangle to 3" and make a mark. Then do the same on the other end of the rectangle. Draw a line from corner to the 3" mark. Do the same with the other line. You have defined the kerf, while creating two equal triangles 3" X 14".

slanted support for shelf.jpg

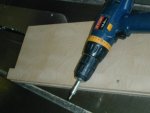
#5 I will now screw the rectangle to the 5" board with the rectangle lined up on the line we drew so that the blade will properly cut where the kerf should be to give us two equal pieces. See above illustration.

(The ripping that we screwed on earlier is a spacer, the same thickness as my rectangles. This adds safety :thumb: when passing the 5" board through the TS blade.)

With the rectangles attached to the 5" board on the blade side and the ripping near the fence, the 5" guiding board will not tilt into the blade from lack of even support under it..

In the photo below you can see one of the rectangles has been screwed to the straight edge and one merely has the mark (one line only, for me).


Front cabinet friday 11 jan 019.jpg

I decided to cut 2 at a time, for safety :thumb:, so as to balance the 5" straight guide board.

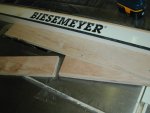
#6 Time to rip the rectangles. Here we see the first one cut and the other in progress.

Front cabinet friday 11 jan 021.jpg

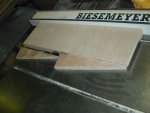
In the photo below you can see the second rectangle cut completely and a view of the jig (cross section) almost past the blade


Front cabinet friday 11 jan 022.jpg

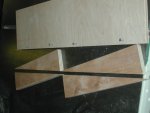
Here we have the rectangles as cut and the straight edge.

Front cabinet friday 11 jan 023.jpg

A glimpse of the triangles cut.

Front cabinet friday 11 jan 024.jpg

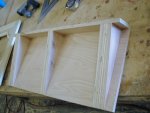
Finally we get to nail something together!

Front cabinet friday 11 jan 031.jpg

After sanding this will be done.

Front cabinet friday 11 jan 032.jpg

Now what? The pillars, the frieze or the supports for the removable section of deck top? On and on it goes, where it stops will not surprise you. Or will it?:rolleyes:
 
Last edited:
Lookin' good! I don't know that I'd have even thought about angling the speaker up. Makes a lot of sense and you did a great job on it (as if I expected anything else)!
 
Top