How much weight will biscuits joints hold?

I think your first design with biscuits would work just fine. Bear in mind that the edge of plywood is 1/2 face grain, which makes a much stronger joint than end grain. Adding in the strength of the biscuits, and IMO your cabinet will withstand anything you put in it.

FWW did a test some years ago comparing biscuits and M&T joints. You can search their index. The M&Ts were stronger, but the biscuits did well. I respectfully disagree with those who think that biscuits are for alignment only. They add little to the strength of say - an edge joint in a table top [because a well executed edge joint is stronger than the wood by itself], but for joinery, they clearly add significant strength and durability.

I'd say go with your original design, if it suits you.
 
after smashing up 2 zero clearance plates,(smack it once with a board, its done, its only thin plastic, they work well, but cant take direct hits)
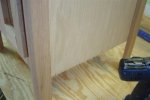
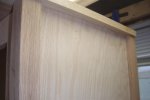
I used the hand saw for oak ply, huge, huge error, idiotic decision.
Alot of ripout, which didnt concern me much, I kinda knew Id be putting some trim moulding to hide it. thank my lucky stars for mouldings.

so now Im thinking, do I need to cut a fancy crown type moulding for this box cabinet, or just a flat piece all around edges for uniformity.
Any ideas how to finish this mess? I cant leave the edges exposed, not on the bottom at least, the top wont be seen due to top.
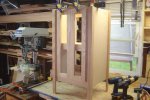
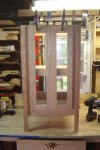
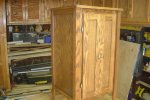
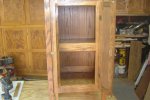
I solved my dilema with biscuit joints, I only used them for face frame and door frames.
Instead of making mortise and tenons, I cheated big time and cut the legs in an L shape and screwed and glued from inside, looks fine. and this isnt going to be a family heirloom, its just gonna hold the liquor bottles.(I know my limitations, so heirloom type furniture isnt something I expect to build)
 

Attachments

  • cabinet (Medium).jpg
    cabinet (Medium).jpg
    68 KB · Views: 23
  • cabinet 2 (Medium).jpg
    cabinet 2 (Medium).jpg
    38.9 KB · Views: 23
  • cabinet 3 (Medium).jpg
    cabinet 3 (Medium).jpg
    41.6 KB · Views: 18
  • cabinet 6 (Medium).jpg
    cabinet 6 (Medium).jpg
    35.9 KB · Views: 15
Last edited:
the width of the legs are 3/4 inch above the plywood.
is it necessary to trim down the stock to anything less than 3/4 inch?
I was thinking along those lines, this way its cheap and easy to match top and bottom, but Id have to slice it all on my tablesaw, so Im hesitant to trim width of stock.
 
hand plane? is that something made out of balsa wood with a red plastic propeller and a rubber band to wind it up? cause if its not, hand planing is something I might need a little help with. Really, hand planing? Maybe the tablesaw isnt such a bad idea afterall.

I actually have an electric planer, handheld thing, with a 3 inch blade, but Im not sure Id be able to get accuracy all the way the length of the piece.
 
Last edited:
after looking at some of the work here from some of the masters, I realized its either stupidity or courage that prompts me to post a picture of what I build.
(I never claimed to be that smart)
 
Allen, you've built more furniture than a lot of people here, including me...no need to worry about comparing to anyone. I have one of the power planers you're talking about, and I agree that it might be hard to get consistent results with it.

I'm curious how you're losing your zero clearance inserts. How do they get smacked with a board? (Asked by someone who's been known to smack his tools around when they aren't behaving.) :p
 
its very thin plastic. Durable enough to run a sheet over, but if I carelessy, as Ive done, let a heavy sheet end or a 2inch thick piece of oak Im ripping hit the plate, it cracks out the screw holes holding it down, and then its about useless.
I cannot find any other material other than a stiff sheet metal but Im sure that would run me as much as the saw cost to have someone build me a plate.
Seems to be the problem noted by some who own these portable ts. The plates are too thin and the manufacturer doesnt offer a zero clearance plate.
3/32nd of an inch thick.
 
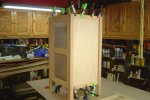
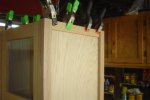
rennie suggested fake rails, thinner than the legs, so I went with it.
Looks good, thanks rennie.
I just glued them on, had to cut and sand them smooth with ts and sander.
never knew Id need so many clamps for one step of anything.
 

Attachments

  • wood stuff 001 (Medium).jpg
    wood stuff 001 (Medium).jpg
    59 KB · Views: 16
  • wood stuff 002 (Medium).jpg
    wood stuff 002 (Medium).jpg
    39.6 KB · Views: 13
rennie suggested fake rails, thinner than the legs, so I went with it.
Looks good, thanks rennie.
I just glued them on, had to cut and sand them smooth with ts and sander.
never knew Id need so many clamps for one step of anything.
You're welcome!

I think it looks good!:thumb: But, I would :D

Give any thought to a third one in the middle? :dunno::huh:
 
are ya just joshing me? a third?the middle of the face frame will not be seen when the doors are on.

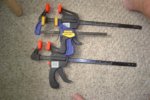
I thought I got a great steal at the flea market a few weeks ago, I buy all these dollar and 2 dollar items. Nothing too serious, but saw these clamps, when I used them today, I realized hey, they are backwards and a bit akward.get what ya pay for I guess.
 

Attachments

  • wood stuff (Medium).jpg
    wood stuff (Medium).jpg
    55.6 KB · Views: 23
Last edited:
...they are backwards ...

They look like reversible clamps.

Several companies make them:
2GXG4.JPG

p1995117_l.jpg
 
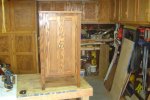
this box is done.
Zar Walnut Stain, 4 coats wipe on poly, 2 extra coats wipe on poly on top.(had quite a few of the same hinges I used on my garage cheapo cabinets, so I used them, found 2 knobs to match finish for 1.29 each.

next box, the bed.
 

Attachments

  • wood stuff 008 (Medium).jpg
    wood stuff 008 (Medium).jpg
    61.5 KB · Views: 24
  • wood stuff 009 (Medium).jpg
    wood stuff 009 (Medium).jpg
    66.5 KB · Views: 23
  • wood stuff 010 (Medium).jpg
    wood stuff 010 (Medium).jpg
    62.2 KB · Views: 22
  • wood stuff 016 (Medium).jpg
    wood stuff 016 (Medium).jpg
    57.4 KB · Views: 19
Last edited:
Top