- Messages
- 36,600
- Location
- ABQ NM
I've been working on a fairly large cutting board, and I needed a way to trim the edges square. Since it was longer than my crosscut sled could handle, I slapped together a longer crosscut sled. I needed to use it today, so I figured I'd snap a few pics to show here. You'll see that I did no refinements. Eventually I'll likely sand it, ease the edges, and put a few coats of water-based poly on it, but for now I'm spending my time making products to sell, not pretty shop jigs.
I started with a 2' x 4' piece of 3/4" oak plywood, and made the fences from 3 layers of 1/2" baltic birch plywood laminated together. The runners are UHMD plastic, bought from Peachtree Woodworking already cut to size. Stealing an idea from Glenn Bradley's (nicer) sled I saw here a while back, I made the front fence in such a way that I could adjust it. (Although once I had it tweaked just right, I locked it in with a handful of long wood screws.)
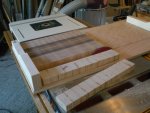
Here's the sled, ready for work:

The wood on the edges of the cutting board is sacrificial pine that I used earlier in the construction process. Since the cutting board is too wide for my planer, I had to cut the initial glue-up in half before planing it (the long grain). I added the pine to the ends of each half so that when I ran them through my planer, any snipe would be on the waste wood, not the keeper wood. When I re-cut the wood and did the second glue-up, I left the pine in place, planning to trim it off after the second gluing operation, when I turned all the pieces to get the end grain orientation I wanted. After the second (final) glue-up, I sanded the whole assembly flat, then trimmed the edges.

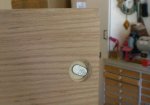
Here's a picture of the bolt I used on one end of the front fence. The hole it's in is a bit wider than the bolt itself, allowing for some adjustment. The other end of the fence was attached with a wood screw, so that acted as a pivot point. This made is very quick and easy to set (and lock) a perfect 90° angle to the saw blade. I'll likely never adjust it again, but making it adjustable for the initial setting of the fence was a very useful addition. (Thanks for the idea, Glenn.)

The bolt is oval-headed for use in a t-track, but I used it because of the lower profile:

And one final shot of the bottom of the sled, showing the runners and the wood screws that I locked the fence down with:

As I said, this one's nothing fancy, but it'll allow me to safely crosscut pieces up to about 3' in width. (My other, smaller sled is a bit more refined, with t-track for a stop block, rounded corners, and a nice clear finish on it.)
Pics of the finished cutting board will be ready after a few days of soaking in oil.
I started with a 2' x 4' piece of 3/4" oak plywood, and made the fences from 3 layers of 1/2" baltic birch plywood laminated together. The runners are UHMD plastic, bought from Peachtree Woodworking already cut to size. Stealing an idea from Glenn Bradley's (nicer) sled I saw here a while back, I made the front fence in such a way that I could adjust it. (Although once I had it tweaked just right, I locked it in with a handful of long wood screws.)
Here's the sled, ready for work:

The wood on the edges of the cutting board is sacrificial pine that I used earlier in the construction process. Since the cutting board is too wide for my planer, I had to cut the initial glue-up in half before planing it (the long grain). I added the pine to the ends of each half so that when I ran them through my planer, any snipe would be on the waste wood, not the keeper wood. When I re-cut the wood and did the second glue-up, I left the pine in place, planning to trim it off after the second gluing operation, when I turned all the pieces to get the end grain orientation I wanted. After the second (final) glue-up, I sanded the whole assembly flat, then trimmed the edges.

Here's a picture of the bolt I used on one end of the front fence. The hole it's in is a bit wider than the bolt itself, allowing for some adjustment. The other end of the fence was attached with a wood screw, so that acted as a pivot point. This made is very quick and easy to set (and lock) a perfect 90° angle to the saw blade. I'll likely never adjust it again, but making it adjustable for the initial setting of the fence was a very useful addition. (Thanks for the idea, Glenn.)

The bolt is oval-headed for use in a t-track, but I used it because of the lower profile:

And one final shot of the bottom of the sled, showing the runners and the wood screws that I locked the fence down with:

As I said, this one's nothing fancy, but it'll allow me to safely crosscut pieces up to about 3' in width. (My other, smaller sled is a bit more refined, with t-track for a stop block, rounded corners, and a nice clear finish on it.)
Pics of the finished cutting board will be ready after a few days of soaking in oil.


