- Messages
- 36,624
- Location
- ABQ NM
Here are some pics of a fixture I built almost two years ago, when I was first getting started back into woodworking. I posted this text and most of these pics at SMC, but I figured I'd add them to the bunch here.
---------------------------------------------------------
I wanted to do some miter joints with feather splines, so I figured I needed a jig for that. Jim Tolpin's Tablesaw Magic book has some good ideas for a vertical sled (that attaches to the "universal auxilary fence"), so I spent the last few weekends putting these two pieces together. I made a few changes to adapt to my fence, and added a runner to keep the sled in the right place, but it's similar to what's in the book. It's 3/4 ply (mostly birch) with a few coats of BLO followed by a few coats of clear poly, with a number of re-do and fix-it moments along the way.
I'm happy with the way it came out. It's 90° square to the table, has absolutely no slop, and it runs smoothly on UHMD contact points.
The first pic shows the aux fence. On its own it's handy for featherboards and other similar attachments. The lower piece of t-track was an afterthought (added for the runner on the vertical sled), and since its location potentially weakened the face of the aux fence at a stress point, I epoxied it in place, so it should be as strong structurally as the wood was in the first place. I tapped threaded holes in the top of my TS fence to receive the knobbed screws, but they're mostly for decoration. The aux fence fits my factory fence like a tight glove and doesn't slip:
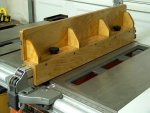
Here's a shot of the face of the aux fence. Nothin' fancy, but it's flat and square:

Here's back side the vertical sled, showing the clamp that contacts the top of aux fence. You can see some of the UHMD tape I used where it slides on the aux fence. You can also see the UHMD t-shaped runner that keeps it tight to the face of the aux fence:
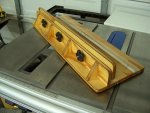
Here's some more detail of the "runner" side of the sled:

Yet even more detail of the runner. I tapped threads in the UHMD runner, and used countersunk machine screws from the other side of the sled to attach it. The washers shim it all nice and vertical:
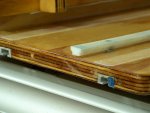
(I hadn't noticed that little chunk of blue masking tape on the mini-track until just now.)
Here's the sled attached, with the rest of the feather joint jig in place:

Here's a shot of the "mechanism" that keeps it all where it's supposed to be:
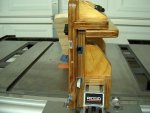
And the obligatory action shot:
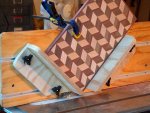
I can tell already I should have mounted the lower mini-track on the sled about 2" higher off the table, since the screws are too close to the blade. (Contrary to how this picture looks, the blade cleared everything for this cut.) I'll probably just add a third track and not use the lower one. I can mount a variety of jigs onto the vertical sled, so I'm looking forward to seeing what other tricks it can do with it.
And the end result:
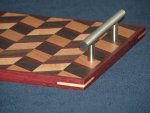
I used this project as a learning exercise, and got some practice with a number of joint types, finishing techniques, and materials. And Heaven knows I need the practice.
--------------------------------------------------------------
Several months after building this setup, I switched to the Incra TS-III fence system on my saw. It was easy to adapt the Tolpin auxilary fence to the Incra fence. Even though the Incra Fence is about 1/4" narrower than the original Ridgid fence, the built-in t-slots allow me to firmly attach the aux fence to the Incra fence and get the same functionality as before, with the Incra accuracy and repeatability. Also, since the Incra uses sliding tape scales, it's easy to "zero-out" the fence after attaching the aux fence and sled.
- Vaughn
---------------------------------------------------------
I wanted to do some miter joints with feather splines, so I figured I needed a jig for that. Jim Tolpin's Tablesaw Magic book has some good ideas for a vertical sled (that attaches to the "universal auxilary fence"), so I spent the last few weekends putting these two pieces together. I made a few changes to adapt to my fence, and added a runner to keep the sled in the right place, but it's similar to what's in the book. It's 3/4 ply (mostly birch) with a few coats of BLO followed by a few coats of clear poly, with a number of re-do and fix-it moments along the way.
I'm happy with the way it came out. It's 90° square to the table, has absolutely no slop, and it runs smoothly on UHMD contact points.
The first pic shows the aux fence. On its own it's handy for featherboards and other similar attachments. The lower piece of t-track was an afterthought (added for the runner on the vertical sled), and since its location potentially weakened the face of the aux fence at a stress point, I epoxied it in place, so it should be as strong structurally as the wood was in the first place. I tapped threaded holes in the top of my TS fence to receive the knobbed screws, but they're mostly for decoration. The aux fence fits my factory fence like a tight glove and doesn't slip:

Here's a shot of the face of the aux fence. Nothin' fancy, but it's flat and square:

Here's back side the vertical sled, showing the clamp that contacts the top of aux fence. You can see some of the UHMD tape I used where it slides on the aux fence. You can also see the UHMD t-shaped runner that keeps it tight to the face of the aux fence:

Here's some more detail of the "runner" side of the sled:

Yet even more detail of the runner. I tapped threads in the UHMD runner, and used countersunk machine screws from the other side of the sled to attach it. The washers shim it all nice and vertical:

(I hadn't noticed that little chunk of blue masking tape on the mini-track until just now.)
Here's the sled attached, with the rest of the feather joint jig in place:

Here's a shot of the "mechanism" that keeps it all where it's supposed to be:

And the obligatory action shot:

I can tell already I should have mounted the lower mini-track on the sled about 2" higher off the table, since the screws are too close to the blade. (Contrary to how this picture looks, the blade cleared everything for this cut.) I'll probably just add a third track and not use the lower one. I can mount a variety of jigs onto the vertical sled, so I'm looking forward to seeing what other tricks it can do with it.
And the end result:

I used this project as a learning exercise, and got some practice with a number of joint types, finishing techniques, and materials. And Heaven knows I need the practice.
--------------------------------------------------------------
Several months after building this setup, I switched to the Incra TS-III fence system on my saw. It was easy to adapt the Tolpin auxilary fence to the Incra fence. Even though the Incra Fence is about 1/4" narrower than the original Ridgid fence, the built-in t-slots allow me to firmly attach the aux fence to the Incra fence and get the same functionality as before, with the Incra accuracy and repeatability. Also, since the Incra uses sliding tape scales, it's easy to "zero-out" the fence after attaching the aux fence and sled.
- Vaughn

