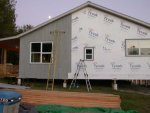
Birth of a shop - The Final Trimester

An introduction of sorts...

Let me start this thread by saying a few things...

For those of you that are reading this as a result of an invitation from me to come to this new forum, I'm sorry I left everyone hanging by bailing out of SMC. Most, if not all of you, realize what happened over there, and why I/we left. This thread is NOT for the purpose of discussing what happened. If you feel compelled, PM me and I might discuss that, but I don't see the point. That was then, this is now!


Ok folks, it's been a quite a while since my original Birth of a Shop thread has seen any action. Now that we have a new home, I'm going to start making at least a few updates up a week. If there's enough interest, I can go back to my (just about) daily updates


With that out of the way, let the updates begin....

- Marty -
 
Haymow Doors Hung...

You might remember, while Denise was away on a business trip, I gave up trying to get the first of the haymow doors hung after I skinned it. I literally left it hanging there until she came home. Once home, she realized why I was having problems getting the door up into the hinges. It was so heavy, she couldn't even lift it while it was hanging from the rope.

Anyway, with a little thought, we realized that the problem was trying to get both hinge pins into their respective holes simultaneoulsy. It was my mistake in the way I designed the doors, and the machine shop for not recognizing the error of my design:

P1000490.jpg

Since both hinge pins were the same size, they had to both be lined up at the same time to be dropped into their holes. I should have designed the hinges so that the upper pin was shorter than the hole it had to get inserted into. That way, I could line up the bottom hinge pin, get it partially inserted, stabilizing the door, THEN concentrate on lining up and inserting the upper pin.

With this realization, all it took was a few minutes with a hack saw to make a 'field-mod' to the upper hinge pins. Not having to line up both pins simultaneously made all the difference in the world:

DSCN5061.jpg DSCN5056.jpg DSCN5055.jpg

In less than ten minutes, both doors were hung and fitting perfectly! The gaps you can see around the door are by design, so that the Cypress can seal around the door and allow for weatherstripping.

Hey, at least they got hung without too much more effort...:rolleyes:

- Marty -
 
Plan A - Spraying Cypress

Ok, so when we last tuned in, Denise and I were trying to get a stain color that would match the house, so I could start spraying and hanging Cypress. Well, it turns out that it wasn't quite as easy as Denise thought it was going to be.

After a 5 hour trip to the paint department at Lowes, she did in fact get a very custom color of Olympic Semi-transparent oil based stain that she was satisfied with. (I feel sorry for the poor guy at Lowes. I can only imagine what she put him through!!! :( :eek:

So, she brings home four 'test' gallons that were used to arrive at the "perfect" color, as well as a five gallon bucket of the final mix. One of these test gallons was in fact the same magic elixir that was in the five gallon bucket, so I was (theoretically) ready to have at it with six gallons of oil based stain.

Since the plan was to spray the Cypress outside, the first thing I did was build a few 8' long, 18" high sawhorses out of some of the culled MCQ lumber I had left. These low horses was perfect for spreading out 10 boards at the proper height so I could spray with the rig at arms length, hopefully not tiring out my arm too quickly.

With the sawhorses built, I spread out my 10 boards, opened the gallon of correct color and loaded my gun. I was ready to go to town! Since this was oil based stain, the viscosity was great for spraying...nice and thin. So, I start spraying, adjusting the gun until I get the coverage and pattern I want, when I notice something. The boards aren't turning the gray Denise wanted!

I stop to examine the boards, shoot a light second coat, and still no gray. Hmmm...what gives here? Here's a shot of Cypress after two coats and a little extra coaxing:

DSCN5051.jpg

So, I go get Denise to check out what was happening, asking her to bring along the test piece of Cypress she had stained at Lowes when they did their mixing.

She brings out the board, which is clearly gray and just the right shade to match the house. I show her the boards I've sprayed and she agrees that they're not even close! I ask her how the stain was applied to the test piece at Lowes, to which she responds "with a soaked piece of paper towel".

Ah ha, I'm not putting it on thick enough. So I get started on coat number three, (looking at the cup on the gun, noticing I've gone through quite a bit of stain already, and I'm only on the first few boards.) Well, the third coat helped, but it was still way light since the Cypress seemed to be soaking in a lot of the stain. Here's a shot after three coats:

DSCN5054.jpg

Ok, one more coat then. Bingo, FOUR coats of stain and I have the right color and shade. But wait, I've used almost a quart of stain putting four coats on a few boards, and ONLY THE FRONTS!!! At this rate, I estimated that I'd need over 100 gallons of stain to cover the shop! :eek: I don't think so! Time for a new plan...

Denise and I talked and decided we'd try Olympic's "solid color" stain, instead of the semi-transparent, thinking that we'd get better coverage. We originally ruled that out, because we didn't want to completely cover the grain and texture of the Cypress. Not to mention, there are all sorts of grading marks in crayon and magic marker, burn marks from saws, etc., on this #2 Common Cypress. Since we're using it fresh from the pile, we need to cover these blemishes up somehow.

Well, after only two hours at Lowes, she brings me a five gallon bucket of Acrylic Latex Solid Color stain, and tells me the color is right. I open the can and instantly see that there's going to be no spraying with this stuff. It's the consistancy of a milk shake!!!!

Time for Plan B - Out come the rollers, and we test a board. Bingo, finally! We get the color we want with only one coat. And since we now have 9 gallons of oil based stain that won't color correctly, we decide to use that to stain the back of the boards before we stain the fronts with the water based acrylic...(being careful to keep the oil based stuff off the fronts!)

It seems to be working. And the solid color stuff doesn't mask the wood as badly as I first thought it would. But, it does hide all the blemishes nicely. Here are a few shots of what we had going on:

DSCN5070.jpg DSCN5071.jpg

With the color right, and a reasonably economical way to accomplish the color, we were off and running...

- Marty -
 
Disappearing Piers

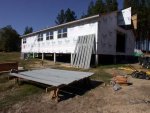
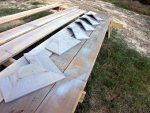
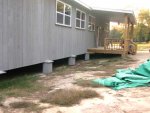
All along, I wasn't thrilled with the look of the piers sticking their ugly little selves out from under the shop. I love what they've allowed me to accomplish with my wooden floor, but they're...unsightly. I needed a way to make them disappear...and with a little creative input from tod, I have a way to "houdini" them. I built a set of roofs for them:

DSCN5052.jpg


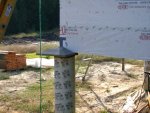
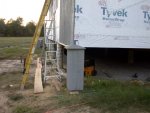
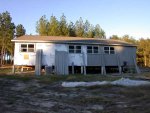
The corners get three-sided roofs, the middle pier roofs are two sided. The roof gets finished-nailed in place, then I attach Cypress 'nailers' to the actual pier. (I used Liquid-Nails and wire-ties to get the Cypress to hold. Once set, I snipped the wire ties and had a nice solid nailer base.) With the nailers set in place, it's just a matter of attaching Cypress siding around the pier. I'll add battens to theses bases when I batten the rest of the building.

DSCN5062.jpg DSCN5063.jpg DSCN5072.jpg DSCN5073.jpg DSCN5075.jpg

I think they came out pretty nice, hide the piers well, and will give me a nice easy base to attach the eventual lattice work to. You'll see more of these in a few more posts...

Thanks for the idea tod! ;)

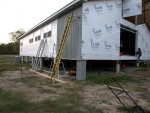
Oh yeah, and you can see in the shots above, the siding is coming out pretty nice as well. In fact, you can see the dozen or so pieces I needed to get done so I could get started on the electrical. That's next...

- Marty -
 
HVAC 90% completed

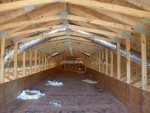
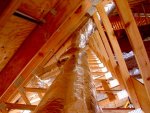
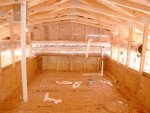
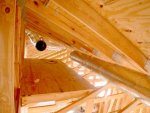
Before I move on the electrical, I wanted to share what the HVAC crew got accomplished. Denise and I had been seriously considering doing as much of the install ourselves as we could, once we got the four estimates :eek: ! Let me assure you, to do this sort of job properly, and in a reasonable amount of time, NOTHING CAN BEAT A CREW OF SEVEN WORKING FOR FIVE STRAIGHT DAYS!

There's no way Denise and I could have done the quality work these guys did, not to mention getting it done in only five days. I had NO IDEA the amount of work there was in building and properly installing ductwork. Nor did I have a true idea just how much metal they were planning to run around the attic and down into the shop.

Here are a few shots of the major components of the ductwork:

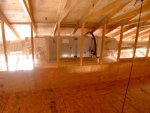
DSCN5057.jpg DSCN5058.jpg DSCN5059.jpg DSCN5060.jpg

As you can see, they did a great job of tucking the main lines up into the trusses. Only a few inches on either side are even exposed. And I love the attention to details they paid while they were sealing off all the joints and drops. Not only did they use mastic tape on the bare metal joints, followed by insulation which was stapled in place, followed by more mastic tape, they then applied gooey nasty mastic putty to every joint and seam. A messy job, but what a nice tight seal they have on everything! That mastic job alone kept one guy busy for a full 8 hour day, climbing in and out of trusses with buckets of that sticky stuff and a 5-in-one. Yuck!

Oh, and here's a shot of the air-handler installed on the platform I built to hold it:

DSCN5099.jpg

Boy am I glad I talked them into letting me build that platform so I didn't have to deal with that monster on the attic floor! That platform is a full piece of plywood, 4'x8', and you can see the air handler hangs over either end! That would have been a lot of floor space I would have had to give up. Not to mention, it's out of harms reach out there, and yet easy for them to service. A win-win! ;)

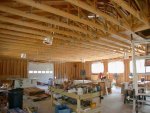
Here's a shot showing how they're planning to condition the air in the main shop area:

DSCN5098.jpg

Those are four 12" drops from their 16" main. Each drop will feed a 12" commercial circular vent, like what you'd see in large retail spaces. No little sissy registers in this shop! :D

There are quite a few more components to the system, but this gives you an idea of the main components and size of the monster. I'll try to shoot some shots of the other pieces in the near future.

Now, on to electrical...
- Marty -
 
Let there be power...

Once I had the first dozen or so Cypress boards up on the back of the shop, I was ready to get power run in to the shop. (And boy was I ready! :rolleyes: )

At first, I needed to get those boards installed since we were going with overhead power coming in. Some of you might recall that the electric co-op quoted me between $4000-$5000 to run the wires underground! :eek:

Well, it turns out that I had another option they failed to make me aware of, and I ddn't find out about until after I got the required Cypress boards installed. I could have them run the wires above ground to a pole behind and away from the shop, then go underground from the pole to the meter head on the shop. There was a 'nominal charge' of $300 plus wire to do this semi-underground install. No brainer to me. I didn't have to deal with running six sets of 4/0 wire up 20' thourhg 3" EPVC. I didn't have to deal with wiring a weatherhead, 20' up off the ground with six pieces of 4/0 wire. I didn't have to...the list went on. And in the end, the nominal charge plus the wire wsa actually cheaper than if I had save the nominal charge and gone overhead. Worked for me.

The only thing is, I could have had power much sooner, since I only really needed the first three boards up to hold the meterhead and my big disconnect. I didn't need to get enough up to make sure I wasn't working high up near their cables and my weatherhead. Oh well, I saved money and a lot of work, and wound up with a much cleaner install!

To recap, I'm running 400 amp service into the shop. The way that's done is with two sets of 4/0 'triplex', which is two runs of 4/0, one for each leg of power, and a run of 2/0 for the common.

Here's a shot showing the meterhead and my disconnect after I got them wired:
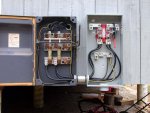
DSCN5083.jpg

Boy was that a challenge getting that big honking wire bent the way I needed!!! :eek: I wound up having to slide an 11/16" box wrench over the wire and using that as a level to apply the pressure I needed for some of those tight bends. All in all, I think it came out pretty neat.

That wasn't the end of the "fun". I then had to drive the 8' copper ground rod all the way down into the Georgia clay:
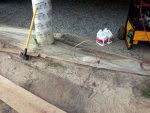
DSCN5082.jpg

That's my 10lb maul sitting next to the rod. It took me well over an hour to beat that thing into the clay. I would take a few dozen swings at it (from atop a ladder, no less), then go back to bending 4/0 wire, then take a few more whacks, then bend more wire, etc., until both jobs were done. That was one tiring day for sure!!!

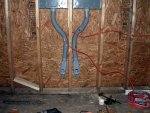
Oh, and in case you think I was done having fun when I got the outside done, let me assure you I wasn't! Here's a shot of the dual 200amp Square-D QO boxes I mounted inside:

DSCN5069.jpg

I had to get that 4/0 wire up into those boxes, which meant I had some nasty 90 degree hard turns to make. And even though the electrical engineer on the job said I could run the wire bare up in the wall as long as the total run was under 6', I felt a lot better running it inside 2 1/2" EPVC. Safer yes, sorer INDEED! Bending three set of that wire up through that EPVC was more than a challenge!!!

Here are a few shots showing the affair:
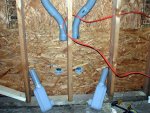
DSCN5077.jpg DSCN5086.jpg DSCN5079.jpg

I cut and dry fit all the EPVC ahead of time to try to make the job go a little easier. It all fit perfectly....until I got the wire in it. That stuff just doesn't bend!! You can see in that one shot that I had to use some 'roll-of-holes' screwed into the bottom plate to give me someplace to attach a clamp. I needed the extra leverage to get the elboy up into place on the EPVC I had run through the wall. A frustrating job to say the least.

An entire day, and then some, spent on just getting the supply lines installed. But it was finally done so I could call the crew in to get me my power! ;)

Getting the actual connections to the grid was a three part process, that took three seperate crews.

The first crew was the right-of-way crew, whose sole purpose is to clear any and all trees or other obstructions within a 30' path on either side of where the power cables would run. They did that by dropping about 20 of our pine trees, and heavily pruning a few dozen Oaks. And much to our chagrin, they were only responsible for 'dropping' the pines. They left them right where they were dropped. It was up to us (actually tractor-queen Denise) to get them cleared out of the driveway so the next crew could get in and do their job. Denise and I plan to buck, split and stack the pine, since it makes great aromatic firewood for our outdoor chimnea. More firewood...just what I need to deal with! :(

Ok, once the right-of-way had been cleared, the next crew to arrive was the 'pole' crew. As you guessed, their sole purpose is to erect the two poles to get the main wires back to the shop area. They had an incredible machine that dug each 10' deep hole and inserted the 30'+ pole in about 5 minutes or less. They then ran the cable from the main lines on the dirt road to the two new poles and back to the shop area.

The final crew, the one I was waiting for, was the 'under-ground' crew. These are the folks that dug the trecnh, ran the wire from the pole to the meter-head and made my connection hot!

After about 4 hours, they energized the meterhead, and said I was ready to go. They didn't even check to see if anything worked beyond the meterhead. That's where their responsibility ends.

Since I had been anticipating their arrival, and had a few days while the other crews were doing their thing, I had run the first of my 30 amp outlet runs along the rear wall of the shop. Before the last crew arrived, I even 'cheated' and energized the disconnect and boxes using my buddies generator. I flipped the disconnect, then the breaker for the outlets, plugged in a flood light and volia, I had done a good job since I had light.

Once the crew had made the meterhead hot, I did the same thing. I flipped hte disconnect, threw the main and circuit breakers and plugged in the floodlight. I now had PERMANENT 400 AMP SERVICE. What a great feeling that was...and still is!!! :D :D :D

Let's see...what else have I been up to?

Oh yeah, back to the siding...
- Marty -
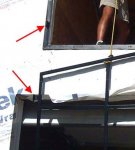
 
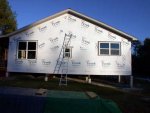
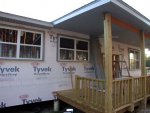
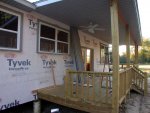
Once I had power to the shop, I spent a few days alternating between hangin Cypress on the rear of the shop, and pulling romex. Hanging that Cypress is bad enough, but I had to make and install molding around the windows as I went. Installing molding 15' off the ground on 8' wide windows, alone, is not an easy chore.

Luckily, Joe Blankshain came to the rescue again. This time I didn't have him up as high as the last time, when he helped install the Tyvek on the gable ends atop a 24' ladder. This time he only had to be about 15' up.

Boy, what a difference an extra set of hands, and a second finish nailer made. A job that was taking me several hours per window, was done in less than a day for all the 11 windows. And the job was much much better since I didn't have to try to balance, level, straighten, nail, and stay atop a ladder alone.

THANKS AGAIN JOE!!! :D ;)

Here are some shots of what Joe and I accomplished that day:

DSCN5104.jpg DSCN5105.jpg DSCN5106.jpg DSCN5107.jpg DSCN5108.jpg

DSCN5109.jpg DSCN5110.jpg DSCN5111.jpg

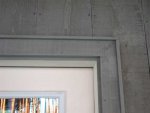
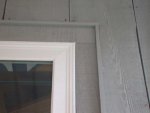
Each window, (and the front door), was trimmed with a 3" wide piece of Cypress, followed by a 1/2" thick 1 1/2" wide piece of Cypress on end, serving as a back-band. The Cypress siding butts up against the back-band. Oh, and every window has a 3" wide sill under it that's cut and mounted at a 5 degree angle to faciliate water running away from the siding below.

All in all, I think they came out pretty nice.

Thanks again Joe! ;)

Joe called it quits about 5 or so, since he a two hour+ drive back up to Carolina. Since there was still a little daylight left, and I was now on the porch with the windows trimmed, and since Denise had a few boards stained and ready to go, I got started on the siding on the front of the shop:

DSCN5112.jpg DSCN5113.jpg

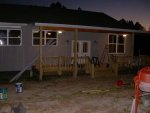
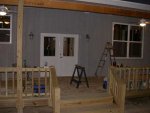
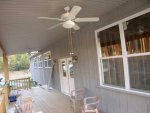
Oh yeah, you can see in a few of those pictures that I have the ceiling fans mounted on the front porch. I almost forgot...:rolleyes: Oh yeah, and they're wired and working quite nicely...:rolleyes: :rolleyes: Oh yeah, and they let me work well after dark now...:rolleyes: :rolleyes: :rolleyes:

A long day for sure, but with Joe's help, a lot was accomplished!
- Marty -
 
Front Siding continued...

With the progess Joe helped me accomplish the day before, I had to continue at that pace on Sunday and get the front further along:

DSCN5116.jpg DSCN5117.jpg DSCN5118.jpg

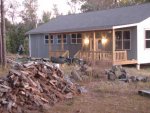
By sundown on Sunday, the front was almost completely sided, and the new porch lights were mounted and functional.

Monday found me back at it, trying to get the front 100% done. And done is what I got it:

DSCN5129.jpg DSCN5128.jpg

Here are a few closeups showing the details of the window and door molding. I'm pleased with the way they came out...

DSCN5123.jpg DSCN5124.jpg DSCN5125.jpg DSCN5127.jpg

Front's all done...on to the side...and no, I haven't forgotten the back. Joe got me off track when he helped me with the wndows. I wound up starting on the front and am now working my way back around to the back...

- Marty -
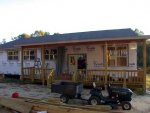
 
Front pier covers done, West Gable siding started...

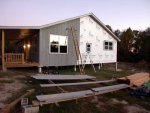
Ok, with the siding all done on the front, it was time to move on to the west gable end wall. (I could have gone back to finishing the rear of the shop, but the gratification of seeing my accomplishments from the deck of the house each night kept me moving on the gable end first...;)

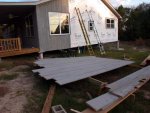
The first thing I did was make larger versions of my 8' sawhorses. All I needed to do was replace the 8' MQC culls with 16' versions, notched to fit:

DSCN5132.jpg

These larger versions of the sawhorses let me stain more boards at a time, which is important since I'm using 14' and 16' lengths, and most of the gable wall has two boards lapped together to cover the required height.

The next step was to lay out a dozen or so boards and get to staining. Once I had the back of all the boards stained, I went back to the front and finished up the pier covers:

DSCN5133.jpg DSCN5134.jpg

I'm happy with the way they came out, and am really glad I no longer have to look at those piers. They serve their purpose very well, but they sure aren't very aesthetically pleasing.

Once the back of the boards had a few hours to set up, I flipped them and applied the finish coat to the fronts.

By sundown on Wednesday, I had a few boards up and was making headway across the wall:

DSCN5131.jpg

Yesterday I was painting more boards and doing some more wiring inside while waiting for boards to dry. Today I got a few more boards up and am now almost half way across that wall:

DSCN5137.jpg DSCN5138.jpg

Tomorrow I get to stain more boards and continue.

One of the biggest challenges with this gable wall is that most of the spans beyond the office window are longer than 16', the longest boards I have. That means I have to cut boards with a 45 degree angle on the bottom, hoist these long boards up into place, hold them level and get them nailed. Then I have to measure and cut boards with an opposing 45 degree angle cut at the top to fill in the bottom section. Let me tell you, 16' of stained Cypress is alot heavier than I imaged it to be. And I can't figure out an easier way to get them hoisted up into place alone. Oh well, I'll be back at it tomorrow. Hopefully an easier approach will come to me.

Well folks, there you have it. I've caught you all up to date. This is obviously an abridged version of my updates, since I wasn't posting daily, and have greatly shortened my explanations. If any of you have questions, or would like greater details or better pictures of anyting, please let me know.

Oh, and I'd also like to hear from those interested in following along as to whether or not I go back to daily updates, or just make periodic updates like those above. More frequent means more details...and I don't want to bore too many of you...:rolleyes:

Thanks for your patience while we created our new home and now have a place to host the final trimester of the birth...
- Marty -
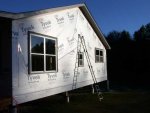
 
Marty, its great to get caught up on your "doings". :) It's the middle of the night here, so I only briefly glanced at your posts and I must get back to bed, but I look forward to reading all about your progress tomorrow.
 
Yeah!!!!!!!! The crowd goes wild - Marty's Back!

Great to see the progress. Its looking fantastic and now that you have electric light there is no need to waste time on sleep - just keep going!

For me I would love to see daily updates but your the man with the schedule - you should post as often as you feel suits you but bear in mind that we will wll be waiting with baited breath. The only downside from my point of view to daily updates is that I will get to reflect on how inadequate my shop is at least once every 24 hours.

Really glad to see you posting in this series again - thanks.
 
Y................. The only downside from my point of view to daily updates is that I will get to reflect on how inadequate my shop is at least once every 24 hours......

Boy Ian, do you speak the truth :D (let me be clear, MY shop is inadequate compared to Marty's shop too!)

Marty, looks fantastic, man have you got it going on!

I too would look forward to daily updates, but, I'll take what I can get, as we've been WAY too long without it!

Cheers!:D
 
Last edited:
thanks for bringing this back to life marty! even though i stay pretty much up to speed on the happenings via telephone seeing you put the work into making your progress available for everybody to see speaks loudly of both your character and work ethic! thanks man!........tod
 
Frank/Ian/Stu,

Glad you're enjoying getting caught up. You KNOW my intentions are to share, and not to make you feel inadequate with your shops. (Stu, what can a person say about "the dungeon"?)

tod,

Your comments made me blush. And you know that ain't easy :eek:

Kevin,

You missed the 90 odd page thread over at SMC. I'm looking into a way that I can port it over here, short of re-doing all the work. It started in late August, with my plans created in Sketchup, and progressed from breaking ground right up through what you see here. There's quite a bit of great question and answer and advice in that old thread, which is why I'd like to get the bulk of it over here. Hopefully you'll enjoy following the remainder of the project.

Randy,

Thanks for coming aboard. I know you were a true fan of the thread, and thought you might like to get back to getting your 'daily fix' ;)

And let me tell you, I'm realizing how BIG the shop is, as I'm toting and hanging all that Cypress! :eek:


Now if only the frost outside would melt so I could get out there and get to staining the next batch of boards...:(

Thanks everyone...
- Marty -
 
Thank you Marty

Marty,

I no longer feel like I've read 3/4 of a great book and did not get to finish it, please post you progress daily. The shop progress looks great, is it just me or does the shop not look as large once the sidding was installed.

Ken
 
Frost??? Wasnt that long ago when it was hot.


Randy,

Thanks for that visual reminder of my suffering this past summer! :(

I could use some of that right now, although the sun is up now and the frost is all but melted. I need it to warm up, or else that thick stain will be all but impossible to roll...

- Marty -
 
Top