Frank Pellow
Member
- Messages
- 2,332
- Location
- Toronto, Ontario, CANADA
Background:
I “finished” constructing and populating my shop two years ago this spring, but a big item that has been missing is a proper woodworking bench. One of the things that held me back was that I could not figure out where to put such a bench. Almost everything in my shop is mobile and I thought that a bench needed to be stationary. Then, a year ago I visited Rick Thom’s shop and saw his bench that is mounted on a General International mobile base. Here are few photos of Rick’s bench:
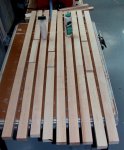
Front view of Rick’s bench:
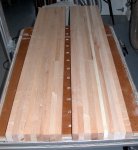
View of the top of Rick’s bench from the end with vise: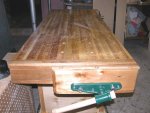
Top view of the end vise of Rick’ bench: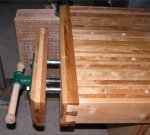
The bench certainly seemed sturdy enough, yet it could easily be moved. I resolved then and there to make a bench modeled upon Rick’s.
Here are some notes that I took about Rick’s bench:
Like Rick, I want to build a practical and useful bench but spend as little money as necessary on it.
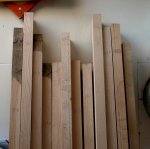
Early in 2006, I helped my neighbour Norm clean up his basement and garage and Norm gave me quite a lot of hard maple scrap that he had been saving for years. Here is a photo of some of that maple:

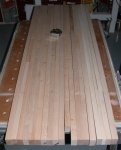
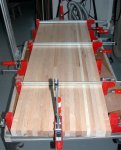
There were lots of pre-drilled holes in the wood, but I managed to cut around them and come up with these boards to be used for my bench top:

I generally work in my shop from late October to early April and outside at various projects from mid April to mid October. Making a woodworking bench was supposed to be one of the projects that I got to early in the current shop session. Well, better late than never –I got started on it last week and it will be the last major project of the session. In fact, I have already started some outside projects, so the bench project will probably drag out for a some time as a “rainy day” task.
I “finished” constructing and populating my shop two years ago this spring, but a big item that has been missing is a proper woodworking bench. One of the things that held me back was that I could not figure out where to put such a bench. Almost everything in my shop is mobile and I thought that a bench needed to be stationary. Then, a year ago I visited Rick Thom’s shop and saw his bench that is mounted on a General International mobile base. Here are few photos of Rick’s bench:
Front view of Rick’s bench:

View of the top of Rick’s bench from the end with vise:

Top view of the end vise of Rick’ bench:

The bench certainly seemed sturdy enough, yet it could easily be moved. I resolved then and there to make a bench modeled upon Rick’s.
Here are some notes that I took about Rick’s bench:
• Bench size: 27” by 72”
• Bench height: 33”
• Cabinet size: about 24” by 48”
• The top is made from 2” by 1” maple glued together with Elmer’s Probond. It was laminated in two sections each of which was then run through a planer. The two sections were then joined together and a skirt was affixed to the edges. It was then covered all-round with two coats of shellac. Rick says that the skirt at ¾ inch on the long sides is too narrow and he will augment it to properly support clamping.
• The cabinet support pieces are pine and are joined with mortise and tenons. The sides are 1 inch plywood. The drawers are maple with dovetail joinery and are on “standard” side drawer runners.
• The bench top just sits on the cabinet.
• The end vise is from Lee Valley (catalogue number 70G08.02) The front vise is a Record clone.
• The bench is mounted on a General International mobile base. The bench is very easy to move but, once the wheels are lowered, it is very stable.
• The ¾ inch dog holes are spaced 6 inches apart. They are angled 2 degrees towards to vice. All holes were drilled with a auger bit in a hand held drill employing a simple shop made jig.
Like Rick, I want to build a practical and useful bench but spend as little money as necessary on it.
Early in 2006, I helped my neighbour Norm clean up his basement and garage and Norm gave me quite a lot of hard maple scrap that he had been saving for years. Here is a photo of some of that maple:

There were lots of pre-drilled holes in the wood, but I managed to cut around them and come up with these boards to be used for my bench top:
I generally work in my shop from late October to early April and outside at various projects from mid April to mid October. Making a woodworking bench was supposed to be one of the projects that I got to early in the current shop session. Well, better late than never –I got started on it last week and it will be the last major project of the session. In fact, I have already started some outside projects, so the bench project will probably drag out for a some time as a “rainy day” task.
Last edited:


