Frank Pellow
Member
- Messages
- 2,332
- Location
- Toronto, Ontario, CANADA
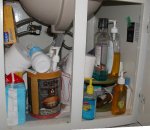
Most under the sink cabinets are very crowded with a combination of plumbing pipes, taps, etc. as well as all kinds of stuff. The cabinet in the Loo on the main floor of our house is very typical in this regard. Here is a photo that I took about half an hour ago:
I recently did an extensive renovation of the bathroom attached to our master bedroom and decided that I did not want to put up with this sort of thing there (or anywhere else for that matter).
So, I came up with a design that has a sub-cabinet with drawers on each side coupled with an open area for large bottles and things like that in the middle. The cabinets as well as the top drawer were built with a cut out of the corner to accommodate the shut-off taps. Here is a sub-cabinet with one drawer being checked for fit both in the cabinet and around a tap:
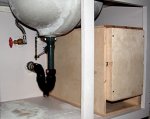
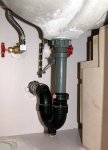
The design is such that it is possible to manipulate the cut-cut off taps with the sub-cabinets in place.
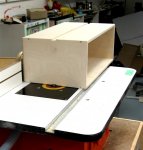
The sub-cabinets are mostly made of 12mm baltic birch. With the limited space, I wanted to maximize box the width and height of the drawers, so I decided to experiment with slim-line drawer slides that I purchased from Lee Valley (see: http://www.leevalley.com/hardware/page.aspx?c=2&cat=3,43614,43616&p=40591). To use these, it is necessary to route a groove in the drawer sides. I did this after building the drawers:
The were kind of finicky to install, but once installed work well. And, there is only 4 milimetres of “waste” space between the drawer side and the sub-cabinet.
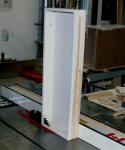
I painted the sub-cabinets and the drawers, with the same paint the I used for the cabinet and other trim. I will digress for a while to point out how much I appreciate my Festool Linear sander when preparing material for painting jobs like this:

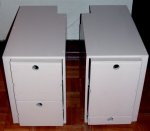
Here, the sub-cabinets with drawers are waiting for installation into the sink cabinet:
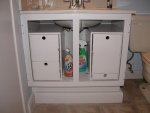
And here they are installed –using only a coupe of small angle brackets for each sub-cabinet:
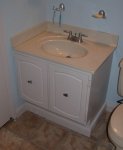
And here is the sink cabinet with the cabinet doors installed:
As with all projects that I engage it, there were a few miss-steps along the way. For example, don’t even ask why I was trimming a bit off this drawer, then later gluing as much as was left of the off-cut back onto the drawer again
  :
:

In closing I will say that both Margaret and I are very happy with the result and, next winter, I will tackle some or all of the other 4 under-sink cabinets in our house.

I recently did an extensive renovation of the bathroom attached to our master bedroom and decided that I did not want to put up with this sort of thing there (or anywhere else for that matter).
So, I came up with a design that has a sub-cabinet with drawers on each side coupled with an open area for large bottles and things like that in the middle. The cabinets as well as the top drawer were built with a cut out of the corner to accommodate the shut-off taps. Here is a sub-cabinet with one drawer being checked for fit both in the cabinet and around a tap:


The design is such that it is possible to manipulate the cut-cut off taps with the sub-cabinets in place.
The sub-cabinets are mostly made of 12mm baltic birch. With the limited space, I wanted to maximize box the width and height of the drawers, so I decided to experiment with slim-line drawer slides that I purchased from Lee Valley (see: http://www.leevalley.com/hardware/page.aspx?c=2&cat=3,43614,43616&p=40591). To use these, it is necessary to route a groove in the drawer sides. I did this after building the drawers:

The were kind of finicky to install, but once installed work well. And, there is only 4 milimetres of “waste” space between the drawer side and the sub-cabinet.
I painted the sub-cabinets and the drawers, with the same paint the I used for the cabinet and other trim. I will digress for a while to point out how much I appreciate my Festool Linear sander when preparing material for painting jobs like this:

Here, the sub-cabinets with drawers are waiting for installation into the sink cabinet:

And here they are installed –using only a coupe of small angle brackets for each sub-cabinet:

And here is the sink cabinet with the cabinet doors installed:

As with all projects that I engage it, there were a few miss-steps along the way.


In closing I will say that both Margaret and I are very happy with the result
 and, next winter, I will tackle some or all of the other 4 under-sink cabinets in our house.
Last edited:
