New Iron Horse Rockers

Darren Wright

Administrator
Staff member
Messages
20,168
Location
Springfield, Missouri
I've been working on a new version of the Iron Horse Rockers I built about 15 years ago, scaled down to come out of a 4x8 sheet of plywood, birch in this case.
2020-06-27 13.22.29.jpg

This is the first proto-type, but will reduce the engraving for these motors to 1/8" deep rather than 1/4" as they are here.
2020-06-27 14.35.35.jpg

The issue with my spindle sending and estop happened 3 times during this part of the job at the same spot. I finally reduced the speed/feed to about 60 ipm to complete this part. I tried changing a few of the settings on the vfd, but still no luck. I will check all my grounding tomorrow to see if maybe it's a noise issue with one of the estops. :dunno:

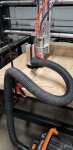
Tomorrow will be pocket cut-outs and dowel holes, then part cut-outs for the main body. I also need to work on a hose hanger as it was really starting to chip up that front edge of the plywood pulling across it.
 
Bummer about it stopping. I think you may be on to something with the noise from the VFD. I have issues at time with the noise from my vfd resetting my raspberry pi running octoprint. doesn't happen all the time, but every now and then with the vfd spins up, it resets it. In my case, once things are running it's all fine, but definitely a possibility.
 
Bummer about it stopping. I think you may be on to something with the noise from the VFD. I have issues at time with the noise from my vfd resetting my raspberry pi running octoprint. doesn't happen all the time, but every now and then with the vfd spins up, it resets it. In my case, once things are running it's all fine, but definitely a possibility.
hmmmm (knock on wood) I haven't had any issues. Unlike Darrell my VFD is not located in the same enclosure as the rest of the electronics
 
I'll check the grounds on the shielding, but I still think it's a vfd setting, caused by load, either a amp, volts, or rpm change. It always sends the stop at the same spots unless I slow it way down, then goes through and works fine.
 
I'll check the grounds on the shielding, but I still think it's a vfd setting, caused by load, either a amp, volts, or rpm change. It always sends the stop at the same spots unless I slow it way down, then goes through and works fine.
Darren, is the shielding grounded on both ends, if it is that could be the problem, you only want to ground one end and make sure the other is not touching ground.
 
Lesson for the night, send everything to zero before starting new operations even if you're sure something didn't change. :rolleyes: Luckily all the additional holes will be located under other parts or were in the waste area of the board. ;)
2020-06-28 21.12.50.jpg 2020-06-28 21.12.46.jpg

With some tweaks, the next time I run this it should be about 1.5 - 2 hours total. I still have the other half of the plywood to mill out with the rockers, wheels, and other pieces.
2020-06-28 21.51.11.jpg

I didn't check to see if this was a up or down cut spiral bit, will have to make sure I run it with a down cut next run to see how the fraying is. It's easy enough to knock off with the sander though. I'll cut all the parts out from their tabs with the HF plung saw tomorrow night.
2020-06-28 21.48.55.jpg

Darren, is the shielding grounded on both ends, if it is that could be the problem, you only want to ground one end and make sure the other is not touching ground.
No, only on the cabinet side. I'm pretty sure it's something with the spindle sending the estop when it's overloaded, it did it again tonight twice in the same spot. I finally dropped the feed rate and took a little lighter cut and it finished the whole job without issues. I'm sure I have a setting off on it, just need to find my list and run through them again.
 

Attachments

  • 2020-06-28 21.33.50.jpg
    2020-06-28 21.33.50.jpg
    122 KB · Views: 10
I was watching some youtubes the other day and saw one with some cnc projects April Wilkerson did. She was using a multi-tool to cut part tabs out on her cnc and thought it was a great idea. I stopped by HF tonight and picked up another multi-tool to keep at my cnc since the other one stays in my tool chest for house projects.
2020-06-29 17.24.45.jpg
2020-06-29 17.24.21.jpg

I also setup my router with a pattern bit and trimmed off the tabs from all the parts, then went looking for some 5/16" dowel, but must have used it all up. However, I did have some #2 yellow pencils of the right size. ;)
2020-06-29 19.24.37.jpg

Here is the mock-up of the body.
2020-06-29 19.30.30.jpg

So has anyone else used these abrasive nylon brushes? I also saw them on a youtube the other day and they work great for cleaning up the fraying wood from grooves and tight spaces. This one was a 320 grit, but have some 240 grit ones on order (https://smile.amazon.com/gp/product/B082VW14M8).
2020-06-29 19.51.15.jpg

Before...
2020-06-29 19.35.49.jpg

After...
2020-06-29 19.38.19.jpg

Lastly, I did get the rest of the rocker parts cut out tonight, about 7 hours of cut time total, should be able to cut that in half, if not more, if I can figure out my estop issue.
2020-06-29 20.44.08.jpg

I've got some round-overs to do at the router table, then will start gluing up some of the layers and getting ready for paint on others. I found when I built the last two it's much easier to paint in some of the edges prior to final glue-up.
 
So I've been plugging away at this project, but I'm not sure I'd do another out of plywood. :)

I glued all the parts up, then ran a couple of pattern bits around them to match up all the layers a little better and save myself some sanding. But before sanding I had to spread filler around all the edges to fill voids and chip-outs in the plywood edges. Some were bad, others were pretty smooth
2020-07-12 16.44.24.jpg 2020-07-12 16.44.36.jpg

Tonight I finally got to sanding and it's looking pretty good, have some final hand sanding and then I'll do a sanding sealer before another knock down, and start painting some of the parts, then assembly of some, more filler, and final painting/assembly.

I have to say that the parts are fitting quite nicely together, but most of the work is in the finishing of the plywood itself to make it look decent. I think I'll try doing a solid wood one next to figure out that process, but looking like I may want to just mill out the motor side pieces and some templates for the rest of the parts to sell to others that are interested in them, rather than making full rockers myself. I think I'll have a lot of labor in assembly and parts otherwise that just don't add up to much profit.
 
I picked up paint the other day, going with a navy blue on the tank and front fender for this one. Last night I got all the parts sealed, will do another knock down sanding and start the primer coats. The natural parts will start getting some lacquer.
 
I guess it's been a while since I've updated this, but trying to get it done for Xmas for my great nephew. I've got 2 coats on the painted parts. I started attaching those to the body for some final fitment, filling, and paint before final assembly. The white area is just primer and will be painted to match the parts next to them.
2020-11-07 17.03.52.jpg
2020-11-07 17.04.07.jpg
2020-11-07 17.05.43.jpg
 
I like yours a lot better than the one I'm trying to make
That Cnc router was made for projects like
This

I think I need my head examined for taking on something that clearly needs precision cutting in a computer
Don't care how good anyone is with a bandsaw getting perfectly round parts even with template routing is a task for me
 
Last edited:
Well, this took way longer than I had planned. I'm not real happy with the end product, it turned out fine, but there are things I'd do differently. Using plywood turned out to be way more work in the end as filling all the end grain took a long time and doesn't look great. The paint I used wasn't what I've used prior, and was quite temperamental, lots of brush strokes showing. I wish I had just sprayed the parts. I would like to have painted the wheels, but I'm way past my deadline on this one, so it's going as is. I still need to pickup a couple of mirrors to put on for the headlight and as the gas cap, but it's mostly done. I may stop by the craft store and look for some stickers though.

2021-02-23 18.54.35.jpg
 
Top