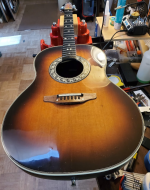
1979 Ovation Custom Balladeer

Brent Dowell

Administrator
Staff member
Messages
16,585
Location
Reno NV
Probably the first brand new instrument I ever bought was my 1979 Ovation Custom Balladeer. I have a lot of great memories with this guitar from using it as one of the instrumentalists in a Singing group in high school and just in general being a part of my life for a long period of time.

It still seems to play well but time and humidity (or lack thereof) has taken it's toll over the years. Ovations of this era are kind of known for having some cracking issues and what not, and this one is no exception. The bridge has pulled the top down a little bit at the front. The neck could use a little attention, the frets need a little dressing.

On the upside, it is still very firmly attached to the bowl, and other than a number of dings and bashes here an there, it's probably not in that bad of shape for something this old.

I'm going to try and do this as low impact as possible. What I'm thinking at this point I'm going to do are:
  1. Do a little aggressive re-hydration
  2. Do some repairs on the cracks
    Glue some patches on the inside to level and keep the cracks from getting worse
    Fill in the cracks
  3. Dress and flatten the frets
  4. Do a little ding filling and polishing
  5. Replace the Nut and fit it with a lighter gauge of strings. Going to to with .10's on this to reduce the tension a bit.
  6. Adjust the truss and set the action
Nothing to big, but Should be some good practice for building my new guitar.

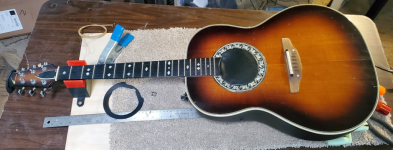
Starting point.
1675633536703.png

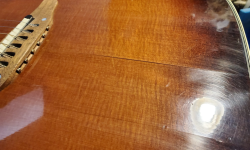
Cracks
1675634380615.png

Ovations start out as true flat tops, I.e. no arch or dish at all on the frong, but over time the tension on the bridge can cause the top to 'sink' in a bit.
1675634502228.png

1675634447090.png
 
Ok, So first step is that big crack right down the middle.

Ovation at that time used more of a fan brace pattern with only 4 braces going from the bridge to the bottom of the guitar. There were no cross grain braces so these cracks seem to be fairly common.

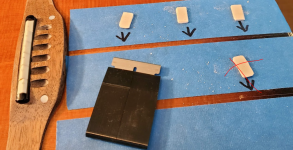
I made some little braces out some light pine and identified where I want to put them under the top. I decided against that one brace. That crack is right up against an existing brace and it doesn't seem like it quite goes all the way through.

1676411332376.png

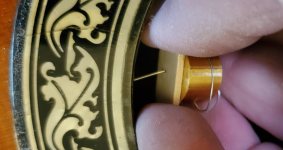
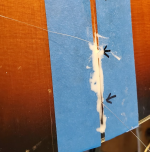
I used a little pin vise with some music wire (old guitar strings) to poke holes through the top were there arrows are and fed the wire under the guitar, through the brace and then into a little 3d printed backer

1676411792360.png1676411765097.png

I thinned out some titebond glue and worked it into the crack with a brush and by pushing the wood up and down from under the top.
1676411896850.png

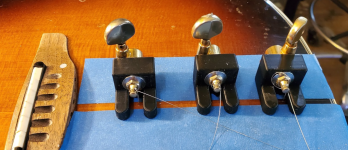
One thing you're going to notice is that I've been making a lot of my tools with my 3d printer. The clamps I've got here are no exception. Stewmac sells them as 'crack clamps', but I had plenty of old guitar tuners laying around and this seemed like they'd be super easy so model and print. Stew mac wants 44.49$ for each of the crack clamps. I've literally had those old tuners laying around for 40 years, so free for that part and a few cents of plastic each for the base, and 0$ for the old guitar strings.
I made 4 of them, but only used 3 here.
Really hoping this works, lol.

1676411924957.png

So thats where I'm at. Going to let the glue dry on this and see how it comes out tomorrow.

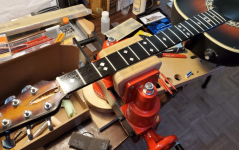
Really enjoying my new stewmac vice and body board. The guitar does not move at all while working on it and it's at a nice height for working on.
Got cold again so I just drilled a hole in the table and mounted the vice right on it, lol. Looks like I've got a portable workstation now.

1676412133359.png
 
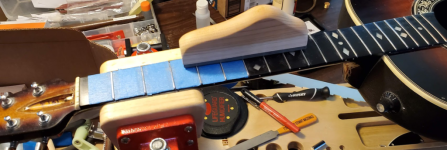
Just did a light fret dressing to remove some wear marks out of the frets.

I made sure the fretboard was perfectly flat by removing tension on the truss rod.

I then taped off the the fretboard. ok, I got tired of taping it off and my tape didn't fit anymore and I figured the fretboard needed a good cleaning anyway.

So went ahead and used the file to gently remove as little as possible as evenly as possible to get rid of any wear marks.

I then used a 10" radius sanding block to make sure I didn't screw up the fretboard radius on anything and got the frets down to a level as I can figure.

Next up I took a triangle file and hit the sides of the frets to rebuild the crown.

The fretboard was looking pretty dry so gave it a few drops of lemon oil, which it seems to be enjoying.

To be clear I'm not 100% sure what I'm doing, so I'm watching videos, reading books and trying to be as gentle and non destructive as possible.

I have to admit, I am hoping for some halfway decent results and can't wait to get it all strung up again and see how it plays.

1676422107332.png

1676422134944.png
 
Took the clamps off today. The crack seems to have closed up nicely.

I also did some ding fill and repair with 'glu-boost' Fill and Finish CA and accelerator.
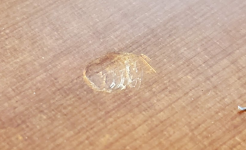
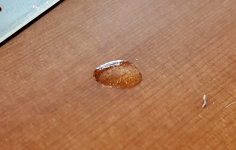
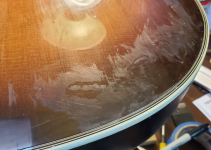
There was really no excuse not to. The top of the guitar had a lot of dings like this one in it.

In these pics you can see one of the dings, the ca after I filled it, and the same ding after filling. It's not going to completely disappear, but it is flush with the surface and smooth as I could get it.
Basically after filling you use a razor blade with some tape on the edges as a scraper. The tape keeps it from digging in and you get it down to just a few thou above the surface before you start sanding

1676503288566.png1676503305677.png1676503338725.png

At about this point in fixing it with the dings and cracks kind of filled and scraped that I started thinking 'What have I done', but figured worst case scenario I'd just have to strip it and do a complete refinish.

1676503735891.png1676503821760.png

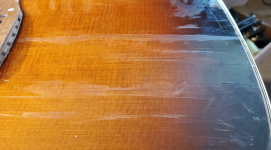
Since I had the huge crack to fill and so many dings, I basically just started sanding the whole top starting with 400 grit through 600,800,1000,1500,2000. Once I got through those I hit the top with the same micromesh pads I use for turning pens. It really didn't take that long to work through the grits on everything. Finally, after all the sanding, I used the Novus 3 part polishing system on it. I think I was fortunate that Ovation used such a tough poly type finish on their guitars as it stood up to my abuse.

Also soldered the battery holder back into the wiring harness. Pretty sure the bouncing around taking it out to the desert on my quad last year is what caused those to bounce off, lol.

Going to sit it aside and let the glue continue to cure for a while before I string it up. I'm going to to with a little lighter gauge string then before to reduce the pressure on the bridge and crack. Really hoping I don't have to make a new nut for it, but I'm prepared for that if it comes down to it.

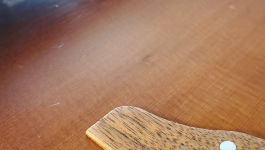
Not at all unhappy with the final results here. It's not perfect, there are still some scratches in the finish probably from uneven sanding, but it's nice and shiny and with the dings filled in, it looks a lot better, even if you can still see the dings.


1676503688701.png
 
There was a bit of a hump up above the 14th fret, which as I've read is another humidity related issue in older guitars. I don't really play up above the neck joint on this guitar anyway, so I filed down those frets a bit and it seemed to improve it a bit.

I did drop it down to custom light strings, which are a bit light for me. I've got big fat fingers and tend to clamp down pretty hard and play pretty hard, so light strings are a bit spider web like to me. So, again, a bit buzzy, I might go back and loosen the truss rod a bit more and bring the action up a bit. All in all though, it seems to be playing pretty well for me.

Well, I reckon that wraps up this little project. Almost like having a new guitar.


{edit}
Compared the action to my Taylor guitar. Low E at the 12th fret on the Tayler is like 140 thou, the ovation 90 thou. It's quite possible the taylor has increased over the years, but I'm thinking I might someday look at raising the action on the ovation by cutting it a new nut. I might actually do that right before I do the nut on my kit guitar.
 
Last edited:
There was a bit of a hump up above the 14th fret, which as I've read is another humidity related issue in older guitars. I don't really play up above the neck joint on this guitar anyway, so I filed down those frets a bit and it seemed to improve it a bit.
That's a fairly common problem with acoustic guitars, and you've done the most common remedy. :thumb: This whole project came out nicely. :clap:
 
Top