A Basic Router Sled

Stuart Ablett

Member
Messages
15,917
Location
Tokyo Japan
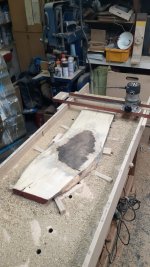
Nothing quite as nice or involved as John's router sled, I made this to flatten the top of my Roubo bench and to do some slabs too.

I really like the look of John's DC mount, I might add that kind of thing to mine.
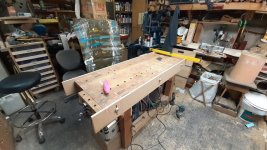
20210301_025313 (Small).jpg
I made two side pieces that can adjust up and down so I can do the benchtop and then do slabs later.
The adjustable sides are attached by bolts into threaded inserts on the sides of the bench.
You can't see it really in the pic but I checked for level across the bench in four positions then diagonally as far as my 3'level would reach.
Finally I got out my string I use on construction sites and did an "X" pattern across the whole thing and the strings just touched.
I do not know, without a much longer level how I'd check for the two sideboard runners to be parallel and level with each other, any suggestions?
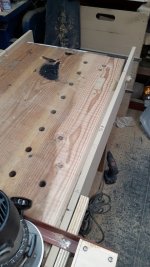
20210301_032108.jpg
I knew this one corner was a bit high, so I started there.
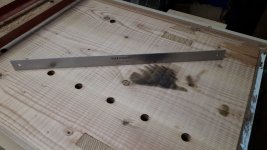
20210301_033441.jpg
As I did more passes I was getting almost complete width cuts, my straight edge says it flat.
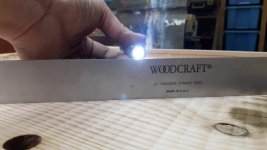
20210301_033503.jpg
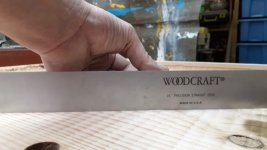
I put a light along the edge (this just shows that the light is on and bright)
20210301_033507.jpg
I cannot see any light, so it looks flat.


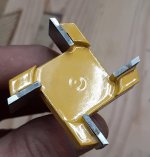
Dish Carving bit.jpg
I'm using the dish carving bit, it's the only thing I have, it works OK but I have ordered a slab bit...
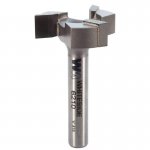
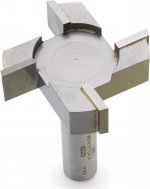
Slab bit.jpg
This one which I hope comes soon.

Some of you might remember my slabs of wood up on my rooftop, many of them are rotting.
I need to do something with them so I'm finally getting some off the roof, I hope to make some tables and some other things with them, but first I have to make them flat

Cheers
Stu
 
71de11e2bce0e5baa5981de948fbd5e5.jpg


0ae70ef1d3661272047e743984fc99b9.jpg

I got the rest of the top done, its smoother than it looks. I finished it with the ROS #80 & #120.


5b5e537d94d188d04c0fd62a4dbd0dde.jpg

Later I'll put a finish on it, maybe some Osmo Hard Oil.

2c27d1db8c89912c9034bcb98555cb42.jpg


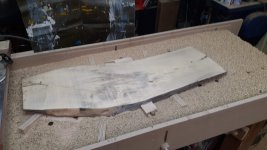
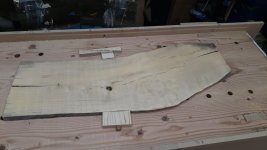
I put a slab on the benchtop leveling it and securing it with wedges and hot glue.

e35d452b822eb3a1718d73e099d8aec9.jpg


I'll try flattening a slab now.

Sent from my SCV43-u using Tapatalk
 
20210301_194252.jpg
20210301_195838.jpg
Boy, this sure is messy, I think the router is the messiest tool in the workshop.
I do need to figure out a dust extraction setup for sure.
Taking 1/16" passes, does not take that long, but did I say it's messy?
I have a few knots etc to fill with black CA glue then I'll flip it and do the other side.
Some interesting spalting going on for sure.
Cheers!

One side is done!
 
Stu, I wish you were closer. I have several dado planer bits in my router bit collection that I used when I was flattening and planing to thickness high figure woods for box tops. My planing jig was only 18" wide. I bought a carrying plate from Woodhaven which was designed so that each pass overlapped the previous pass just a little. It must be tedious to flatten/plane large boards in this manner.
 
Stu, I wish you were closer. I have several dado planer bits in my router bit collection that I used when I was flattening and planing to thickness high figure woods for box tops. My planing jig was only 18" wide. I bought a carrying plate from Woodhaven which was designed so that each pass overlapped the previous pass just a little. It must be tedious to flatten/plane large boards in this manner.
That would be great Mike, I'm sure it will get less tedious when I get the much larger bit, this bit I do about 1/2" at a time. It's not that bad, a good audio book or podcast in my iLink IsoPro headphone rig and in good. The clean up is almost more work LOL
20210301_211648.jpg

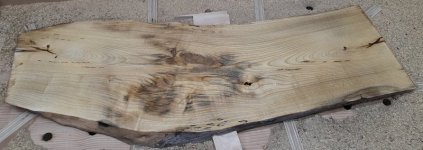
Sanded to #120 and wiped with thinner.

Blue Keyaki, no idea what I'll do with it yet.

Sent from my SCV43-u using Tapatalk
 
Hi Stu. Correct me if I am wrong but despite the side boards are leveled one respect the other, if your bench top is not leveled (which I asume it is) and not twisted, you would not get two parallel faces, as their level will be respect to the ground, not respect to the bench top, or so I think.
Knowing you I'm pretty sure you had that into account, if so please disregard.
Nice board BTW, I look forward to se what you do with it.
You would be correct Toni, so the first thing I did was router off the benchtop then once I got that level I used spacers to set the two sideboards the same height off the leveled benchtop, using the leveled benchtop as a reference.

I think this is correct.
I checked the board I did with my straight edge and it is flat as can be.
Once I do the other side I'll run the board through my drum sander to make sure the two faces of the board are coplanar.
 
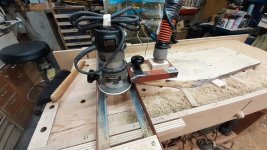
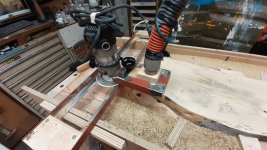
For the DC on the sled, I welded up this shroud.
20210303_001617.jpg20210303_001626.jpg

It attaches to the router using the handle hole on one side and then I mounted the handle on the DC shroud.
I will not have to buy some long bristle brushes to enclose the shroud on three sides.
I know it will not be perfect, but I hope to capture the really small dust that is very harmful.
I will still run the air cleaner and wear a respirator but I hope to reduce the amount of dust that goes EVERYWHERE LOL
 
The other cutter you posted, you can expect it to throw even more dust out as it's literally throwing it out sideways in every single direction. :) I used one flattening the cnc bed and even with the dust boot brushes on, it was just throwing mdf dust right past it.
 
The other cutter you posted, you can expect it to throw even more dust out as it's literally throwing it out sideways in every single direction. :) I used one flattening the cnc bed and even with the dust boot brushes on, it was just throwing mdf dust right past it.
Well, I guess I have a better chance with the DC attachment no?
I found some of the "Strip Brush" stuff but it's two weeks out... :(
 
20210303_205329.jpg
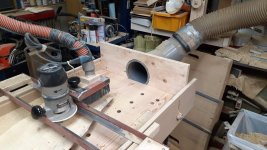
I added a dust port to the end of the bench, this has made a HUGE difference.

20210303_152057.jpg
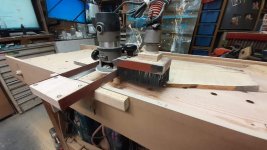
I also butchered an old broom to make some sort of brush around the vacuum DC.

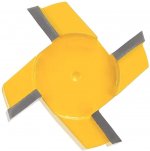
I bought a cheap bit on Amazon here in Japan for about $18, I did three sides of slabs and the darn thing is now dull and burning the wood... :mad:

I have a Whiteside bit coming from the US that is supposed to be very good, but it won't get here until the next week, bummer.

20210303_152405.jpg
I did two slabs and ran them through the drum sander, they look great, now what to make with them? LOL

I'd love to get into the Epoxy river tables but the epoxy is REALLY expensive here and I'm not sure I can get the right stuff exactly.

What I'm trying to do is daily do a slab or two and get through all the slabs I have up on the rooftop, they are not in good shape, they have been up there too long.

I also what to make some raised beds on the rooftop to grow some vegetables in the future so I need the roof cleared off!
 
I bought this bit here in Tokyo from about $18, really I should have known better.
On Amazon it looks OK, I knew that it would not last as long as a good quality bit, but it would get me started, well it did not last through 2 slabs of Blue Keyaki (which is NOT a very hard wood like regular Keyaki or Japanese Elm, the Blue Keyaki is MUCH softer) before it started to burn the wood. I was taking only about 2mm at a time and only half a bit diameter cuts, not stressing the PC 6902 router at all, it's a 3/4hp router.
If you look at this picture from the Amazon site showing the bit...
51mftG0Mf2L._AC_SL1001_.jpg
It all looks good, but when I tried to hone the dull edge of the carbide on my #600 diamond plate what showed up is disappointing but not surprising...
20210304_124413.jpg
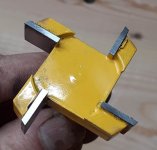
Only the end 1/3 of the carbide is being honed because you can see that the other 2/3 of the carbide has been undercut so that it does not cut at all.
I'm sure this is why it dulled so quickly, well that and the most likely subpar quality of the carbide.

WhiteSide 6220.jpg
I have ordered the Whiteside 6220 bit from the US.
I expect the full width of the carbide to be sharp and ready to cut.

As I have a LOT of slabs to do, I also decided to buy one of these bits...


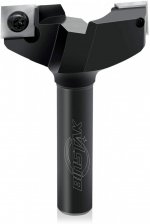
Binstack insert slabbing bit.jpg
Binstak 2" two wing Spoilboard cutter, it was only about $62 with shipping to Japan and get a 4.6 out of 5-star review with 43 reviews, the cutters can rotate so I hope to use this for most of the work but we shall see. I also ordered a set of 10 replacement cutter so I should be able to do a lot of slabs.
A similar Armana tool bit would cost me about $150 to get, so I know I'm taking my chances but the good reviews give me hope LOL

The only fear I have is that the PC 6902 3/4 HP router is underpowered, so I might swap it out for an old Hitachi M12 3-1/2hp router I have (honestly I forgot I even had it LOL) as it would allow me to hog off more wood on the roughing passes.

This has become quite the rabbit hole I've fallen into, but building a good set up to slab chainsaw milled lumber seems like a worthwhile investment to me.
Maybe with the Hitachi and an upgraded sled and the insert bit, I'll also be able to design a DC attachment that actually works, here's hoping!

Cheers
 
e19932919c9172e3d6d0746e1d8ba230.jpg

I honed the crappy slabbing bit the best I could, and I switched out the PC 3/4hp router for the Hitachi 3-1/2 hp router.
5c0dafe094b0c1acc7e65264b2fe7893.jpg

I took slightly deeper cuts at a faster feed rate, but I still got a lot of burning.

a4005580a1cfe67dbb7be41e05c5be9b.jpg

After four light passes through the drum sander the slab looks pretty good.
a5fcfff99373cd3a42e53bd9cc63cb18.jpg

I'll need to hit it with the ROS #120 and maybe #240.
The slabs are about an inch thick-ish, I was thinking to make natural edge cutting boards out of them...?

Cheers

Sent from my SCV43-u using Tapatalk
 
Wire brush the edges to clean them up, put on a food safe finish and they would work well for charcuterie boards. If they have some thickness, and you are feeling lucky, you could try cutting a bowl shape into them...these went over well.
 
Wire brush the edges to clean them up, put on a food safe finish and they would work well for charcuterie boards. If they have some thickness, and you are feeling lucky, you could try cutting a bowl shape into them...these went over well.
Wow, Ted, that board with the bowl in it looks great! :oops: (y)


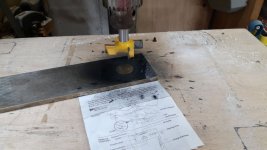
I thought I'd try one more thing on the poor quality slabbing bit, I'd try to resharpen it.
20210304_223301.jpg
I chucked the bit up in my drill press then put my #150 diamond, plate under it, I rotated it by hand and got a half circle pattern, I then used paper to shim the one side up until I got a fairly circular pattern on the diamond plate.
I turned the drill press on at min speed, about 500 rpm, and applied light pressure, then I flipped the diamond plate over so it was on the #600 side and did it again.

20210304_223507.jpg
As you can see it looks all shiny now across the length of the carbide tips.

I tried it out on a smaller board, well half of a very warped longer board, and well it sort of worked but I got even more burning, I think that there needs to be an angle on the carbide faces so that only the leading edge is cutting and I am not set up to do that kind of sharpening.
20210305_012358.jpg
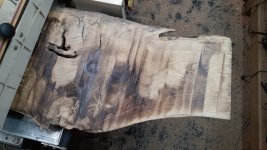
You can see how burnt up the board is before I put it through the drum sander.

20210305_013007.jpg
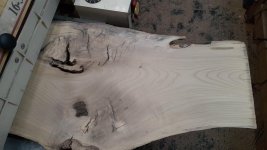
After six passes on the drum sander, it cleans up fairly nicely.

I guess I'll just have to wait until next Wednesday, the new bit should arrive on Tuesday but I'll be out of town on Monday and Tuesday working.

The sled and the router work well, the DC is much improved, now I just need a good slabbing bit.

Cheers
 
I think that there needs to be an angle on the carbide faces so that only the leading edge is cutting

Yep otherwise it'll rub after it shaves. I'd bet the bevel from the outside in to give it more clearance was intentional as well. I don't think you'd need a whole lot of clearance though (@Leo Voisine could probably give a specific answer to that?).
 
Yep otherwise it'll rub after it shaves. I'd bet the bevel from the outside in to give it more clearance was intentional as well. I don't think you'd need a whole lot of clearance though (@Leo Voisine could probably give a specific answer to that?).
The initial grind was not a beveled relief grind, 2/3 of the whole carbide was ground lower than the actual cutting edge.
 
Top