Built a Fixture

Leo Voisine

Member
Messages
5,731
Location
East Freeetown, Massachusetts
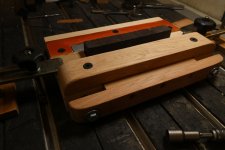
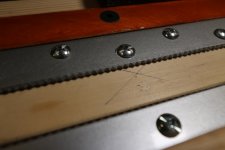
I made some sample pillow bungs on a drill press vise, The vice is a cheapy vise and the movable jaw flexes too much when you clamp at the top 1/8 inch. Also the jaws are smooth. When I clamped a piece of wood in the vise I needed to level it out. If I want to make hundreds and hundreds of pillow bungs I need something much better than that.

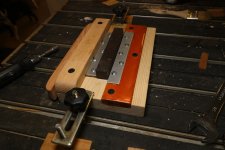
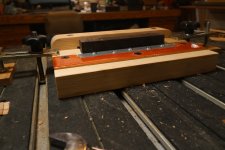
So I made a vise.

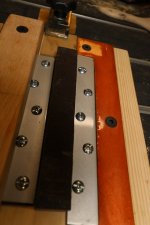
The jaws are steel saw tooth jaws that VERY securely GRIP the bottom 1/8 inch and hold the piece of Ebony very very securely.
I made the jaws on my CNC router.

NOW - I can make hundreds and hundreds of pillow bungs.
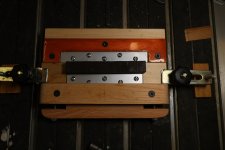
Fixture-1.jpg Fixture-2.jpg Fixture-3.jpg Fixture-4.jpg Fixture-5.jpg Fixture-6.jpg
 
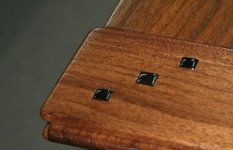
What is a pillow bung, a Google search insisted on only showing ads for pillows
Leo has been doing his mad scientist magic on things like these.
GnG Low CoD (274).JPG
The vise looks great Leo. As to making lots of things . . . you guys ought to try making a few hundred of these by hand like Rennie and I have been doing o_O
 
❤️ the low profile vise..

I might add an indexing stop to one end? Maybe that doesn't add value over just a drawn line though (it'd probably be more useful if you had a helper loading pieces).

I'd be really interested to see one of result pieces post-cut but still in the vise if you don't mind sharing. I'm having a smidge of difficulty imagining the cut path (I think I get it.. but I'm not quite sure).
 
This video will be available about 5:10 EST or so - it is still uploading.

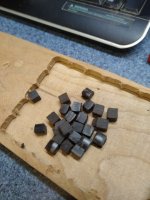
This is the first batch. I made the small adjustments as desired by Rennie.

I tested some in some square holes I made - and YES they fit tighter.
I also adjusted the easy entry.
And they are .250 high x .270 square - not .260
Rennie - yer gonna love em.


IMG_20211130_154554338.jpg


Ryan, I will make a video of the whole process. You will see everything and I will explain all my strategies.
BTW - there IS an end stop. It's a temp stop as I am not sure yet how I want to make an adjustable stop.
 
I have never heard them called pillow bungs. I called them square plugs as I cut the recess for the plug/bung using a mortising chisel. I have made a few of them the old fashioned way using a strip sander to round the top of the pillow and then cutting them off using a stop on my saw.

You know what they say; you learn something every day.
 
That's a good market niche Leo!, many woodworkers will pay to get rid of the time consuming job of making them, because G&G pieces tend to have a lot of them.
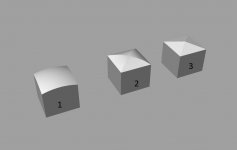
I know that with the size that G&G pillow bungs have I may be being too picky, but shouldn't they be like number 2 in the attached sketch?
There is a difference between being the top a spherical dome section or the intersection of two arches. Obviously if you make number 2 and you sand or polish it it will end almost like number 1. (That's why I am saying that I may be too picky.) To be able to compare I've drawn numbers 1 and 2 tops using the same radius, and number 3 making the pyramid of the same height.
Number 3 is with a pyramidal top.
pillow.jpg

I have an additional question to Glenn & Rennie, when you make those, the top of the plug is end grain? or is it indiferent?
 
Toni,

It is #1.

Technically they "should be" end grain but in MANY many samples exploration, youtube videos, and conversations, we are all in agreement that face grain or side grain will be a worth while compromise.

We have gone round and round on that.
 
Typically the hand made, and presumably the originals, were end grain. However, once you polish something that is only 1/4" square it is nearly impossible to see the difference with the naked eye. As Leo said, given the amount of time/work saved, it is a worthwhile compromise.
 
Top