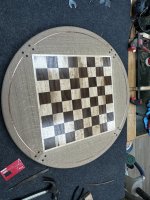
Chess Table Build

Sorry I am late in this thread. It's a great project and really challenging.
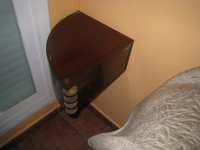
One of my first designs was a bedside table which was a quarter of a circle.
I wanted the drawer to open towards the person on the bed to avoid putting the arm in an akward position or having to change posture too much while on the bed.
On that one I opted for using a piano hinge which is quite unobtrusive. I also made keyhole receptacles on the back to hang it on the wall as I have certain tendency to avoid legs on furniture if I can. The brass hardware has tarnished since...
IMG_6521.JPG
 
Inlay issue solved - I went with copper. Quite the chore finding a supplier that could give me square wire exactly .125" square. I found a supplier in Mexico and when it arrived it was over by about .010". This was good and bad. Good because once pounded into the wood I can rest assured it will never come out on its own, bad because it protruded so far above the surface that it took me about 3 hours of filing and sanding to level it. An I have the blisters to prove it! :rofl:

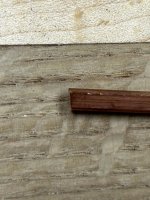
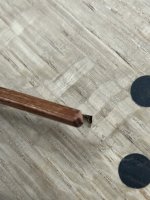
First I laid out the wire and straightened it as best I could (it came in a coil). Then I used a file to flatten one end and taper it so it would fit tight against the end of the groove.
IMG_2027.JPEGIMG_2028.JPEG

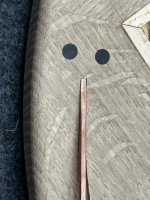
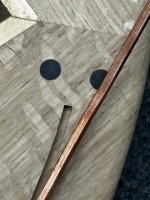
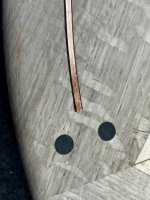
I tapped it halfway home using a hammer and a wood block till I reached the other end of the groove. Them I cut it off just a little over length and filed it as I did the other end. The card is to protect the table from the file.
IMG_2029.JPEGIMG_2030.JPEGIMG_2031.JPEGIMG_2032.JPEG

Then I pounded it in as far and as tight as it would go. I spent about 3 hours with a file leveling the copper. No pics, sorry. I used a single cut file and put some masking tape over the end to protect the table. Then I put the taped end on the table top and filed....a lot. Then sanded through the grits to 220. Then the copper got a hand sanding with 1000, 2000, and 0000 steel wool.
IMG_2033.JPEG

I began applying the dyes and will add the stain later today.

My first thought was to mix up some ammonia, vinegar, salt, and lemon juice to brush on to the copper to give it a patina prior to varnishing. But it is slowly oxidizing to a nice deep copper color so I might skip that step.
 
Brushing that mixture on the copper, might change the patina of the wood also.?
I was afraid of that also, but I did a few test pieces and there was little or no effect at all. Also, should I do it it will be after I've applied two dyes and a stain so the wood would not accept too much of the mixture anyway.
 
Very nice! BTW - next time (if there is one) try using a scraper instead of a file to level the copper. If the copper is dead soft, the scraper will peel off thin shavings pretty easily.
 
Very nice! BTW - next time (if there is one) try using a scraper instead of a file to level the copper. If the copper is dead soft, the scraper will peel off thin shavings pretty easily.
I did try that. It tended to skip. Probably related to my lack of skill in getting a razor edge on my scraper.
 
I did try that. It tended to skip. Probably related to my lack of skill in getting a razor edge on my scraper.
The copper has to be dead soft for it to work very well, I'm guessing this wasn't which might be good for longevity (and does make filling a bit more pleasant as it's less gummy so trade offs).

Looking really good, glad you finally found some material that works!
 
Top