Compact tractors

Interesting, I was wondering if you were getting close to the granite areas. Usually the Galena is found in conjunction would limestone or Dolomite which makes the mix of rocks pretty interesting. I'm guessing you must be around some of the boundary zone(s) and are getting wash from several weathered features down in the bottom land.

Very cool seeing the weathered piece like that, you can clearly see some of the structure where it formed in the base rock as well.

I wonder if you're in/near the silver bearing zone as well :D

 
I've got some, but haven't used it yet. It's supposedly perfectly safe until it gets hit with something moving at a pretty high velocity, lol.
I've used it. Not sure I'd want to use it for making holes because you'd pretty much have to be standing over the hole shooting a rifle into it. I suspect that's gonna leave a mark, lol.

Here's a quarter pound of it "decommissioning" a laptop computer...it's about 50 yards away in a plastic jar about the size of a medium jar of peanut butter. The old laptop is sitting on top of the jar.
sniper.gif


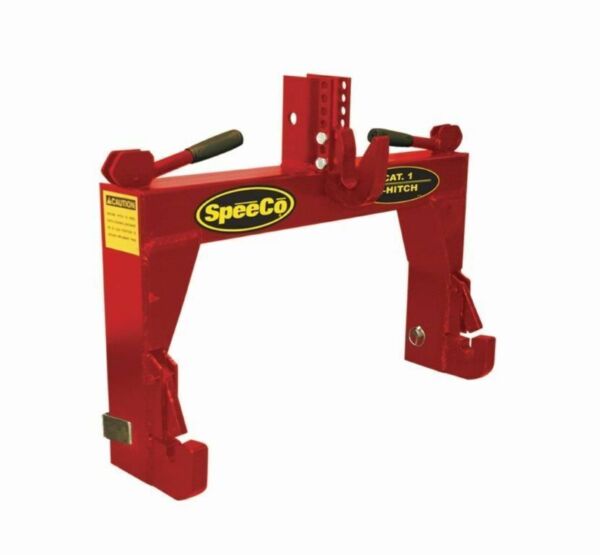
I ordered a Speeco EHitch QuickHitch last night. Seems like everyone I’ve spoke to with a compact praises the quick hitch. This one is just for category 1 implements only, so no bushings required. It was about $100 more than most other quick hitches, but just one set of bushings is usually $40 a set and I’d need 5 or 6 sets already to get started.

 
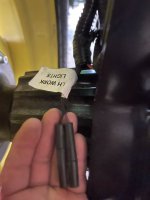
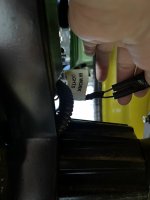
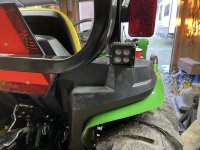
Spent some time today wiring up some rear work lights. For the JD, they have them prewired and can find the connections in the bottom of the ROPS, labeled even with a ground wire. The ends are bullet connectors. But I snipped them off and used my own with heat shrink tubing.
FC36F5D6-42FC-43C5-99A0-96DA318940EE.jpeg 8B08A9CC-C163-40D7-87F6-C36C884F36F8.jpeg

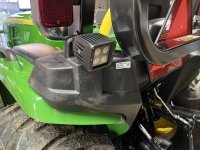
I mounted some led lights I got from HF to the fuel tank bolts at the rear, which are out of the way when the ROPS is folded down.
AE2FED2E-98F9-4CE6-9EAE-C0925E76B100.jpeg 89D37C13-1607-4B39-AE84-ECDE179C0157.jpeg

I had to pull some tape off the looms, but was able to re-route the wire almost all the way up to each light. The lights themselves had enough wire to complete the connection. The first click of the head light switch just turns on the head lights, the second click turns on the work lights too.
 
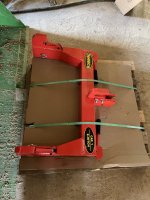
FedEx freight dropped off my quick hitch today.
114D448F-5B13-4181-A0F3-CF7AE9680F67.jpeg
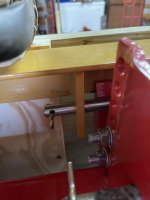
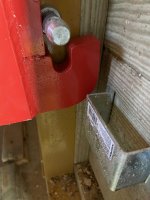
Unfortunately the top hook was too wide to fit between the front of my carry all frame ant it’s top pin
EDF4CD81-55F3-48BD-9B2B-3F8968858007.jpeg
It was holding each of the bottom pins about an inch too high.
224CE04C-744A-47B0-8B6C-974C0B90E460.jpeg
It is the only implement I can’t use it with, besides the post hole digger. But was considering adding a receiver hitch on the back edge, so may cut and modify that top link area. Just cut away the offending area and weld some 1/4” plate on the front it to give some clearance for the hook.
 
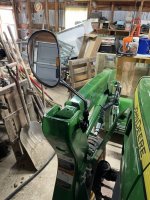
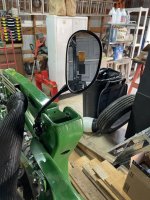
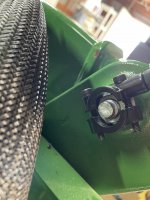
Well, they were a good location while parked in the shop, but apparently those bolts rotate when the loader is lifted. :D

I can do a bracket on the right side of the loader, but the left doesn't have any pre-drilled/threaded holes to use, so thinking I may make some kind of bracket to go over the cowl/dash area for both mirrors. I also may weld up some mounts to come off the ROPS that fold up when needed.

Similar to this...
images

I don't think I really need 2, but the ones I have are small enough they are easy to look around. I only need them for when grading the road, I just like to watch out for any cars coming up behind me so I can pull off to the side a bit.
 
So used the tractor over lunch to clean up the drive and parking areas. All I have is the front loader and a box blade.

Neither are great for pushing snow since the blades tend to dig in to the yard. I ended up using the FELs float function (push all the way forward until it clicks), which takes the hydraulic pressure off the loader and lets the blade float on the ground. I was able to drag most of the snow backwards or if kept the front cutting blade turned up a bit, it would cut through most of the snow, leaving a little down. This was still a pain and left a few holes in the yard.

I did a little research after I came in and found a product called Edge Tamer (https://r2manufacturing.com/products/edge-tamer), so ordered some 4" wide ones for my bucket. Basically adds a set of shoes to the blade to keep the cutting edge off the ground.

 
Last edited:
Mirror hanging out like shown looks like a easy way to get caught and pulled off. Rivet a bracket to dash console and mount there?
David
Good point, but pretty much could do that anywhere I mount them around here. ;) I am trying to keep them inside the width of the loader to help protect them a bit. I do still like the idea of putting something over the dash/cowl, but we'll see.
 
I did a little research after I came in and found a product called Edge Tamer (https://r2manufacturing.com/products/edge-tamer), so ordered some 4" wide ones for my bucket. Basically adds a set of shoes to the blade to keep the cutting edge off the ground.
Saw those at my dealer's. My driveway is paved, so he recommended an UHMW (plastic) cutting edge instead. Priced one...$168 for a 4" X 48" X ¾" ! Too rich for me, so I went on Peachtree Woodworking's site, and found the UHMW in that size for $35. Bought it, drilled it out for the proper bolt pattern, beveled the front edge on the router table, and installed it with seven ½" carriage bolts. Works great! Cleaned off my driveway (Three times) one neighbor's twice and another neighbor's once. No noticeable wear on the UHMW. Works best tilting the bucket down a few degrees and using the 'float' function.
 
It's doable with the box blade but that rig is pretty subtle and doesn't work as well for pulling around really deep amounts. It would work pretty good once you've removed the bulk to grade the remaining out (caveats about using the box blade requiring much subtlety of control aside).

The bucket shoes look handy regardless.
 
Saw those at my dealer's. My driveway is paved, so he recommended an UHMW (plastic) cutting edge instead. Priced one...$168 for a 4" X 48" X ¾" ! Too rich for me, so I went on Peachtree Woodworking's site, and found the UHMW in that size for $35. Bought it, drilled it out for the proper bolt pattern, beveled the front edge on the router table, and installed it with seven ½" carriage bolts. Works great! Cleaned off my driveway (Three times) one neighbor's twice and another neighbor's once. No noticeable wear on the UHMW. Works best tilting the bucket down a few degrees and using the 'float' function.
I saw on GreenTractorTalk where some users are just cutting a slit in ABS pipe and slipping it over the blade for paved areas, but sounds like the UHMW is a better solution. :thumb:
 
So used the tractor over lunch to clean up the drive and parking areas. All I have is the front loader and a box blade.

Neither are great for pushing snow since the blades tend to dig in to the yard. I ended up using the FELs float function (push all the way forward until it clicks), which takes the hydraulic pressure off the loader and lets the blade float on the ground. I was able to drag most of the snow backwards or if kept the front cutting blade turned up a bit, it would cut through most of the snow, leaving a little down. This was still a pain and left a few holes in the yard.

I did a little research after I came in and found a product called Edge Tamer (https://r2manufacturing.com/products/edge-tamer), so ordered some 4" wide ones for my bucket. Basically adds a set of shoes to the blade to keep the cutting edge off the ground.

Interesting device. It’s always tricky to clear the first snowfall before the ground is frozen underneath, without creating a whole lot of springtime work restoring gravel and sod to their proper places.
Pusher blades are popular here, especially for larger jobs like parking lots or farmyards. They have adjustable shoes as well as hydraulic wings that corral the snow or let it roll out to the side. They’re quicker since you don’t have to pause and empty the bucket.
 
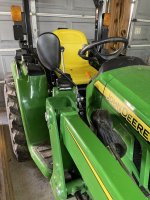
Picked up some atv mirrors to try out on the tractor...

...Well, they were a good location while parked in the shop, but apparently those bolts rotate when the loader is lifted...
How about rear-facing a GoPro mounted on the ROPS with a dash-mounted tablet as a monitor? OK, not really practical with things like cost and battery charging in mind, but you've gotta admit you'd have the coolest tractor on the block. :D
 
Top