Dining Table 2

Rennie Heuer

Moderator
Staff member
Messages
11,635
Location
Constantine, MI
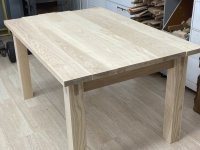
This is the second table I'll be building in the shop starting this month. Since the construction is similar to Dining Table 1 I thought it best to build them concurrently.

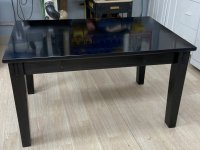
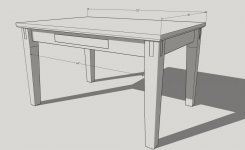
This one is ash. The customer wants it 'ebonized' which, in this case, means using a black dye followed by a black stain. Topcoat will be Arm-R-Seal satin on legs and aprons, Rock Hard satin on the top. Aprons are overlapping tenons. Drawer sides are hard maple, full extension slides. Delivering to Indianapolis.
FWW1.jpg
 
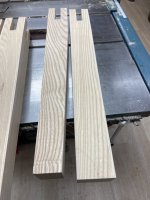
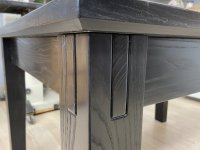
Been making progress on the second table. Leg joinery is complete. Everything locks together well and is rigid and sturdy. I'll accentuate the joinery by giving the mortise edges and tenon ends a 3/32" round over and leave the tenons about 1/16" proud of the legs.

Getting the taper on a 3 1/2" square leg had me baffled for a little while. I don't have that much blade on the TS and, besides, having that much blade exposed scares the heck out of me. Can't imagine guiding that hunk of leg past that much blade using a tapering jig. :eek:

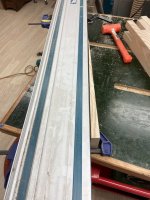
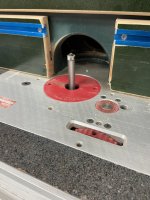
The band saw was a possibility with cleaning up the cut on the jointer, but keeping the tapers consistent would have been a challenge. So, it occurred to me that I already had the perfect combination of tooling for the job. I cut as deeply as I could using the track saw. The I used the band saw, favoring the waste side of the cut, to remove the rest of the waste. Then I went to the router table and used a flush trim bit to clean up the bandsaw cut using the track sawn surface as a guide. One very light pass on the jointer cleaned up any remaining imperfections. Clean, consistent, and safe. :thumb: The finale glue up and trimming of the top come next.
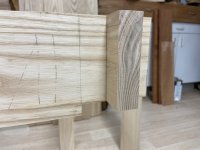
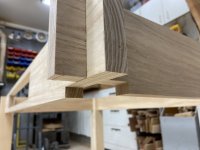
IMG_1590.JPEGIMG_1589.JPEGIMG_1588.JPEGIMG_1591.JPEGIMG_1592.JPEGIMG_1593.JPEGIMG_1587.JPEG
 
Color's great. Love the effect on the crossed leg tenons. Not sure about the metal drawer slides, though.
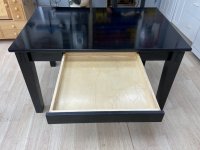
A compromise. It is a big drawer, over 2 feet wide and 2 feet deep. It has a half inch plywood bottom just to be sure. With that larger drawer I needed the security of the ball bearing slides. Additionally, I needed the full extension to get it out from underneath the lip of the table to be fully accessible.
 
WOW - I really like it.

Nice thing about doing work for customers is that we get to try new things and expand our knowledge of new things. The color and the style may not necessarily be of our choosing or our desire, but we build it as though it was our own. More often than not, we all like it. It may not be what we adorn our own house with, but we enjoy the journey.

Rennie, I love what you are doing.
Agreed. This is probably not something I would ever build for myself, many of the pieces I build are things I wouldn’t do for me, but it does help us stretch our abilities a little each time we take on something unfamiliar.
 
it does help us stretch our abilities a little each time we take on something unfamiliar.
So true. It's cool to see the difference the two finishes make. I have several pieces in my own home that use metal slides. The ability to fully access the drawer is something I like so I have no problem wit the 'mechanicals' used to get that. I think there are only two pieces out there made for others that used them. I think you can blend hand crafted quality with modern conveniences. In some cases it actually makes things more interesting to design.
 
Top