Hinges: Gate or Frame First?

Vaughn McMillan

Administrator
Staff member
Messages
36,132
Location
ABQ NM
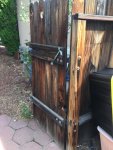
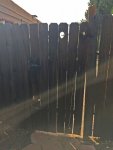
I'm replacing a worn-out gate on our side yard fence.
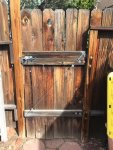
Inside View 800.jpg Open View 800.jpg Outside View T 800.jpg

The two 4x4 gateposts are not plumb or square, but they're solidly anchored in concrete. They are staying.

I've built a frame for the new gate, and I'll attach dog-eared red cedar boards to it. (As funds permit, I'll be replacing the whole fence to match.)

Here's a sketch of the frame, missing a few details like carriage bolts at the lap-jointed corners and other screws. In addition to metal fasteners, the joints are glued with Titebond III and everything is square. Since the opening isn't square, the frame will have about 1/4" gap between the posts on each side at the top, and about 3/4" gap on each side at the bottom. That gap will be hidden by the slats, though.
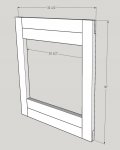
Shiloh Gate 2 800.jpg

Now to the question: Would you mount the hinges on the gatepost, and then hang the gate on them, or would you mount the hinges on the gate first, and then attach it to the gatepost?

I built the frame yesterday, and was going to finish it up today, but I threw my back out (closing the sliding glass door to the patio, of all things), so it looks like I'll have until next weekend to ponder my approach to finishing things up.
 
I'd mount the hinges on the post - using the existing holes, if possible.

Then put the gate in place, shimming it on bottom & side(s) till it's in the proper position. With the gate in place, drill for, and install, the hinges.
 
Yeah, I'd go with post first as well as Jim explained. Usually while putting posts and the top/bottom runs in, I'll attach the gate frame in it's opening with shims, put the pickets on, hinges, then remove what I've connected the gate frame with or cut the connecting material, whichever it is.
 
A diagonal 2 x ? in your frame running from the lower hinge side to the top swing side will help prevent sagging. I've found it helpful on gates I've built.

Thanks for the suggestion, Wayne. The two shorter horizontal pieces are intended to help minimize racking/sagging. They are tight within the frame, and glued and screwed to the outer horizontal pieces. There are also two carriage bolts pinning each corner. If I start seeing problems, then I'll add the diagonal piece. :thumb:
 
A diagonal 2 x ? in your frame running from the lower hinge side to the top swing side will help prevent sagging. I've found it helpful on gates I've built.

There's actually a sub trick to this that isn't perhaps immediately obvious. You want the diagonal to lock into the horizontal top and bottom pieces not the uprights. The reason is that if the brace goes into the uprights it will push them apart, whereas the cross pieces are naturally resistant to that due to the somewhat obvious physics of the thing (slowly trailing off as I loose the ability to describe this further)...

Correspondingly you'd want a cable brace like on Vaughns old gate to go from upright to upright because the tension help hold the thing together.

Anyway, here's a highly technical and detailed drawing showing the good and bad way for a diagonal brace..

gate.png

Edit:
I might note a small error in my "good" version where the diagonal is perhaps not going out as close to the edge of the cross pieces as it might and is thus offering less bracing power than it could.. but.. given the level of drawing quality the reader is encouraged to take a bit of leeway with the notion. Some birds mouths cut into the cross pieces to set the brace in would also be encouraged.
 
Last edited:
Vaughan, I have never had a gate without a diagonal brace last very long, and with the diagonals they seem to last forever. Just counting on the face boards to hold it square makes it dependent on the nails not wiggling a larger hole. The diagonal inset into the horizontal pieces removes the primary dependency on nails and screws. Be sure the diagonal goes into the bottom hinge, not next to the top hinge.
 
Thanks, Charlie. Unlike the old gate, I'm not really counting on the face boards to keep the gate square. Instead, I overbuilt the frame itself. (Lap joints at each corner with glue and two carriage bolts each. Plus the two shorter horizontal pieces glued and screwed to the outer horizontals.) Pretty sure it's going to stay solid for a long time.

Got the gate hung last weekend before the cold and snow hit, but didn't get any photos yet, as it was dark when I finished up. It came out looking pretty good and it works great. Only problem now is that the rest of the fence looks ancient compared to the new gate. :)
 
Top