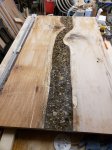
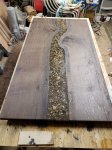
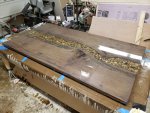
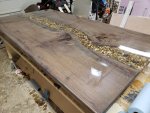
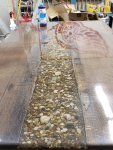
Island epoxy river top fabrication commences.

I just found out there's a local guy with a large CNC who offers slab flattening for others. I need to get in touch with him and see what his prices are.
I know a guy with a CNC who doesn't live too far from you who could flatten that slab too. I can do 24 x 48 without tileing but can do as 48 x what ever if I tile and I wouldn't charge you any thing. We would just have to figure out the logistics.
 
This kitchen is a heck of a big project and it's catching up with me. I have been on my feet all day long with only a couple short breaks. I started pouring the seal coat on my island top at about 2:45. I had already spent several hours on my feet straightening up the garage in preparation for the pour. I hadn't even considered that once you do the pour, you can't just spread it out and walk away. You have to babysit it and use a combination of torch and heat gun to pop the bubbles that appear as air escapes from the slab. 85% of it looks beautiful, but there are a couple of areas that the air bubbles were nonstop! As the resin cures, it got so thick that heat no longer worked for removing the bubbles.
1f641.png
:(

It's not a failure, but I've got more work to do to take care of the bubbles before I can do the flood coat. I've got to relax for a while and then take a hot shower and crash for the rest of the night. I only got about three hours of sleep last night. I hope that doesn't happen again tonight.
 
This kitchen project is going well, but it is taking longer than I thought it would. It's starting to drag me down a bit. I should have been finished with the island top today. It's coming out very nice, but I'm very fussy. It is giving me a heck of a time with air bubbles in the finish layer of epoxy. I have decided that I'm going to let it cure for a day or so and sand out the two areas that I'm unhappy with. I had to order another gallon of epoxy so I can do a third coat.

I hope it works, but I have devised a solution to the air bubble issue. It's going to add a few days to the project, but I want it done right! By the time I'm finished with this top, I'm going to have probably about a hundred hours into it. But it is going to be spectacular.
 
Last edited:
It's only 1/16". The directions call for a 1/16" "seal coat" of the super gloss coating to allow it to seal up the air trapped in any voids and grain. I did so, but the air bubbles just kept coming. It got to thick to allow them to be popped with heat or a spray of alcohol. I sanded down the area with the bubbles and applied another coat, but the darn bubbles are still emerging. I'm going to allow it to cure and sand those two spots again and then pour in a little bit of the deep pour epoxy which is much thinner and takes far longer to cure. That should seal up the voids. Then I'll lightly sand the areas again and make one more thin pour over the whole thing. That should solve the problem.

I have decided to do a test. I'm going to get another small chunk of an oak slab and prepare it the same way I did this table. Then I'm going to do the seal coat with deep pour instead of the super gloss coating. This should penetrate the voids far easier. As I said before, it is much less viscous and takes a lot longer to cure. This should allow the wood to drink it up much more easily and truly seal the surface. I can pour it on and allow it to soak in and come back several hours later and add some more if needed. Then I should be able to do a flood coat without having nearly as much of an air bubble problem.
 
My fussiness pays off. The final coat came out almost flawlessly. I finished the pour only about an hour ago, but it should cure just fine.

I found the secret. Thin layers. I was having a lot of trouble with bubbles in my first two pours. After the second pour, I sanded two areas that kept bubbling, I then mixed up about 6 oz of deep pour and poured it on those areas, and worked it around. I let it cure for four days and then sanded those areas flush. I sanded the rest of the surface and poured another layer.

This time, I only mixed up 96 oz of resin instead of the 140 oz that my calculations called for. I poured it and worked it around. Then I scraped off much more than I did on my first two pours, leaving a very thin layer. It appears to have worked. I'll post pics after I build the cabinets and get it installed.

RT9.jpg
 
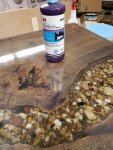
I am proud as heck of this piece! It's basically finished. I just have to flip it over and seal the backside. Then it's ready to be installed. I've got about a hundred hours into this piece, but it is WELL worth it! Look at that shine. It was wet sanded up to 3000 grit, then cut and polished with the 3M Perfect-It EX compound system. Not cheap, but worth every penny. Look at that shine!

RT10.jpg

RT11.jpg

RT12.jpg
 
Top