
- Messages
- 36,131
- Location
- ABQ NM
Robert Horky recently asked in another thread how I hollow out my turned Christmas ornaments. I did one tonight (just the body so far), and I took a bunch of pics along the way. You might want to grab a cup of coffee...I took a lot of pics. ")
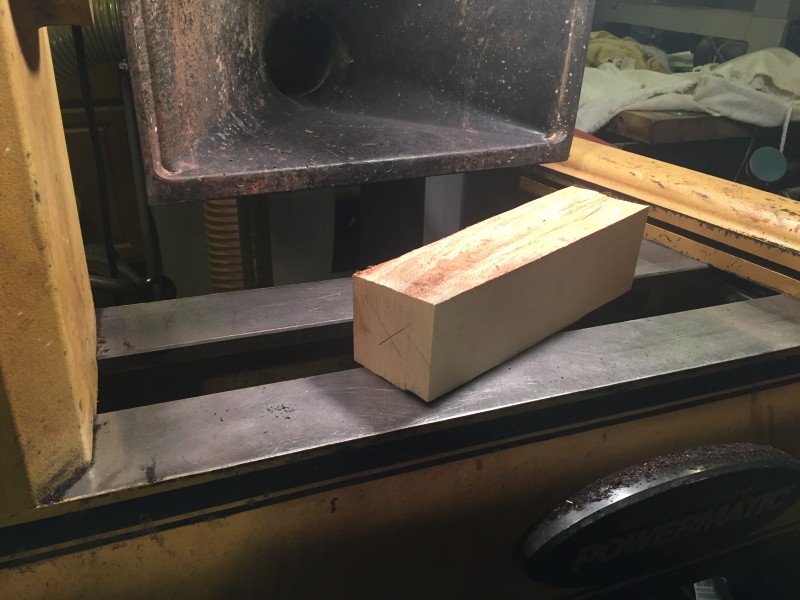
I started out with a chunk of scrap sycamore that came from the center slice of a log section. It was part of the leftovers from cutting out the pith from the log. I didn't bother measuring it. It was probably somewhere around 3 x 3 x 10 inches. It was just rough cut on the bandsaw, and nowhere near perfectly square. I marked the center of each end by drawing a line from corner to corner. Basic stuff.
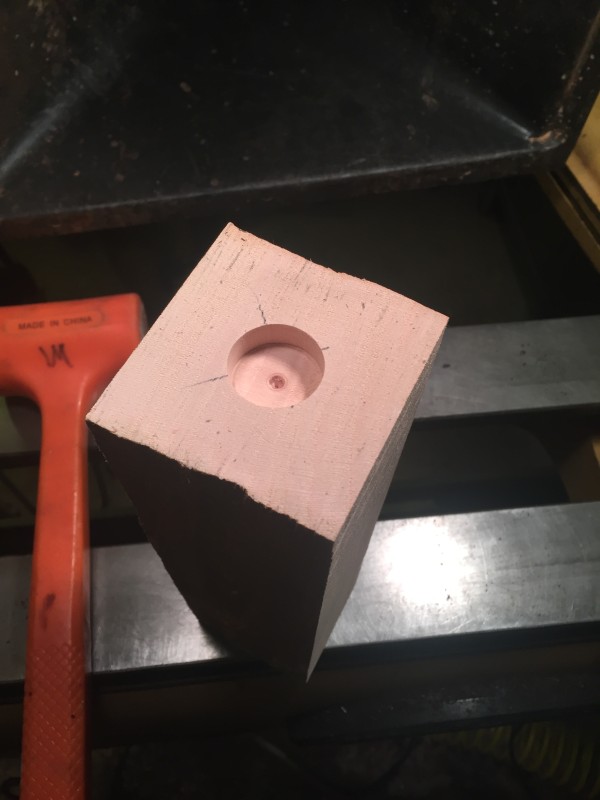
Another look at the "X".

I like to drill a 1" diameter hole on the end that's going to get the spur center. The spur center also happens to be 1" in diameter. How convenient, lol. This hole helps prevent the blank from coming off the lathe when I'm roughing it out and making it round. I use a Forstner bit in the drill press and drill it 5/8" or so deep.
Spur center inserted and seated with a dead blow hammer...
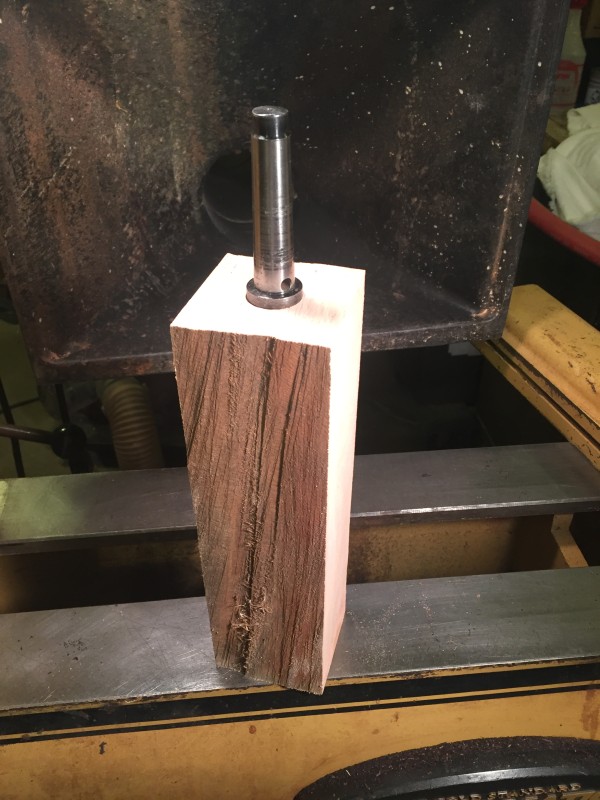
...and the blank is mounted between centers.
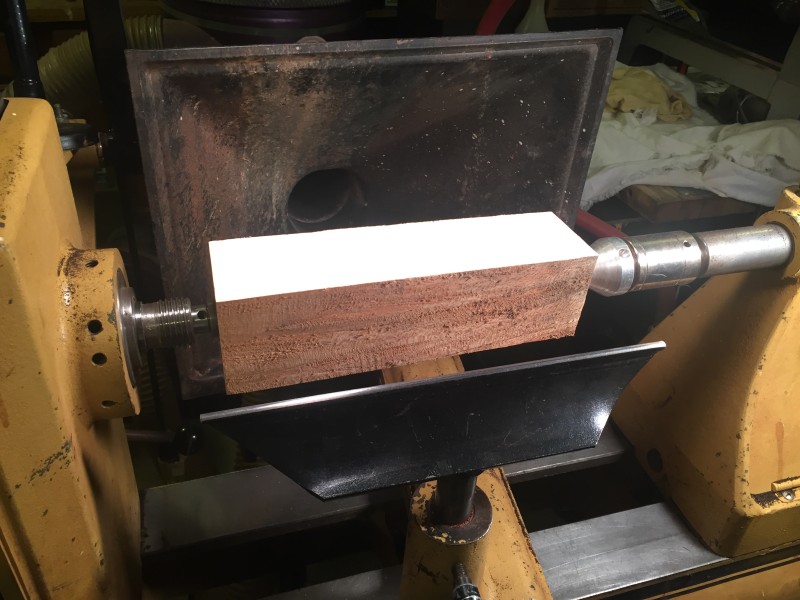
Made round.
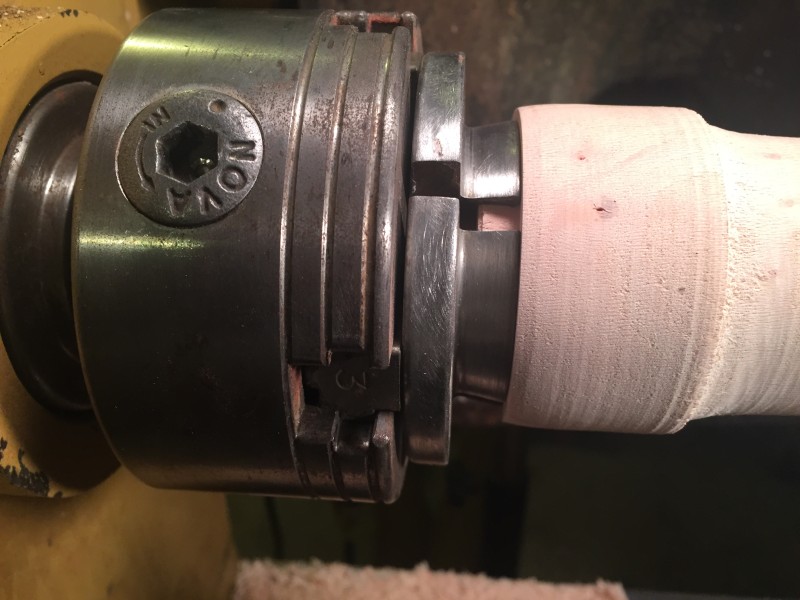
Dovetail tenon cut at the tailstock end to fit a chuck.
A better look at the dovetail. Keep in mind not all chuck jaws are shaped to fit a dovetail. This particular Nova set is.
Mounted on the chuck, but with the live center in place still to help stabilize things.
A closer look at the tenon in the chuck.
And a closer look at the live center at the other end. Remember the hole I drilled? I'll turn that away with a few cuts.
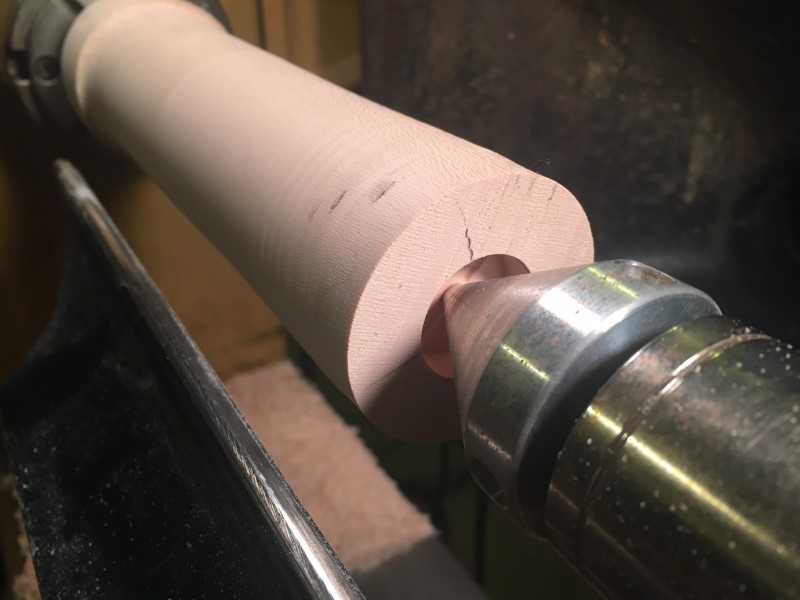
Starting to shape the top of the ornament. You can see I turned the hole away, but I still have the marks from the spur center. Easy enough to fix...just take away more wood. I did these cuts with the tailstock pulled away for a minute.
Spur center marks are gone and the tailstock is back in place.
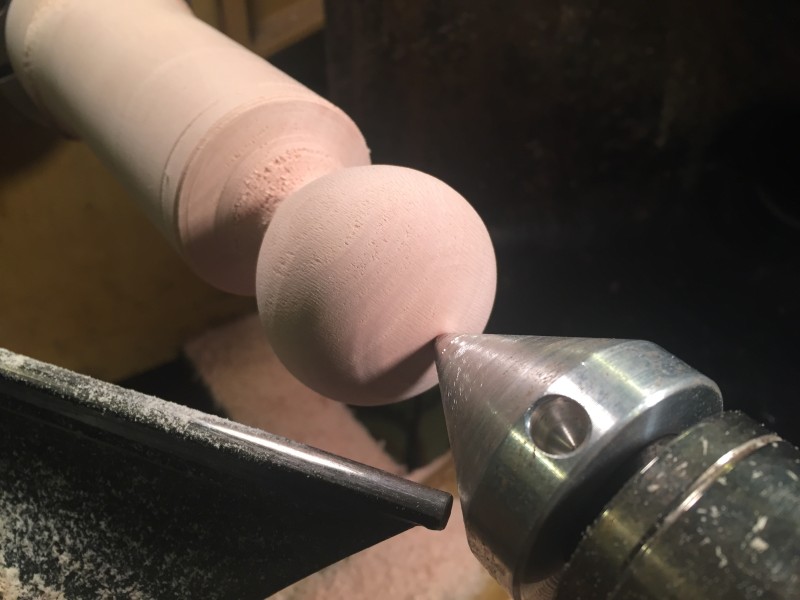
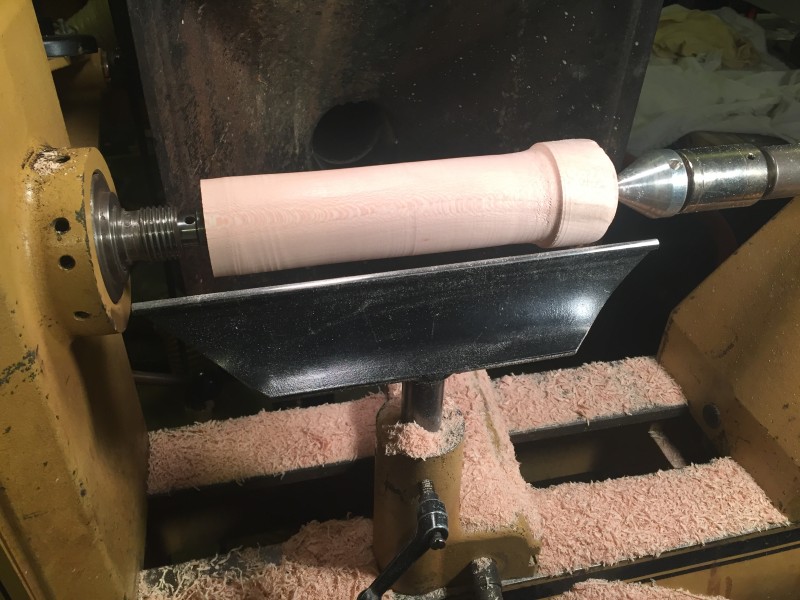
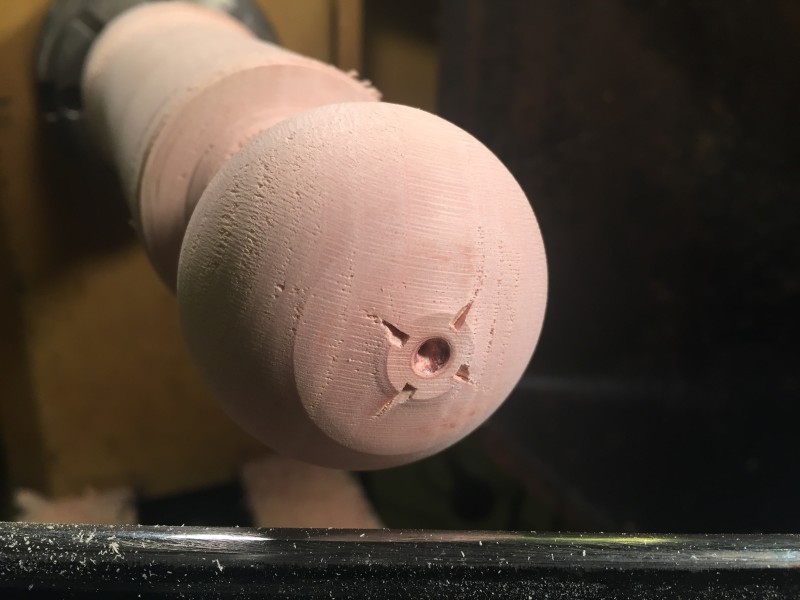
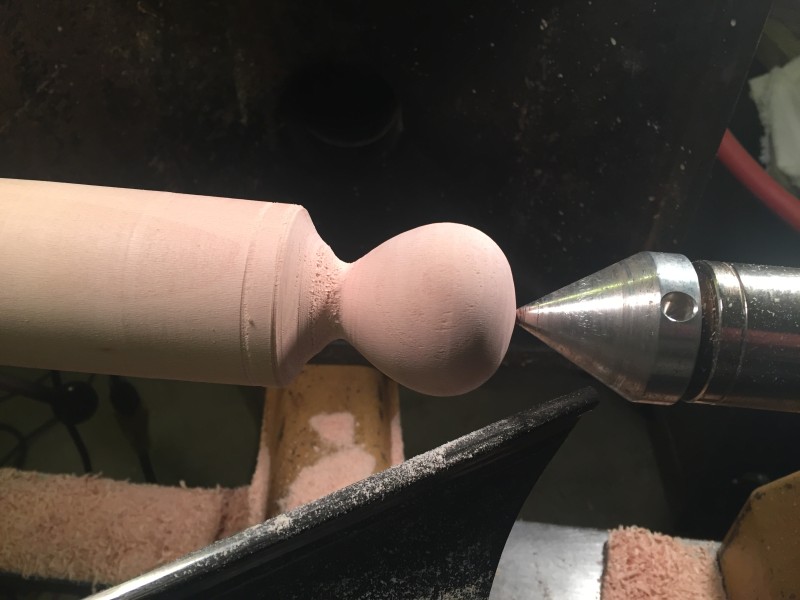
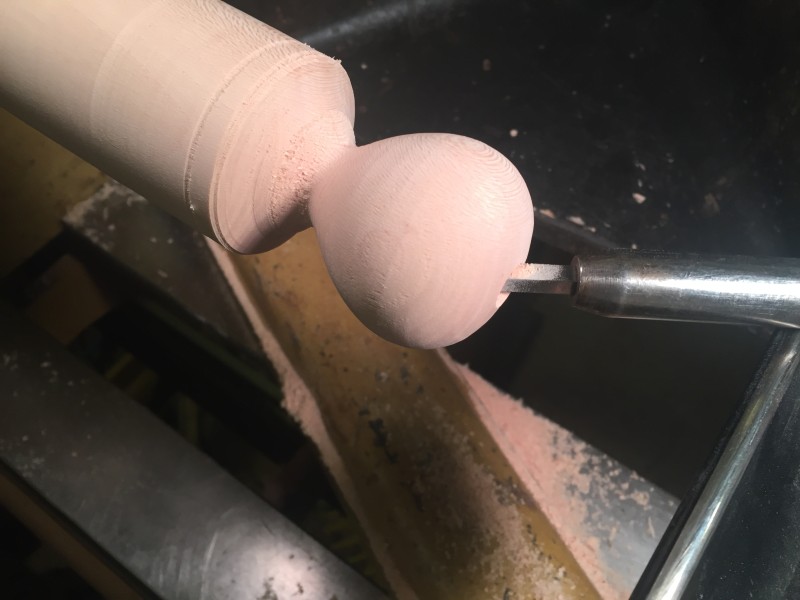
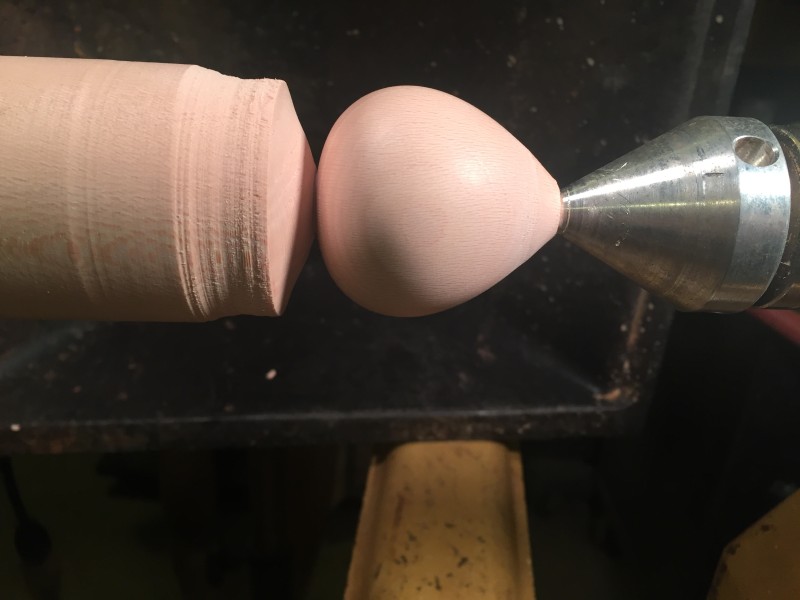
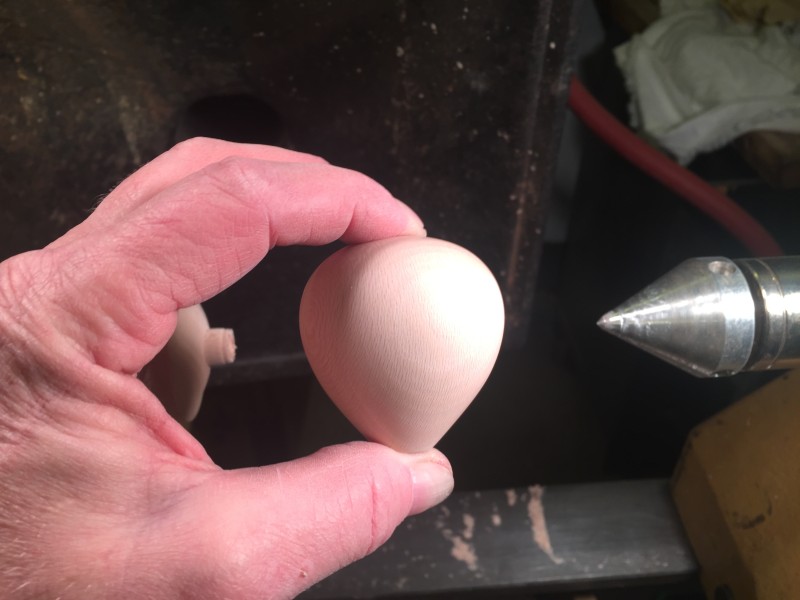
Turned to rough shape, but still needs sanding. The bottom of the ornament will still be made narrower a bit later.
The rest of the photos follow, but I'm going to leave the captions hanging until tomorrow. It's almost 1:30 AM and I need to get a few other things done before i hit the hay. I'll finish up the captions tomorrow. To be continued...
OK, I'm back.
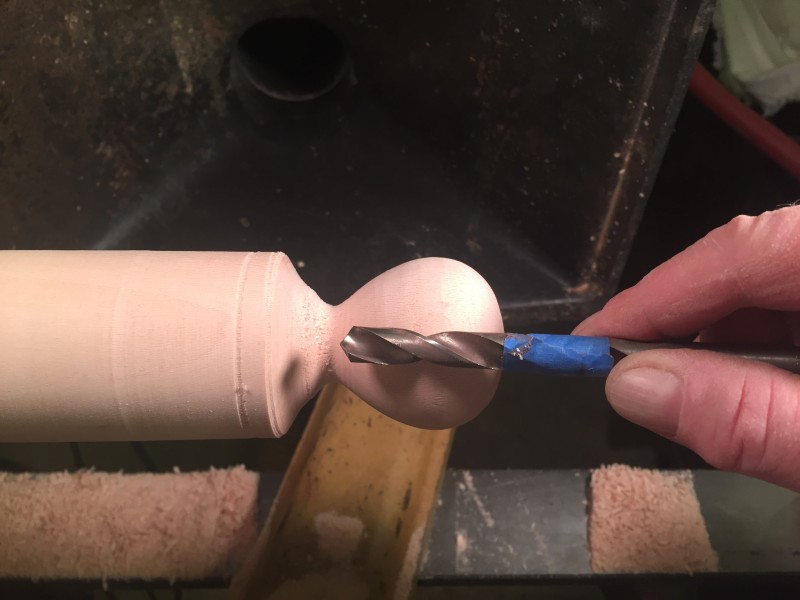
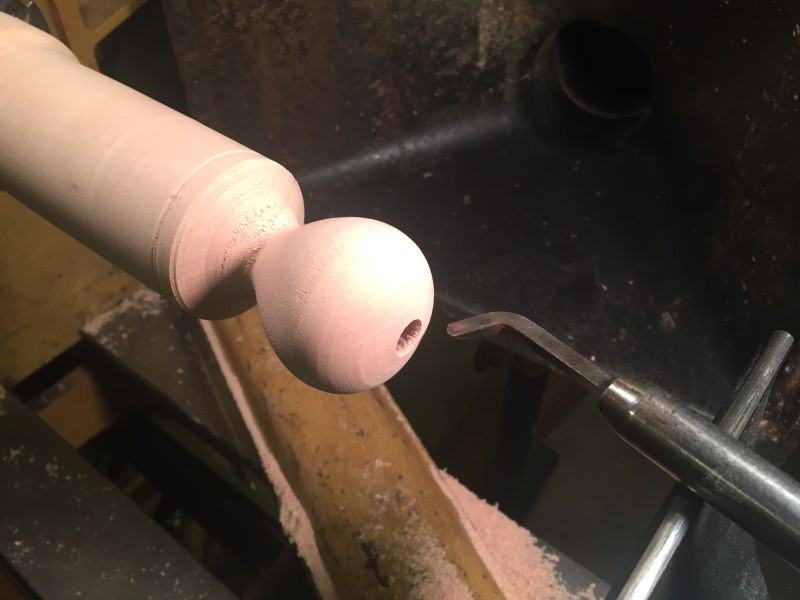
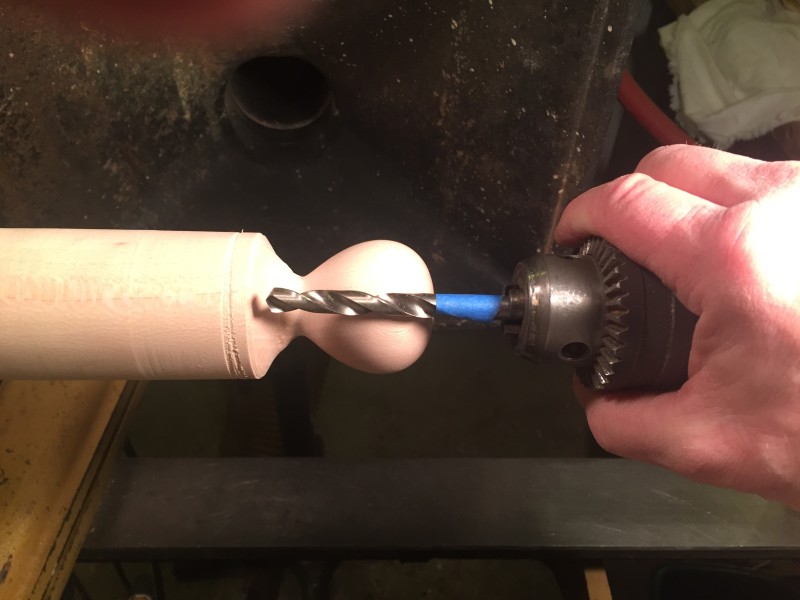
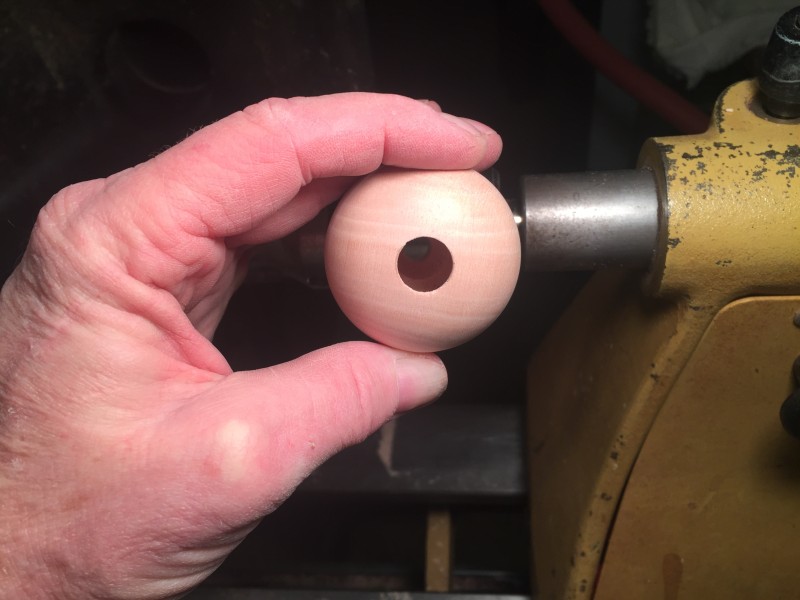
Next step is to drill a starter hole. I use a piece of tape to mark the bit so I don't drill all the way through the bottom. That gives me a guide to know how deep to go when I'm hollowing. Once the depth has been marked, I use a drill chuck in the tailstock to make the hole.
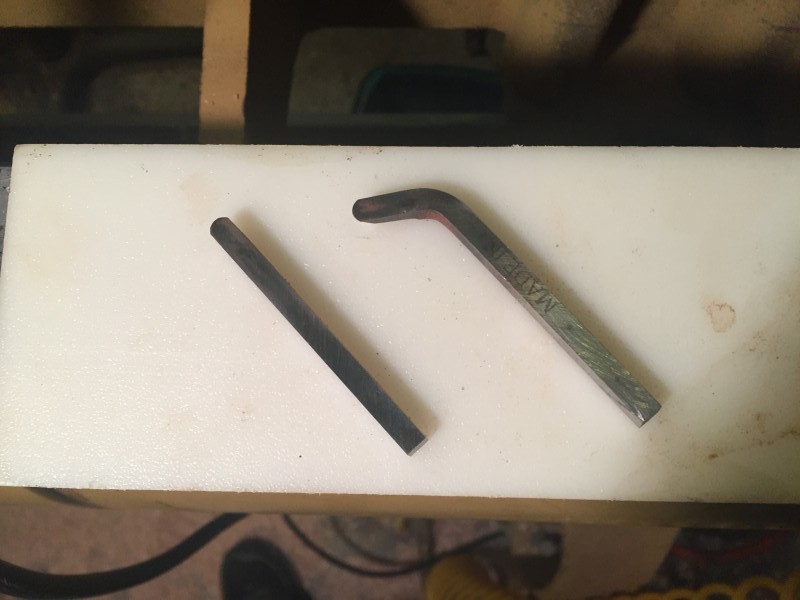
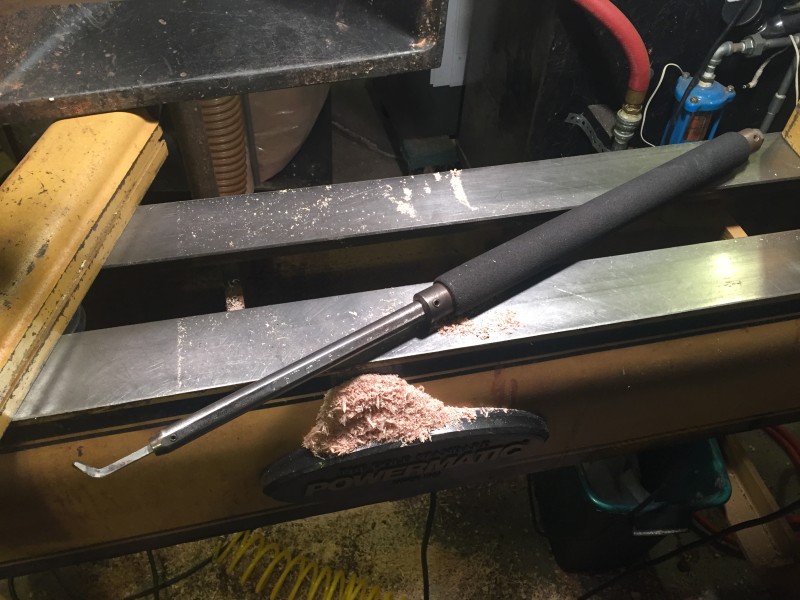
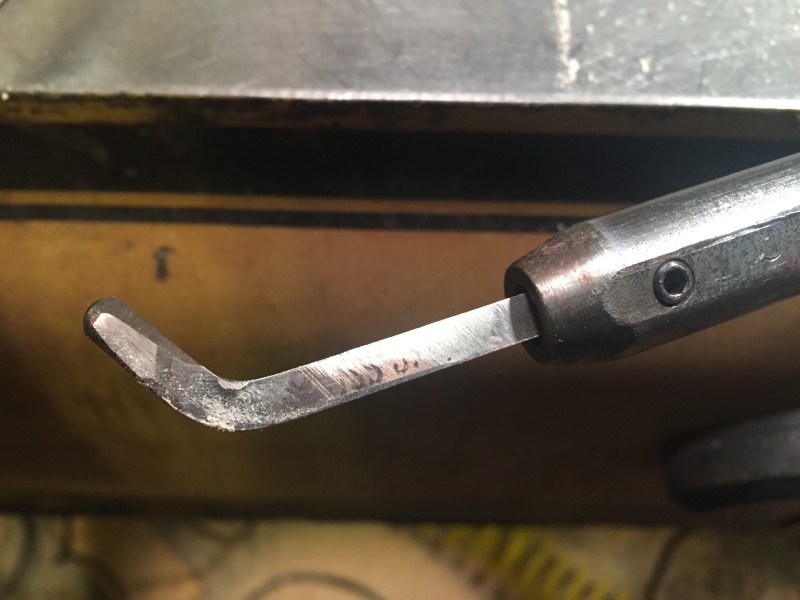
These are the tool bits I use in an Oland-style handle Randy Privett (Monster Lathe Tools) made years ago. They are 3/16" HSS bits. The bent one was made for me by Randy. I have no idea how he bent it, but I'm certain heat was involved.
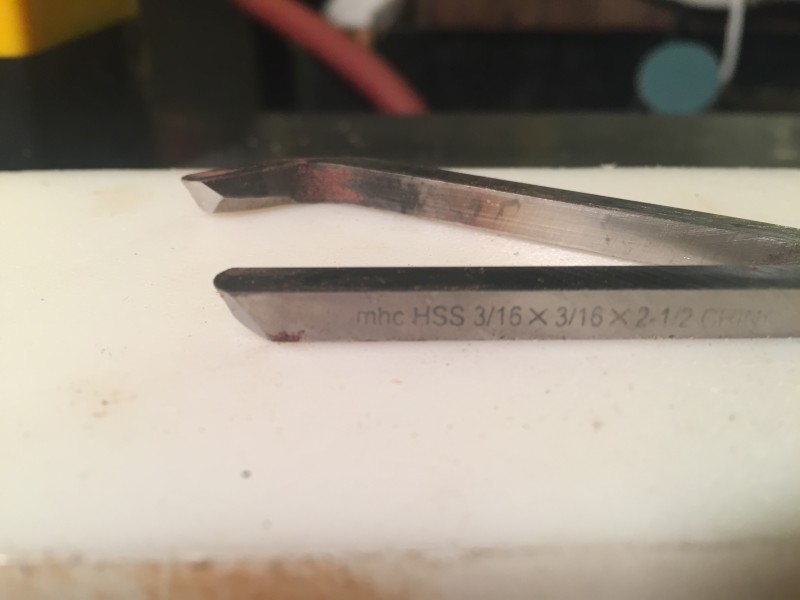
These bits cut with a burr edge, and are ground just like a scraper. I use the same angle setting on my dry grinder for all my scrapers, including these.
Here's a shot of the boring bar and handle that holds the tool bits. The bottom side of the bar is flat, to help keep the cutter in the proper orientation.
The bits are held with a small hex screw.
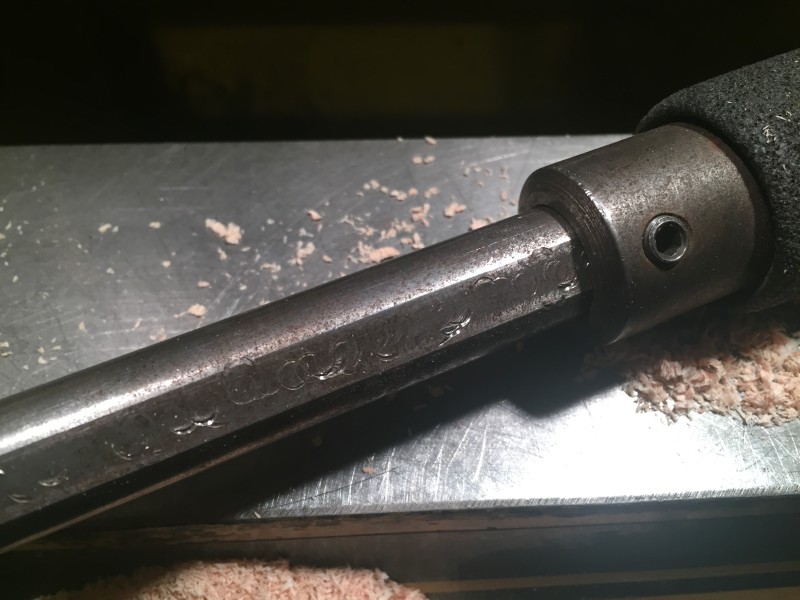
The boring bar is held in the handle the same way. The handle is hollow, so the bar can be set to a variety of lengths. You can see the divots from many years of random adjustment.
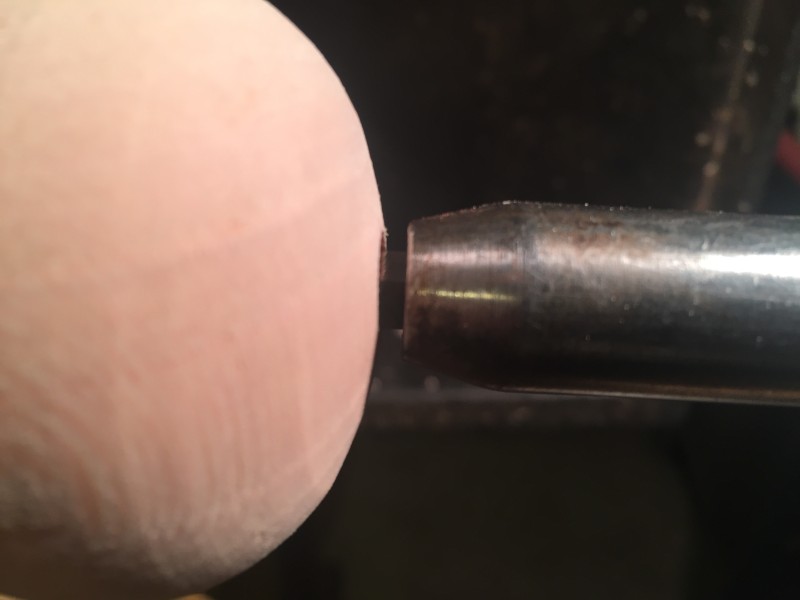
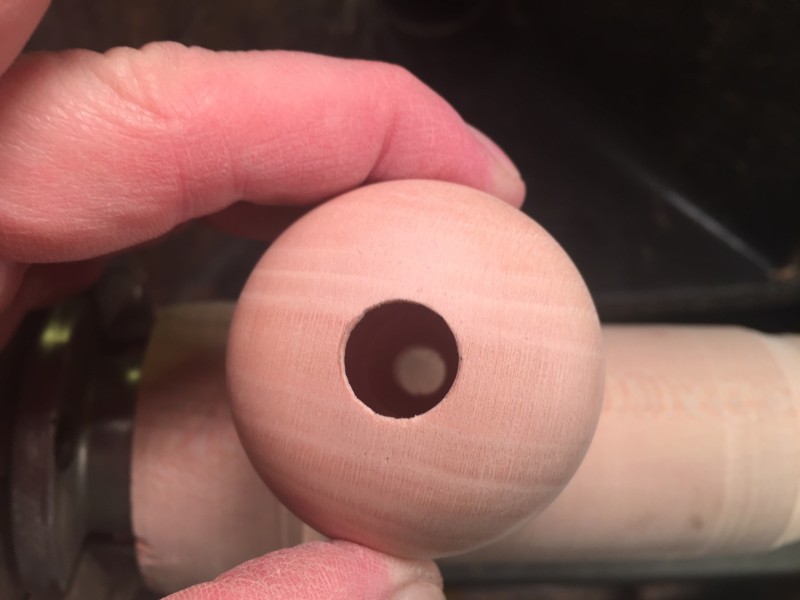
With the straight cutter touching the bottom of the pilot hole, I get a quick visual idea of the "go no deeper than this" limit for this particular ornament.
The straight bit can reach about 75% of the interior.
Then I switch to the bent cutter to hollow the top part of the interior.
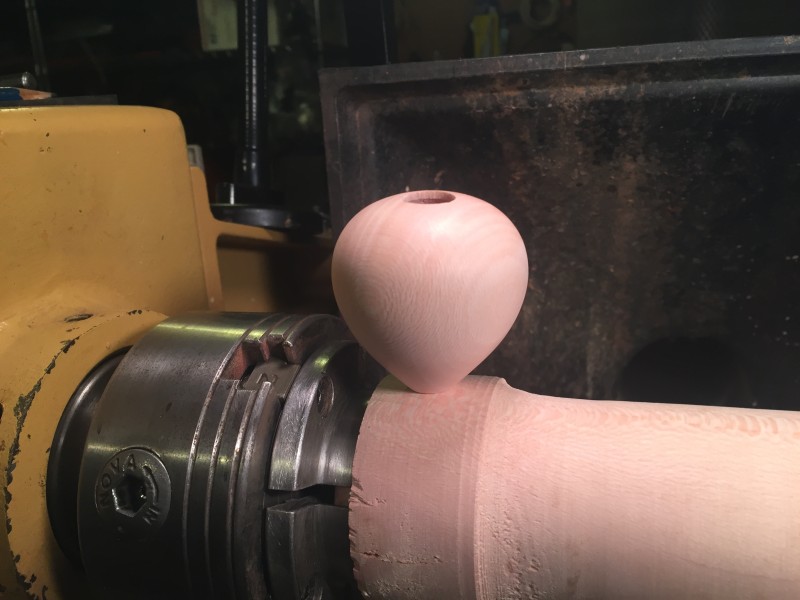
Hollowing is done. Total hollowing time is just a few minutes, since there's not a lot of wood to remove.
Most of the outside gets sanded to 400 grit. I use a pneumatic Grex 2" ROS with the lathe spinning at 100 rpm or so. It speeds things up and eliminates concentric circles, but hand sanding would also work.
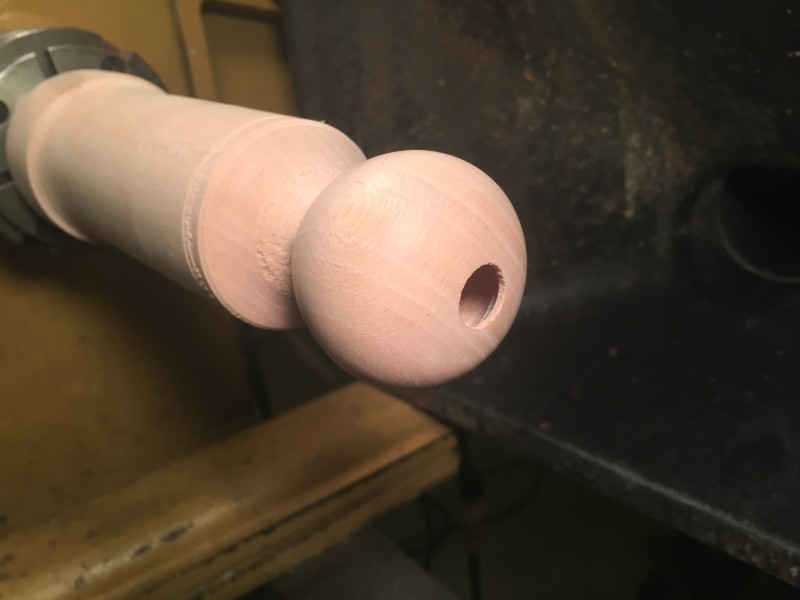
Next step is to drill a hole all the way through the bottom. I arbitrarily use a smaller diameter bit for the bottom hole, partly because it allows me to hang the ornament on a 16 penny nail driven vertically into a board while the finish is drying. (I'll bring up the other reason in a minute.) Again, I use tape as a depth stop, and use the drill chuck in the tailstock to make the hole.
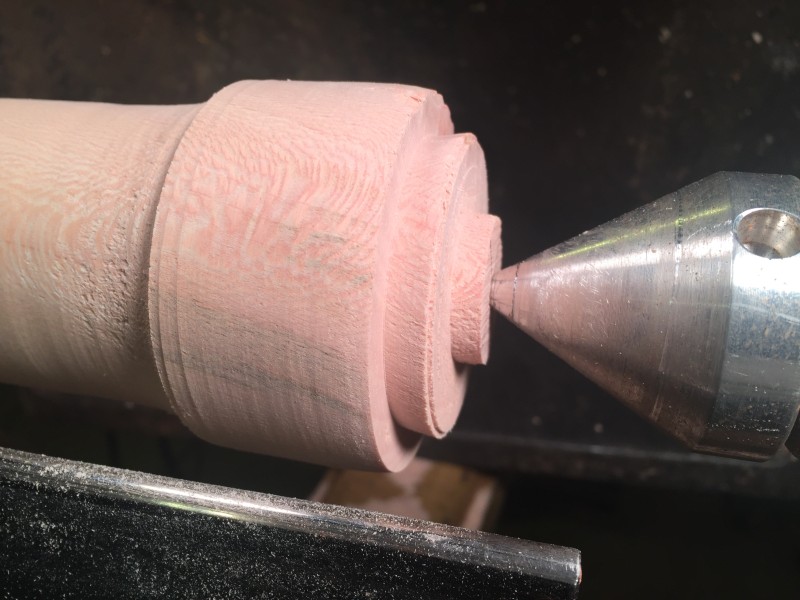
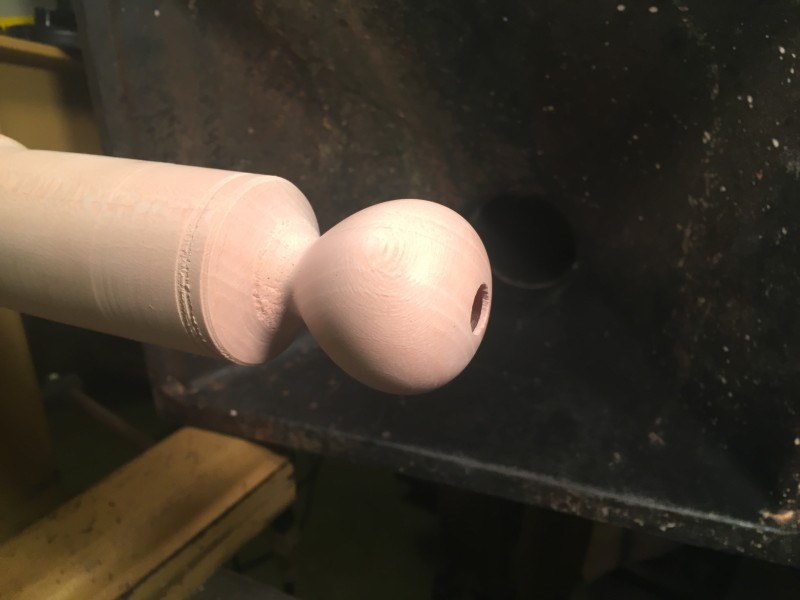
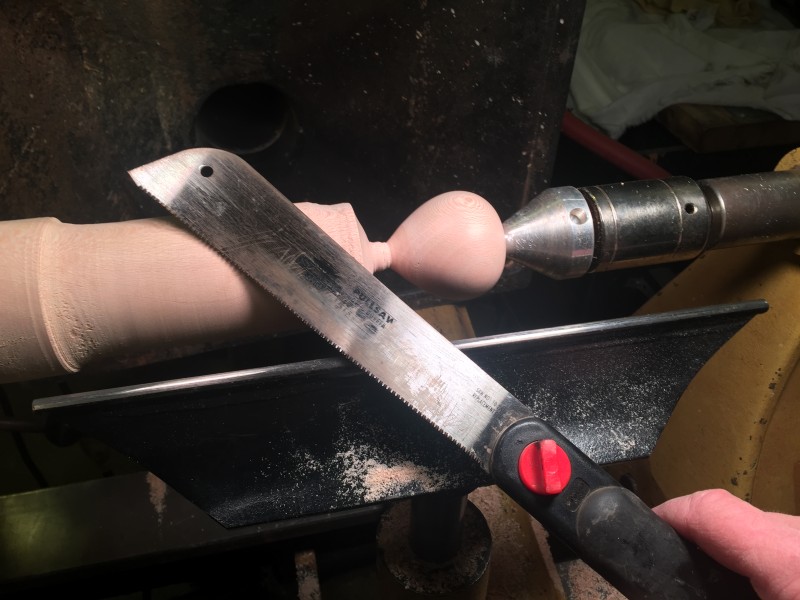
The hole has been drilled, and the bottom of the ornament has been turned to final dimensions. The diameter at the bottom of the ornament is only slightly bigger than the hole. I use a little razor saw to cut it off the lathe.
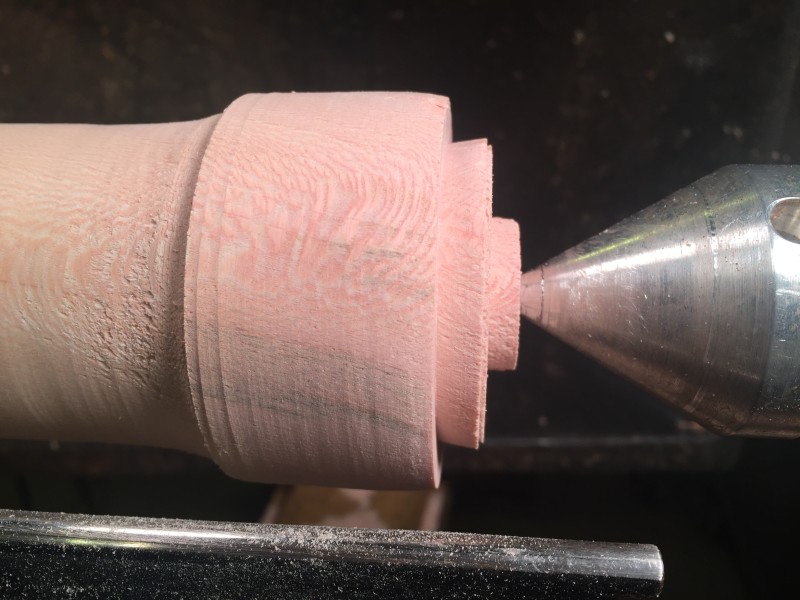
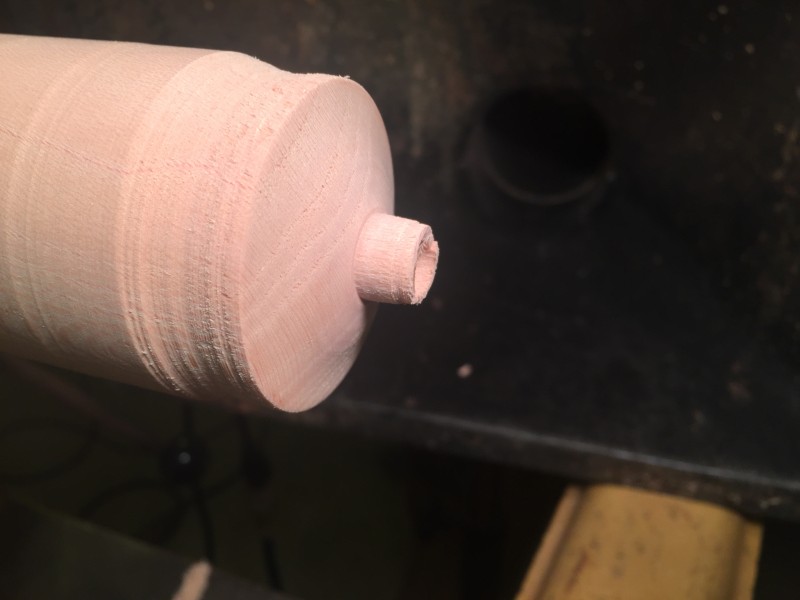
I leave a small tenon on the blank that's still in the chuck, and size it to fit the hole in the top of the ornament. (This is the other reason why the bottom hole is smaller than the top hole.)
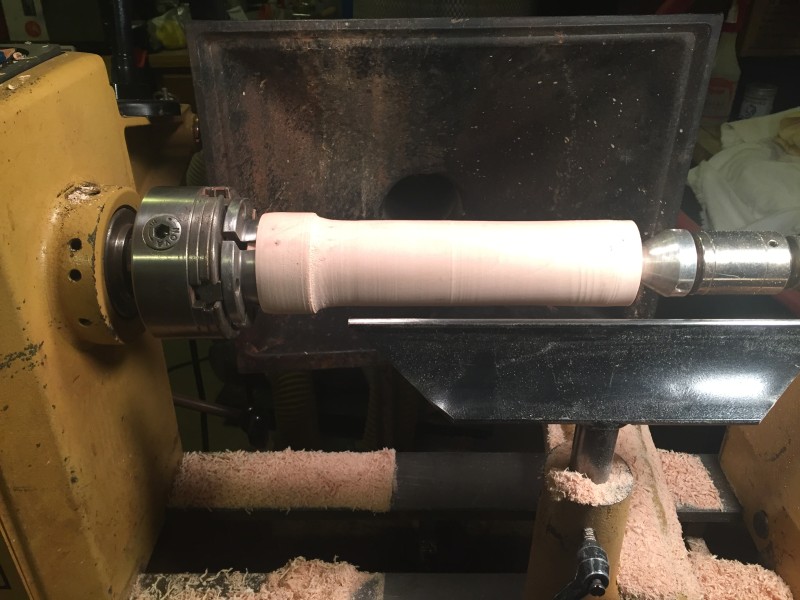
I reverse the ornament and hold it gently with the live center to do the final sanding on the bottom portion of the body.
All done and sanded.
It's hard to get a photo with a phone showing the hollow inside, but I had to try.
Ready for finish. This one will get a few coats of Formby's Tung Oil Finish, then buffed and waxed. Still need to turn the finial and icicle for it, but I should be able to get to them later this week. I can probably get two more ornaments out of the blank, too.
If you made it this far, thanks for reading! Feel free to offer suggestions or ask questions.
Edited to add...Part II of this saga is continued in this thread.
I started out with a chunk of scrap sycamore that came from the center slice of a log section. It was part of the leftovers from cutting out the pith from the log. I didn't bother measuring it. It was probably somewhere around 3 x 3 x 10 inches. It was just rough cut on the bandsaw, and nowhere near perfectly square. I marked the center of each end by drawing a line from corner to corner. Basic stuff.
Another look at the "X".
I like to drill a 1" diameter hole on the end that's going to get the spur center. The spur center also happens to be 1" in diameter. How convenient, lol. This hole helps prevent the blank from coming off the lathe when I'm roughing it out and making it round. I use a Forstner bit in the drill press and drill it 5/8" or so deep.
Spur center inserted and seated with a dead blow hammer...
...and the blank is mounted between centers.
Made round.
Dovetail tenon cut at the tailstock end to fit a chuck.
A better look at the dovetail. Keep in mind not all chuck jaws are shaped to fit a dovetail. This particular Nova set is.
Mounted on the chuck, but with the live center in place still to help stabilize things.
A closer look at the tenon in the chuck.
And a closer look at the live center at the other end. Remember the hole I drilled? I'll turn that away with a few cuts.
Starting to shape the top of the ornament. You can see I turned the hole away, but I still have the marks from the spur center. Easy enough to fix...just take away more wood. I did these cuts with the tailstock pulled away for a minute.
Spur center marks are gone and the tailstock is back in place.
Turned to rough shape, but still needs sanding. The bottom of the ornament will still be made narrower a bit later.
The rest of the photos follow, but I'm going to leave the captions hanging until tomorrow. It's almost 1:30 AM and I need to get a few other things done before i hit the hay. I'll finish up the captions tomorrow.
To be continued...OK, I'm back.
Next step is to drill a starter hole. I use a piece of tape to mark the bit so I don't drill all the way through the bottom. That gives me a guide to know how deep to go when I'm hollowing. Once the depth has been marked, I use a drill chuck in the tailstock to make the hole.
These are the tool bits I use in an Oland-style handle Randy Privett (Monster Lathe Tools) made years ago. They are 3/16" HSS bits. The bent one was made for me by Randy. I have no idea how he bent it, but I'm certain heat was involved.
These bits cut with a burr edge, and are ground just like a scraper. I use the same angle setting on my dry grinder for all my scrapers, including these.
Here's a shot of the boring bar and handle that holds the tool bits. The bottom side of the bar is flat, to help keep the cutter in the proper orientation.
The bits are held with a small hex screw.
The boring bar is held in the handle the same way. The handle is hollow, so the bar can be set to a variety of lengths. You can see the divots from many years of random adjustment.
With the straight cutter touching the bottom of the pilot hole, I get a quick visual idea of the "go no deeper than this" limit for this particular ornament.
The straight bit can reach about 75% of the interior.
Then I switch to the bent cutter to hollow the top part of the interior.
Hollowing is done. Total hollowing time is just a few minutes, since there's not a lot of wood to remove.
Most of the outside gets sanded to 400 grit. I use a pneumatic Grex 2" ROS with the lathe spinning at 100 rpm or so. It speeds things up and eliminates concentric circles, but hand sanding would also work.
Next step is to drill a hole all the way through the bottom. I arbitrarily use a smaller diameter bit for the bottom hole, partly because it allows me to hang the ornament on a 16 penny nail driven vertically into a board while the finish is drying. (I'll bring up the other reason in a minute.) Again, I use tape as a depth stop, and use the drill chuck in the tailstock to make the hole.
The hole has been drilled, and the bottom of the ornament has been turned to final dimensions. The diameter at the bottom of the ornament is only slightly bigger than the hole. I use a little razor saw to cut it off the lathe.
I leave a small tenon on the blank that's still in the chuck, and size it to fit the hole in the top of the ornament. (This is the other reason why the bottom hole is smaller than the top hole.)
I reverse the ornament and hold it gently with the live center to do the final sanding on the bottom portion of the body.
All done and sanded.
It's hard to get a photo with a phone showing the hollow inside, but I had to try.
Ready for finish. This one will get a few coats of Formby's Tung Oil Finish, then buffed and waxed. Still need to turn the finial and icicle for it, but I should be able to get to them later this week. I can probably get two more ornaments out of the blank, too.
If you made it this far, thanks for reading! Feel free to offer suggestions or ask questions.
Edited to add...Part II of this saga is continued in this thread.

 .
.