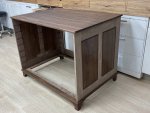
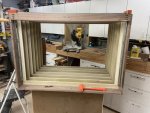
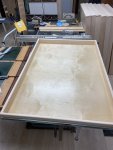
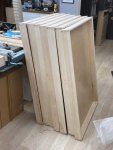
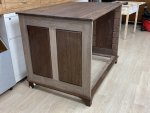
Map Chest in walnut

How about using figure 8 washers to attach the top. A Forstner bit counter bore in both the frame and the overhang of the top would let you attach the washers to the top of the frame and then attach the top to the washers from the outside of the frame. I used these once when I had a similar problem, and they worked quite well.


Charley
Considered this but the overhang of the top is not deep and since the cabinet is tall I'm afraid they would be visible.
 
so what did you decide to do on the top anchoring and the dividers
I think I have it figured out.

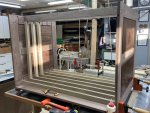
I glued in the back rail of the dust frames.
IMG_0718.JPEG
The next step is to attach the top and bottom dividers. These will go in with pocket holes and help hold everything square during the next phase.

Then I will temporarily install the side stiles of the frame to position the slides and install those. Once the slides are in I will cut a 3/4" plywood 'plug' that will fit the inside dimensions of the case snugly. One for the top and one for the bottom. These get installed with lots of pocket hole screws around their perimeter and about 1/32" shy of the top of the case. Then I turn the entire thing upside down on the top, center it, and screw through the 3/4" ply into the top. I'll elongate all the holes to allow for movement and that 1/32" gap will allow me to pull the top down tight onto the case sides.

Next while it is still upside down, I'll build the balance of the dust frames in place, drop in the plywood, and glue in a trim piece to hold it in place. Once all the dust frames are complete I can put the plywood plug into the bottom, attach the base, and turn it over on its feet. Then I go to the ER for the hernia. :ROFLMAO: :ROFLMAO:
 

Attachments

  • IMG_0717.JPEG
    IMG_0717.JPEG
    174.3 KB · Views: 13
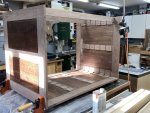
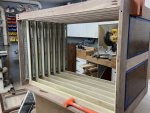
Made a minor change to the schedule because my plywood supplier could not get my material to me today. I installed all of the slides, drawer dividers and the outside stiles of the dust frames (thanks Jim Delaney for the tip on Old Brown Glue. This would have been impossible, for me anyway, to attempt with anything else.) I'll get the plywood 'ceiling' in tomorrow. I need to get started on the drawer boxes and want to do all my drawer test fitting before I seal up the case and put the rest of the dust panel parts in. Initially I had planed on setting this on the floor and get inside the case to install the slides, but it was just too easy to do it on the bench. Now comes the hard part. The slides alone weigh in at 65#. I guess the case, as it sits, is tipping the scale at about 110#. My assistant, though quite lovely, has never claimed to be muscular. We'll find out tomorrow when we attempt to lift this beast off the bench and place it on the floor. 🥴 :LOL:

IMG_0721.JPEG

IMG_0722.JPEG
 
Nearing the finish line and looking great. Don't you have one of those HF hydraulic lift tables? Just right for this.
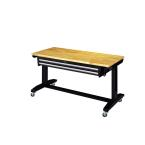
Funny you should mention that. I have been thinking a lot about the adjustable Husky bench that John Pollman and several others here have. Wanted to buy one about 2 months ago but they were out of stock. I went on a watch list and they finally became available last week. There were about 150 of them in stock. I hesitated 24 hours and they were all gone! 😖 Popular item!

So, now I'm waiting again. The HF unit only lifts to 27.5". The lift feature is good but the work surface is small and is too low for a comfortable work height or to serve as aux support for the TS, router table, etc.
 
Them’s some big drawers! Finished assembling the drawers today. Sides are 5/8” hard maple, bottoms are 1/2” prefinished ply radiated and ing grooves. Bottoms are glued in to add rigidity and keep things square. They’re heavy too. With the faces on they are 22 lbs each.

Tomorrow they get a quick application of danish oil and the slides will be attached. I’ll test fit them in the case and once I’m sure everything fits and works I can finish the installation of the dust frames and top.

F902B998-A284-45A0-8DBC-CFD6F8573827.jpeg

97282B9D-0722-4C91-BBCA-EBB539B43110.jpeg
 
We'll find out tomorrow when we attempt to lift this beast off the bench and place it on the floor.

Three words; hydraulic lift table. I put off buying one despite others claims to their usefulness. The last Horror Fright sale plus coupon made it about $200 for the 1000 lb version and I bit. True, you have to store it when not in use. Like pipe clamps it can be awkward to store. However, just like those pipe clamps, when you need it and its there. . . the storage issue fades quickly.

I have seen people trick them out with work surfaces but, I feel it is a little unstable for that. I don't think it is going to fall over or anything. It just has too much wiggle to be a work surface for me. I just use it to move things up and down. Humping one end of something onto the lifting table, swinging the other end up and pumping with your foot beats musceling heftier weights up onto and off of things. Christmas is coming . . . . just sayin'.

My thoughts have strayed here a few times, but the inability to make it serve as a suitable work surface (both wiggle and not high enough) combined with the storage issue has kept me from taking the plunge. things in my small shop must serve more than one purpose to be considered.

As a compromise, I have been giving very serious consideration to the Husky (HD) adjustable height workbench. In fact, I have one in my shopping cart and just need to pull the trigger but am having doubts as to whether I should get the 46" or the 52". That will serve many functions - outfeed, auxiliary infeed, work bench, and lift table. I even bought a bunch of 'T' track when it was on sale so I can rout it into the top to help with hold downs.

1607008586686.png
 
That Husky is a nice looking bench and should serve you well for everything you mention, but it seems to be limited as a lift table. "Table height adjusts from a 26 in. to a 39 in. H when using the included leveling feet. Table height adjusts from a 29 in. to a 42 in. H when using the included casters." 300lb capacity. Not trying to sway you from getting one, but sure do recommend you put a real lift table on your wish list.

Just for grins the HF 1000 lb capacity table goes from 11" to 38", and happily lives outside under a tarp until needed. Northern tool has lift carts that go even higher (for more money). If required, wiggle can be greatly reduced with a couple of wood X braces, and shallow ramps can overcome height differences when moving heavy things. I added a piece of 3/8" steel to the top of mine to increase the size of the work surface and increase stability, (doubles as a welding table).

You work alone with heavy, awkward pieces, moving from bench to vehicle, floor to bench, etc., anything you can do to minimize the risk of screwing up your back forever is well worth the money and effort. Voice of experience here.
 
Just for grins the HF 1000 lb capacity table goes from 11" to 38", and happily lives outside under a tarp until needed. Northern tool has lift carts that go even higher (for more money). If required, wiggle can be greatly reduced with a couple of wood X braces, and shallow ramps can overcome height differences when moving heavy things. I added a piece of 3/8" steel to the top of mine to increase the size of the work surface and increase stability, (doubles as a welding table).
Was not aware of the height range. I must have been looking at another lift table. Will look again. Thanks.
 
I have the husky table version without the drawers. I do love using it and working on stuff at it due to the height adjustment.
The heaviest item I've had on it was the drum sander to get it out of the truck and onto its stand, which was about 250 lbs. It's also nice to setup as a feed table next to the tables when cutting ply.
I'll probably get the other lift at some point myself, but don't regret getting the husky table at all.

Edit: BTW, the center bottom cross support on mine can move to the rear to allow for stuff to roll and store under it. Not sure how much doing that affects its max capacity, but just fyi.
 
Top