- Messages
- 8,633
- Location
- Thomasville, GA
Computer Assisted Maker Wall
As some of you might be aware, I've been doing various updates to my 3D printer as well as my CNC. I've also built a stand-alone laser engraver after initially installing a laser module on my CNC machine. I've been using all of the machines a bit over the past several months while also doing some of the updates. Here's what I now have to play with:
Right to left: CNC, laser, 3D printer.

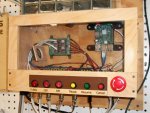
For the most part, my CNC is much as it has been since building it in early 2015. I ran it via a USB cable because that was the simplest way to get operational. The changes I made are to the electronics. First, I added a Raspberry Pi 3 for wireless connectivity. Next, after getting familiar with the J-Tech BOB (break-out-board) when setting up my laser, I updated to one of those on my CNC. I also added a few operational buttons. This became a composite update since the small panel holding the switches and buttons was done on my 3D printer and the label for them was created on my laser engrave. Overall, I can cut something 17.5" wide by 51" long - longer if I run a board out both ends of the machine. Power supplies are mounted on a board under the CNC bench.


I started the laser engraver build after not being totally comfortable with the idea of the laser module enduring the vibration of the CNC when mounted directly on the spindle mount. I had some makerslide and other parts left from the CNC build, ordered a few more items and got to work. The overall work area is about 22" on the X axis and 18" on the Y axis. The electronics include an RPi3, J-Tech BOB and the J-Tech laser driver module. Power supplies for the system are in the large box on the wall and include 24VDC, 12VDC, and 5VDC supplies.


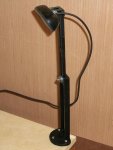
The changes to my 3D printer include a RAMPS 1.6 board, which meant a change from an Arduino Uno to an Arduino Mega 2560. With that combination, I added the Reprap Graphic Smart Controller that I mounted in a printer box and placed near the front of the printer enclosure. In place of the old, smaller lcd display, I printed a panel to hold the power switches along with reset buttons for the RPi and RAMPS. The thing in the photo on the right is not an old-timey phone - it's a Logitech webcam on a mount I printed.


Thanks for looking!

As some of you might be aware, I've been doing various updates to my 3D printer as well as my CNC. I've also built a stand-alone laser engraver after initially installing a laser module on my CNC machine. I've been using all of the machines a bit over the past several months while also doing some of the updates. Here's what I now have to play with:
Right to left: CNC, laser, 3D printer.

For the most part, my CNC is much as it has been since building it in early 2015. I ran it via a USB cable because that was the simplest way to get operational. The changes I made are to the electronics. First, I added a Raspberry Pi 3 for wireless connectivity. Next, after getting familiar with the J-Tech BOB (break-out-board) when setting up my laser, I updated to one of those on my CNC. I also added a few operational buttons. This became a composite update since the small panel holding the switches and buttons was done on my 3D printer and the label for them was created on my laser engrave. Overall, I can cut something 17.5" wide by 51" long - longer if I run a board out both ends of the machine. Power supplies are mounted on a board under the CNC bench.


I started the laser engraver build after not being totally comfortable with the idea of the laser module enduring the vibration of the CNC when mounted directly on the spindle mount. I had some makerslide and other parts left from the CNC build, ordered a few more items and got to work. The overall work area is about 22" on the X axis and 18" on the Y axis. The electronics include an RPi3, J-Tech BOB and the J-Tech laser driver module. Power supplies for the system are in the large box on the wall and include 24VDC, 12VDC, and 5VDC supplies.


The changes to my 3D printer include a RAMPS 1.6 board, which meant a change from an Arduino Uno to an Arduino Mega 2560. With that combination, I added the Reprap Graphic Smart Controller that I mounted in a printer box and placed near the front of the printer enclosure. In place of the old, smaller lcd display, I printed a panel to hold the power switches along with reset buttons for the RPi and RAMPS. The thing in the photo on the right is not an old-timey phone - it's a Logitech webcam on a mount I printed.


Thanks for looking!

Last edited:

