My Windsor chairs attempt

Ken is the chair seat all one piece and was it part of the same tree the spindles came from? If its glued up i cannot see the line. :)

Great progress I bet the edges on those tools dont last too long gouging out that white oak eh?
 
Rob, the seat blanks are pine. They are not glued up. I went to my Amish sawyer acquaintance and asked if he could find me a board about 2.25" thick, 20" wide, and 10' long. He did. It was green and roughsawn when I put it up in my attic a year ago, after crosscutting it into suitably long blanks and sealing the ends. After air drying for a year, the moisture content is around 8% or so. Before I start shaping the seat, I flatten one face, then plane the other face parallel to it at 1 7/8" thickness. The pine is nice to work. Many chairmakers glue up the seat blank, but I like making it from a single board, and that's how Elia taught me.

Windsor chairs are typically made of a few different woods. The legs are maple, the spindles and continuous arm is white [or red] oak, or ash, and the seat is a soft wood, usually pine, but could be poplar. The chairs are usually painted, alleviating any funny looking wood combo appearance.
 
Shaping the seat

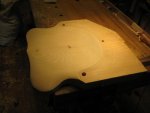
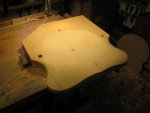
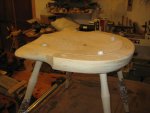
Using a drawknife, inshave, spokeshaves, travisher, compass plane, scrapers and a bit of sandpaper, the seat top is just about done. I have to say my little wooden compass plane is a real gem for this work.

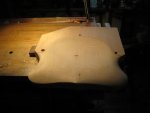
IMG_8538.jpgIMG_8540.jpgIMG_8545.jpg

Next step is to shape the underside of the seat. Note that the wood to the rear of the deck is still there, gives me something to clamp on to as I work. A holdfast would be nice, but I don't have one, and my bench top configuration isn't suited to one.
 
Using a drawknife, inshave, spokeshaves, travisher, compass plane, scrapers and a bit of sandpaper, the seat top is just about done. I have to say my little wooden compass plane is a real gem for this work.

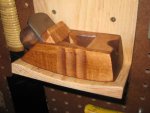
Ken, that does look very comfortable. How about a little closer look at that compass plane when you get a chance? Did you find it out in the wild?
 
I don't remember which forum, SMC or woodnet, but someone had it and the travisher for sale. Both made by Crown. The travisher is nice, but tricky to use, I have not yet mastered it. The compass plane is a joy in the hands. It is radiused along both length and width. Just a few inches long.


Crown compass plane.jpg

And just as an aside, my father was not a woodworker, and had no tools to leave me. But a previous owner stamped my dad's initials "JW" on the compass plane and travisher. So I get a chuckle when I see them.
 
This chair is really looking great!!! One of these days I'll muster up the courage to try one. When I do I'll remember what I learned from your thread here for sure!

Thanks for taking the time to post the build!
 
back at it

Finished shaping the seat. Bored and reamed the leg holes. Starting to look like a seat.

For those interested, Curtis Buchanan has a terrific set of videos free on youtube that walk you through the process of building a Windsor.And Peter Galbert has a wonderful blog [go to petergalbertchairmaker.com] that has a huge amount of information


.IMG_9778.jpg
 
Bob, that's aluminum foil. I put the legs in my drying kiln and the foil keeps the place where the mortise will be from getting too dry. You want a very dry tenon in a not so dry mortise; over time, the tenon swells, the mortise shrinks, and the fit gets tighter.
 
a little more progress

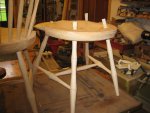
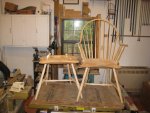
The bottom structure is done on one chair. At this point, I am completing them one at a time. I had to redo some parts, as they dried the fit was poor.
Anyway, here is where it stands:
IMG_9783.jpgIMG_9781.jpg
 
Looks great Ken. Peter Galbert is coming here (Port Townsend) this coming April to instruct a class in building a Fanback Windsor Chair. I thought about it Ken, especially after your threads, but I just don't have quite the time to jump down that rabbit hole yet.
 
Top