New Shop Journey

Maybe I'm wrong, but not sure you should have a ground at the subpanel. Mine has a smaller cable ran back to the main house panel/ground and grounded there on the water line and an outdoor stake.. Having a ground at the sub can create a ground loop from my understanding. This may be a more current method since we have more electronics in our homes and shops.
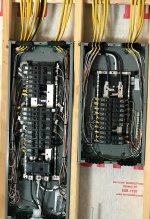
There is a science to this that I am not well versed in. In this build the two hots, the neutral and a ground all come from the primary panel on the house and connect to the 1st service panel (four wires). The ground and the neutral are isolated from each other at the sub panels (no jumper or connecting screw mechanism).

The ground bus in the first sub panel ties to the Ufer ground. Here is where one would be concerned about a ground loop if the ground and neutrals were bonded in the sub panels. The first sub panel has a 100amp main for all of the breakers in that panel. The first sub panel feeds the second sub panel via an 80 amp breaker which feeds all of that panel's breakers.

Again there are four wires between the panels; two hot, a neutral and a ground all isolated. The ground bars are screwed to the panel's chassis so both of the panels are grounded to each other and to the Ufer ground via the first panel's local connection to that ground.
 
Ufer ground

Yep those are amazingly good for your climate and zone (y)

Maybe I'm wrong, but not sure you should have a ground at the subpanel

Current code (as of the last time I looked circa 2014.. so.. slightly out of date but probably still accurate ish..) is to still split the neutral and ground in the sub panel and wire the ground & neutral back to the main separately as you say. But also to have an independent ground from the ground bar on the sub panel to earth as well. My understanding is that this deals with some transients and lightening strike issues somewhat better.

I don't think you can get a meaningful ground loop from that (certainly not like if you miswired the panel...).. at least from my admittedly slightly hand waving understanding of how ground loops form.
 
If the sub panel is in a separate building, you should add a ground rod outside that building and connect it to the ground buss in that panel. If you get a lightning strike on or near that separate building and it gets into the building panel, you want it going to ground there, and not all the way back through feeder and into your main panel in the other building to get to ground. this provides more than one ground on the system, but does not function as a loop. It only carries current during a lightning strike.

Charley
 
I had this happen "before this ground rod was part of the code" when lightning hit a 50' tall pine tree adjacent to my shop. It sheared off the top 16' of pine tree, which landed behind my shop, and cut a 2" wide slot in the bark of the tree all the way down the tree and out one root. With the metal skinned passage door to the shop only a few feet away from the tree trunk, it hit that too, and it and cut two slots through the 3/8" plywood soffit above each of the top door corners, to get into my shop wiring, then went through it to the shop panel. It then went through the ground and neutral wires in the underground feeder cable too, and and through, the crawl space of my house to the main panel on the opposite end of the house and to ground. There have been two vertical ground rods and one buried horizontal ground rod and all are connected to the ground buss in the main panel since back when I bought the house and replaced all of the house electrical service equipment and added these ground rods. Our Alaskan Malamute was lying on the family room floor just above the UF cable when it hit, and she got quite a shock, launching her into the air and making her extremely afraid of thunderstorms from then on. The old style TV that was next to her had a rainbow effect on the picture tube when it was running after this, until I was able to degauss it. This was caused by the sudden and intense magnetic field surrounding the cable with the lighting running briefly through it and this is what affected to dog too.

Inside the shop, there were only a few flash marks visible between the neutral and ground busses within the shop panel, but I had to replace the wires running above the passage door that was hit. This cable controlled my shop lights and the switches were on the opposite side of the door from the panel.

Two days later, I had taken the day off, and I was lucky enough to be sitting at my bench in the shop when the 240 volt outlet behind my radial saw (opposite wall from the panel and not being used) suddenly flashed and popped, igniting the paper covering on the wall insulation (no wall covering at that time). Had I not been there in the shop when this happened, I would surely have lost my shop. After I turned the breaker off, a glass of water put the fire out, which was by then, burning up the surface of the insulation and almost to the ceiling.

The later code (this happened about 22 years ago) now requires this additional ground rod at the sub panels when they are located in different buildings, but that afternoon after that fire, I was installing that additional ground rod for my shop and Hi-Pot testing all of the shop wiring to determine how much more of the wiring needed replacing. Fortunately, only that one cable to the light switch needed to be replaced. The plug on the radial saw was welded into the wall outlet and couldn't be unplugged, so both of them needed replacing too.

Yes, I have become a believer in having a very good electrical grounding system on my property. There is a small 30 amp 240 volt panel in my well house 200+ ft from the house and it has it's own ground rod too. All of my outdoor wiring between my house, shop, well, and even the main electric service from the street are all under ground now. I have also connected the cable and telephone company's grounds to my ground system to keep everything at the same ground potential. If not all kept equal, the differences between them can flow through your TV and telephone electronics and destroy them. Keeping them all at the same potential is the best way to avoid this damage. differences in voltage between these grounds can frequently cause damage to electronic equipment, but the damage is much less likely if they are all tied together at their service points into the house.

Charley
 
Boring update . . . . Been running wire
rolleyes.gif
 
Boring update . . . . Been running wire
rolleyes.gif
Think about it as something absolutely essential for your machines to work, and for you to see, given the fact that you don't have windows on your shop. Easier said than done I admit it, those boring tasks that we all have to do from time to time do break my ww momentum.
 
Like all projects there comes a phase where a lot of time is spent but not much seems to happen. Today will be similar in that I am auditing the electrical to make sure nothing was missed. ...
Ditto! Pulling wire was a snap compared to the amount of time taken to installing the outlet boxes. I don't think I ever got so tired of cutting wire, twisting conductors, screwing terminals, testing . . . yada-yada!
 
I dunno, I sort of find this phase of projects kind of satisfying because you have a definite checkbox that's checked when your done.. plus you get to check off a bunch of little checkboxes along the way.
 
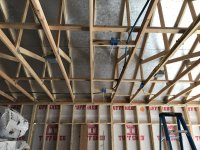
Lots more done that doesn't show ;-) Ceiling j-boxes that will feed along the DC drops down to wireways with twist-locks in them to power the milling area and the tablesaw / router table.
New Shop (123).jpg
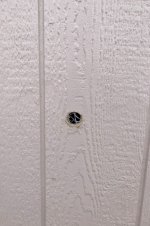
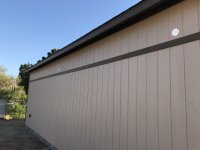
The orange dot on the wall near the top splate on the right is the 6" entrance for the ducting from the cyclone bump-out.
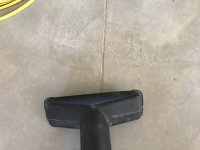
I am already loving how well the sealed control joints clean up with the vac.
New Shop (124).jpg
They are only about 1/16" deep but, still catch the finer spoil in this messy environment.
 
Last edited:
It's a banner day. All electrical wiring finished and tested. Outlets and so forth will go on after the drywall. I need to finalize speaker placement as I want those wires in the wall as well. We marked the locations of the four gable vents; two at each end to allow the area requird to make the ridge vent work properly. All in all a very productive week around here.
 
Are you going to hang, tape and mud or bring in a contractor for a portion or all of that work?
I'm curious about this also. Although I've done my share of drywall in the past when it comes to such a large undertaking, and including ceilings, somehow I would find the budget to hire a pro crew. A building your size would take me weeks to complete and I'd have to muster up several volunteers to help with the ceiling. A pro crew would have everything hung in one day and would have everything ready for primer in three. IMHO
 
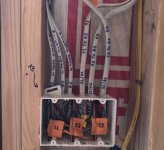
Nice organization and wire positioning in your panels. Most non-pro (DIY) electricians make a rats nest out of their panels. Yours look nice and well laid out.

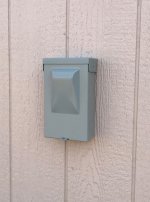
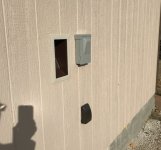
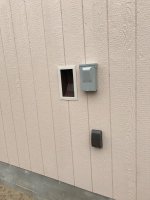
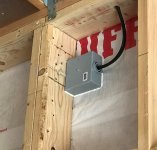
If you get an inspection done, you may have problems with the use of the inside boxes for outside connections. All boxes must be accessible and not hidden behind wall coverings. If you intend to put sheetrock, plywood, etc. on the inside walls, these boxes should be at the inside wall surface, so the cover plate can be found and removed easily after the inside wall is finished, or it should be on the outside wall and accessible from the outside the same way. It can be recessed, but cannot be located where it will be completely hidden inside the wall and not accessible from either side. Your photo seems to look like the 4" square box will become hidden inside the wall, and was my reason for this comment. If it will not be hidden within the wall it will not be a concern.

Charley
 
Top