New Shop Journey

Thanks guys. Walking around in it after the insulation went in was a different experience than when it was an echoing shell. Being able to run the HVAC while we worked on the DC shed was a plus too. Now with the drywall installed it takes on another personality once again. I was just out walking around in it and comforting my traumatized wallet with the fact that LOML and I have been working toward this for nearly 20 years. It feels good. I can't wait to get started on the area between house and shop.
 
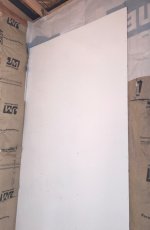
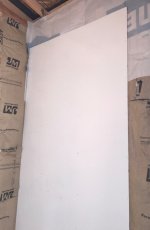
I used some pre-finished interior wall panels. Total cost over using plain hardboard and priming and painting it? About $20; a no brainer. The surface is like a glossy melamine and should reflect light well. This will only be important when you really need to see back into those nooks and crannies so I wanted to take care of it up front.
New Shop (272).jpg
I'm not super concerned about looks in this shed so I just tack the panels up with 1/4" crown staples.
 
why did you leave a 2 ft section open on the back section on both sides of hall way?
Good question. Answer: HVAC. If I ran the walls all the way up I would apparently have created a captive space that had no direct cooling. This creates a challenging space to manage temperature-wise. I looked at a few options.

One - Through-wall fans, one blowing in and one blowing out of the area that has the indoor units in order to circulate the whole air mass so that is gets equally treated.
-- I was pretty close to going with this one despite the near-constant hum of the fans.
Two - Add a third indoor unit.
-- The original design was for three units but, installation effort, cost and having an indoor unit in my "spray area" made this one less desirable.
Three - Make the opening between the walls and the gap at the top of the walls match some HVAC math.
-- The guy helping us out works with structures that have restrooms the size of my shop o_O. This version won in the end.

We went with the math and I can confirm that the whole building feels like one big, consistent space as far as temperature management goes.
 
Well should you have to go with a fan. My Dad used to have a ceiling fan over the wood stove area of his shop. He'd kick it on with the stove running and made the shop feel pretty consistent heat wise. For the summer, he'd reverse the fan and honestly did a good job of pushing air to all corners of the shop. You could feel a slight breeze on the far end 35' away blowing down the wall. Could always test that out with a box fan pointing up or down to see if it would help with circulation. A good ceiling fan is pretty near quiet.
 
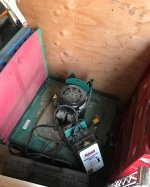
Nearly time to wire up the DC shed disconnect, outlet and remote control / mag-switch. I have been trying to remember what I did with the blower / motor / switch assembly for the last month. Searched more places than I want to admit . . .. can't find it!

Things have been getting shuffled around trying to make do while working on the new shop. I finally went on a mission in the wee-hours this morning (trying to beat the heat) and found it buried at the front of a trailer on the property.

New Shop (273).jpg

You wouldn't think you could misplace something like this (???).
 
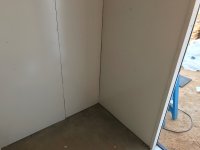
Some of the progress on the DC shed. Insulation (for sound deadening) is in and most of the wall board is up. I was just going to use 1/8" hardboard like I did for a couple other small buildings in the area. I then started picturing myself looking for something I dropped or wanting to do maintenance in the shed and thought white walls would be smart. I found a white glossy finished 1/8" hardboard product at Lowe's.

New Shop (272).jpg

I did some on the fly figuring (in 100 degree heat) and figured a few extra bucks was worth not having to paint them. I am not going for a magazine layout in this shed, I just want some thing to protect the insulation while I am slamming around in there on disco night
biggrin.gif
. Seriously though, I poked a couple tears in the insulation already while moving around in the close quarters and I am pretty careful.

New Shop (274).jpg

A strip of 1/4 round and some dabs of white caulk and I'll be happy. You may notice the 8' panels in the 9' to 10' structure. The upper area is just going to be exposed building wrap. Even I would have to try to poke holes in things up there.
 
Thanks guys. One of the things that keeps me from blushing is that LOML and I worked long and hard towards what we now call our "forever home". Our goal here is to make this a happy place for us, our kids and our grandkids. We do not have to worry about getting our money out of the things we do here. We joke that we are only leaving this place horizontally; someone else gets to worry about all that ;) .

My own experiences contribute of course but I do need to give a tip of the hat to nearly everyone that ever posted anything about their shop here. I have absorbed, percolated, pondered, and sometimes outright stolen a lot of great ideas. When I started the serious scribbling of this shop design I followed my own old adage about things read on the forums. Read everything, keep what helps, pass along what works and pass over the rest. A lot of folks who I've never met have had an unknowing hand in this beast. (y)
 
Last edited:
your tapers know how to do it!!!
Yeah. He mentioned something about rolling it as the 4x12 long joints come out smoother that way. I thought he meant something like a paint roller(???). Usually I am an "open mouth, inseret foot" type of guy but this time I held my tongue ;-) Then I saw him using one of these. It let him do long continuous joints. Pretty cool.
 
Top