New Shop Journey

My first step in setting up a tablesaw is to assure it is in the right spot. Once all the hardware gets bolted on these things get a bit awkward to shift around. I go for level on tablesaw bodies before I add anything else. This gives me a reference point for everything that comes after.

For those who haven't done this a few times here is a method I use for putting on wings.
New Shop (410).jpg
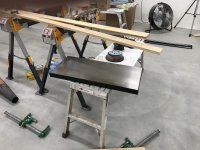
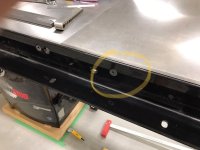
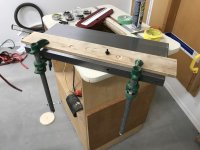
A piece of scrap a bit wider than the wing holds it roughly in place while you pinkie-tight the first few bolts. This assumes you put the fence rails on before the wings.
New Shop (411).jpg
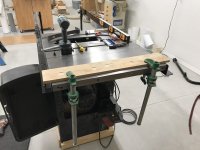
Once I have the left wing on and true I add the right.
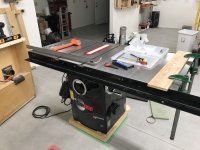
New Shop (412).jpg
I have enough cast iron sections to build out the side table area. I have done this on other saws and the increased mass is welcome. It will also solve the only bad thing I have ever had to say about the 3HP PCS Saw Stop; the side table is chintzy, made of too soft of a wood for the frame and is basically strong on "show" and weak on reliability.
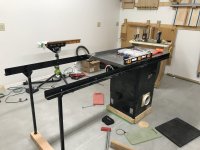
New Shop (414).jpg . New Shop (413).jpg
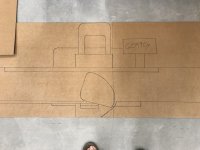
I posted earlier in this thread about my paper dolls for grown ups. They were definitely worth the little time they took to make.
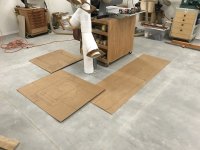
New Shop (415).jpg . New Shop (416).jpg
 
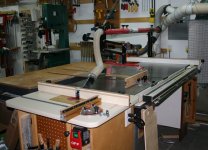
The other cast iron wings I have are from my old hybrid saw.
22124-Mar-2010.jpg
The long edge holes match up much as many C-man, Delta, and apparently Saw Stop wings do. The fence rails beyond the position of the stock cast iron wings on the Saw Stop expect the pine framed side table and are not in line or use spacing like my Biesemeyer rails.

I remember the fear and trepidation of drilling my first cast iron wing. It literally took me a lot of forum reassurance and waiting until the following day before I performed the anticlimactic operation. I have gotten much more comfortable with field mods over the years.

Portable machine shop ;).
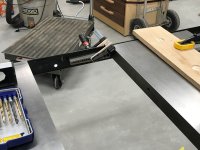
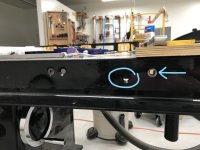
New Shop (417).jpg
Wood table hole in circle, new hole at arrow.
New Shop (418).jpg
Now I just need to do this . . .
New Shop (419).jpg
. . . a few more times.
 
Last edited:
Of course the stock leg mount location would end up right at a spot where a wing rib will interfere. I pondered shifting the last wing over and using some sort of a 3/4" filler strip for about 2 seconds. Then I accepted that I had come this far and it was no time to wimp out now. I will do a field mod on the legs mounts another day. I think this is enough for today.

New Shop (420).jpg
 
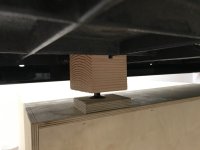
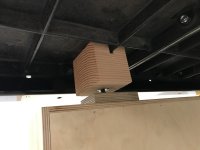
My percolation on how to modify the leg attachment points eventually led me to abandon the legs altogether. I fashioned these blocks from some dimensional lumber.
New Shop (421).jpg
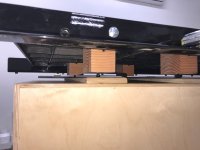
The slot will accept the webbing in the casting under the wings. The height is adjustable and there will be four total.
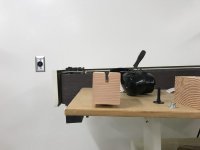
New Shop (423).jpg . New Shop (422).jpg
They will be at the edge of the wing, front and back, where it attaches to the rails. The small block of plywood is just to let me grab a pic of how they work. A larger piece of ply now stretches front to back to distribute the weight.
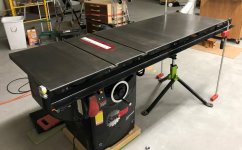
New Shop (425).jpg
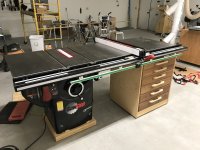
I can't tell you how long I have waited to see this all together again.
New Shop (424).jpg
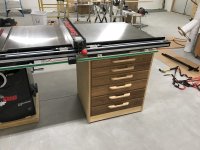
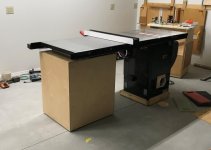
The accessory cabinet acting as the table support gives the saw a sort of gravity defying look 😬
New Shop (427).jpg
 
Last edited:
I don't recall if I mentioned . . . I am repeatedly experiencing the anticipated "It's Christmas!" sensation now that I am finally unpacking some things. There was a flurry of manpower suddenly availablel toward the end of the shop packing so some things got packed a little helter-skelter.

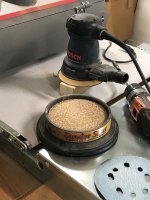
I found my long lost drill press dust port attachment and my 'sander sitter' packed in with the Saw Stop hardware???

New Shop (429).jpg . New Shop (430).jpg

Although it doesn't make much sense it does provide an extra smile here and there as random objects, long since packed, appear in unlikely places :D
 
I don't recall if I mentioned . . . I am repeatedly experiencing the anticipated "It's Christmas!" sensation now that I am finally unpacking some things. There was a flurry of manpower suddenly availablel toward the end of the shop packing so some things got packed a little helter-skelter.

I found my long lost drill press dust port attachment and my 'sander sitter' packed in with the Saw Stop hardware???

View attachment 118095 . View attachment 118094

Although it doesn't make much sense it does provide an extra smile here and there as random objects, long since packed, appear in unlikely places :D
Sounds a little like my move from Houston to Dallas... moving truck arrived before packers were finished, so they just brought everything to the garage and packed it as it went into the truck.... we had about 10 or so boxes marked "Garage Miscellaneous"... we found the toaster in one box, a blender in another,
it got to a point where if we couldn't find something we figured it was in a box marked "garage Misc".... Fun part was, the garage in Houston was attached and you entered the garage from the house through the kitchen.... the house in Dallas the garage was attached, but no entry from the house.... you had to go out the family room door, across the back patio to the garage entry door... we only lived there for 6 months before I was transferred back to Houston.... we still had half a dozen boxes marked "garage misc" when we got back to Houston, where the garage was detached and sitting on the back side of the lot.
 
Although it doesn't make much sense it does provide an extra smile here and there as random objects, long since packed, appear in unlikely places :D
I'm going to have a lot of that. The packing started out very methodical, labeling most contents on the outside, mostly key items I knew I'd be looking for. As the packing progressed the labeling got shorter and shorter, and more and more unlike items got packed together (Misc Hardware, Sander, Welding gloves, & etc.)
 
I'm going to have a lot of that. The packing started out very methodical, labeling most contents on the outside, mostly key items I knew I'd be looking for. As the packing progressed the labeling got shorter and shorter, and more and more unlike items got packed together (Misc Hardware, Sander, Welding gloves, & etc.)
That describes it perfectly :rofl:.

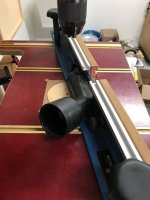
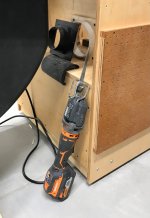
Apparently long ago when I put the 4" port on the router table I anticipated King Kong stopping by to swing from the hose. 6 screws and some sort of sealant!???! I had to use a wrecking barr to pry it off. To enlarge the hole I had to work from the inside using a recip-saw. The hole doesn't look pretty but, is now the right size for the 6" port.
New Shop (431).jpg
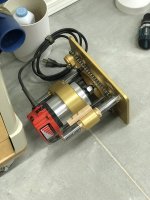
The PRL is waiting impatiently nearby, longing to go back home.
New Shop (432).jpg
This is a duplicate of the milling area vertical floor anchor. This vertical will serve the upper and lower router table, tablesaw plus a spare gated port for ad-hoc use.
New Shop (433).jpg
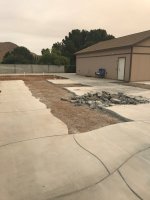
In an unrelated story, there were some finishing issues on the concrete work. The unacceptable areas have been pulled and the replacement pour is Saturday.
New Shop (434).jpg
I hope to have the horizontal runs to the tablesaw and router table done today. If I really kick butt I will finish the whole vertical.
 
How much of a struggle was it to get the concrete work redone? Did they take responsibility without too much aggravation?
Zero trouble. I was lucky and got referred to a quality guy. Took total responsibility even though the root of the problem was mud delivery delays. He was happy to re-do the work since he does quality work and actually cares about his rep. Also he said he got the concrete supplier to take responsiblity and cover some costs but I do not know the details on that. I have used him in the past and this is the only boo-boo we have ever had.
 
When I moved here from NY State, I watched the handle of my shop push broom, bundled together with other long stuff, go into the moving van. When we got here, I watched it and the bundle leave the truck and go into the house. Later, as we were unpacking and putting everything where it belonged, I couldn't find either the broom handle or the broom itself, so I ended up buying another push broom and handle. A year later I decided to set up my office desk, and when I pulled the file drawer out, there was the push broom. I've lived here 38 years and have never found the original handle to that push broom, but I know it's here somewhere, because I saw it entering the house. I later bought another handle for it and put it in my garage, because the replacement broom that I had bought was being used in my woodshop. It's one of my life's big mysteries.

Charley
 
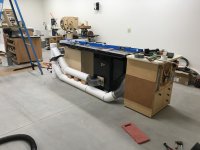
The router table duct will run nearly on the ground with a 3/16" strip between pipe and concrete. The tablesaw duct will run parallel to this for most of the distance. I was pondering various straps and brackets to hold all this securely. I gave it up yesterday and decided to sleep on it. Is it wrong that I do my best thinking when I am asleep?

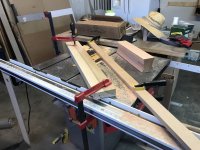
I decided to do this . . . you set up your tablesaw for cove cutting and take after a piece of stock.
New Shop (438).jpg
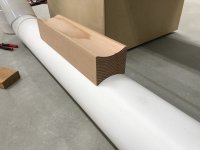
The thickness at the thinnest point is 2-7/16". This just turned out to be the measurement accommodating the wye positions and the height of the tablesaw port.
New Shop (439).jpg
The tablesaw duct sets on top like so.
New Shop (440).jpg
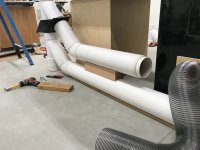
I cut the blank into three sections. These have a blob of silicone glue where each pipe sets in the "cradles" of the blocks. This is certainly more than enough support vertically.
New Shop (441).jpg
If the pipes aren't secure enough for my liking once the silicone cures I can add straps.
 
I frequently design while I sleep, and sometimes wake up and put it on paper so I don't forget it. Then I sleep better, knowing that I have the problem solved and documented. Trouble is, sometimes when I wake up and look at what I've put on paper, it's obvious that it is totally wrong. Well, at least I was able to sleep the rest of the night, but then I go back and redesign it the next night, if I haven't solved it that day. We "Techies" are all alike.

Charley
 
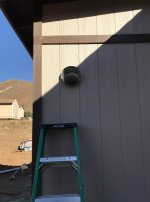
Roughed in the exhaust. The noise level is more than I had hoped for. My original design included a folded baffle at the exhaust to drop the noise level. In this iteration I plan for an adjustable elbow that I will experiment with later. I am inclined to address the noise levels later if someone complains; they probably won't.
New Shop (447).jpg . New Shop (449).jpg
Once I am satisfied I will add some support from the muffler to the overhead.
 
Top