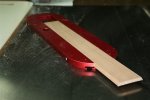
Shop Made Replaceable Inserts for Aluminum ZCI

glenn bradley

Member
Messages
11,548
Location
SoCal
I had planned to dovetail one of my phenolic ZCI's to allow replaceable inserts but, never got around to it. Rockler had a clearance sale and the price on this commercial version was fair. I had held off putting it on until I could make some replacement inserts for it.

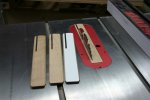
I am still on "light duty" so rather than wrestle a sheet of 1/4" MDF or hardboard I dug some resaw-spoil out of the scrap bin. I milled the scrap to 1/4" thickness and ripped it to width.
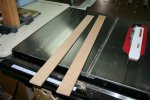
SawStop-Shop-made-ZCI-Inserts (2).jpg

I used the commercial insert to set the dovetail angle.
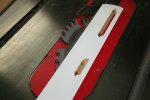
SawStop-Shop-made-ZCI-Inserts (3).jpg

A Marc Adams style push block works well for this long thin stock.
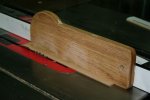
SawStop-Shop-made-ZCI-Inserts (4).jpg

OK, that part fits.

SawStop-Shop-made-ZCI-Inserts (5).jpg

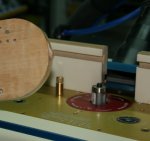
I used a magnetic featherboard as a stop to cut the riving knive/blade guard slot.
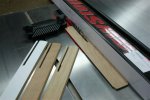
SawStop-Shop-made-ZCI-Inserts (6).jpg

Don't forget the clearance for bevel cuts.

SawStop-Shop-made-ZCI-Inserts (7).jpg

Now that I know how to do it I should be able to make a bunch more in a batch once I'm up to it.

SawStop-Shop-made-ZCI-Inserts (8).jpg . SawStop-Shop-made-ZCI-Inserts (9).jpg

Like many of these things, making one doesn't really pay. Making a dozen out of scrap however, is way cheaper than paying for them.
 
Last edited:
Ahhh ... so that's what Glenn would do! :rolleyes:

This is a timely topic for me. I have a Bosch worksite saw, and the stock table insert is nowhere close to "zero clearance". I've struggled with the "what to do" question for a long time.

A few years ago I noticed that Leecraft made a ZCI for the Bosch, but the price turned me off. Finally, a couple of months ago, I used a Woodcraft gift certificate (won as a door prize) and only paid about 35% for the Leecraft.

OK, so now I have a ZCI. Like you said, it seems a shame to cut into it until I've made copies, but neither the OEM insert nor the Leecraft are easily reproduced:

Elph360HS_2518_Inserts_OEMvsLeeCraft_1.jpg


Elph360HS_2519_Inserts_OEMvsLeeCraft_Bottom.jpg


Elph360HS_2520_Inserts_OEMvsLeeCraft_Front.jpg


Elph360HS_2521_LeeCraftInsert_TableSawOpening.jpg

So now you've got me thinking about the "insert insert" idea. I was familiar with the concept for drill press tables, but it never occurred to me to apply the principle to a table saw insert.

Hmmm... :huh:
 
The commercial versions have rather intricate undersides in order to serve the most function for the most people. The rabbet requirement to the left of the blade looks necessary but, that is a simple matter on a router table with a start and stop block. For my old hybrid saw I used the factory insert double stick taped to a roughed out blank and a flush trim bit on the router table. I would leave a little "beaver tail" that I would shape to lock under the far end of the opening. I also used a pilot hole with a cut-off nail in the tail for this.

ZCI-2009-005.jpgZCI-underside.jpg

In the second pic you can see that I used a 1/4" straight bit to cut a groove to allow the blade to spin freely up to speed before raising it through the ZCI. Later on I got lazier and just cut this groove from the rear up to a bit past the blade arbor as opposed to the stopped groove you see.

I would trace the Leecraft onto a piece (or 6 pieces) of ply, tape the commercial insert to the blank as a template and template route the overall shape, drill all the holes and then add the rabbet. Rinse and repeat.
 
Last edited:
I think I'm catching on.

The whole "gray layer" on the underside of the Leecraft appears to superfluous, so why retain it at all? Just start with a blank the same thickness as the "landings" that have been cut from that layer, right?

That just leaves the left-side rabbet and the blade kerf and some sort of "beaver tail" arrangement. I believe I can manage that.

Thanks Glenn! :five:
 
Yep, you got it. I used to have to rabbet the underside of the ZCI's for my old 1970's Craftsman 113. contractor saw and leave a 3/32" lip around most of the outer edge. Sort of a pain but, doable and the ZCI and the MJ Splitter I used made the saw much safer and gave a cleaner cut as well. Worth the effort if you do a batch at once, It's only a smidgen more effort to make 6 than it is to make 1 :).
 
Nicely done, Glenn. I like the fact that the Sawstop throat plate is designed to have replaceable ZCIs from the get-go. :thumb:
 
Very nice Glenn! :thumb:

I meant to ask at BWII, but do you keep a log of procedures/measurements for the next time you need to make more of these or other jig parts? A "Book of Glenn" if you will. :D

I've been milling some zero clearance plates on the cnc when I need them. I took a couple to the last CNC SIG (Special Interest Group) we had at the local guild, and saw some light bulbs go off for others in the group. They have 3 sawstop saws there that they've just been buying the replacement inserts for, so I suspect I'll start seeing some shop made ones appear on them soon.
 
Top