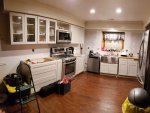
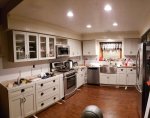
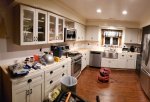
Time for another round of kitchen updates - glass shelves installed!

Thanks guys! :wave:

What is the water arrestor? Haven't heard of this gadget. You da man. This remodel is looking great! Mama will be happy and really proud of you.
David

They are usually a 12" vertical piece of copper with a cap on top to hold some air in the line. Usually located off a Tee next the sink valve, usually hidden inside the wall. They keep your pipes from banging/hammering...

You can also get them to add on to the valves if you dont' have them and are having pipes hammer.

https://www.familyhandyman.com/plum...resters-to-stop-banging-water-lines/view-all/
 
Last edited:
Finally got to one cabinet that had a drawer, the rest after this have 1 to 3 drawers each. Had to do a little clean-up on the dovetail pockets, had some strings of fiber still in some of them mostly, just scraped them out with my pocket knife. It went together smooth and tight.
2018-12-18 20.51.36.jpg 2018-12-18 20.51.42.jpg 2018-12-18 22.53.33.jpg

I'm really liking these drawer glides too.
https://www.youtube.com/watch?v=xNhwUHQrlIk

Still have 5 more lowers and 2 uppers to go.
 
It's nice to know that, when you are in a hurry, you can hip check a drawer and it won't slam and dump the contents out the back (like mine). It's also nice to know that in an emergency you can take a stand up shower in a kitchen sink that supports 200 pounds.:p:D
 
...It's also nice to know that in an emergency you can take a stand up shower in a kitchen sink that supports 200 pounds.:p:D

Plus, the view out the kitchen window when you're showering is splendid. (Maybe not so much with the view INTO the window, though, lol.)
 
Thanks guys!
It's also nice to know that in an emergency you can take a stand up shower in a kitchen sink that supports 200 pounds.:p:D

:rofl:

Tonight was mostly putting together the rest of the base cabinets, mostly so I could get the cardboard out for recycling tomorrow. ;) I still have one more base cabinet to assemble for next to the large set of drawers, then the other two uppers on each side of the sink. I need to stop and pickup a new level I think, mine little 2' one isn't showing level when held vertical, but does horizontal. :dunno:

Here are the base cabinets set in their respective places, have some fillers to cut to size, then can start setting them.
2018-12-19 22.45.25.jpg 2018-12-19 22.45.30.jpg 2018-12-19 22.45.35.jpg

I'll also be looking at some trim for that gap under the sink, the 3" space there looks a bit off to me and would like to hide the joint where the filler and face frame meet, though there is a filler on each side of the sink about the same width, so may look pretty symmetrical once those are in.
 
Last edited:
I decided I'd go ahead and mount the drawer fronts tonight and will do longer screws to mount the handles through the face panels and the front side of the drawer box since the fronts only have a couple of screws holding them on. Still have the base cabinet to the far left to assemble and the two upper cabinets on each side of the sink to assemble, then level and fasten all of them together and to the wall.

2018-12-21 19.09.50.jpg

Might get some work done Sunday, but have all next week off to finish things up for getting counters measured.
 
We celebrated Christmas on Saturday with the kids, so I've worked on getting cabinets set yesterday and today. Had a case of stomach flu in between, so not as much progress as I hoped. Got the last two uppers installed by the sink too.
2018-12-25 21.22.10.jpg

There weren't really any instructions for the fillers, so I winged in and made them the way I thought they should be done.
2018-12-25 21.00.06.jpg 2018-12-25 21.05.52.jpg

Still have some corner fillers to finish, then have a cabinet to make for the corner next to the black cabinets. I think I'll have enough extra filler material to use as face frames. My wife wants to put baskets on the shelves, so no doors. I also picked up some sanded ply to put down as temporary counter tops until we get some ordered, will probably cover them with some shelf liner to make cleanup easier for now.
 
Today I got almost all of the handles and pulls installed, we're still waiting on the trash can pull out for next to the sink that is on back-order, so held off on that one.
2018-12-26 17.08.42.jpg

Also got all but one filler completed and framed in around the dishwasher opening to help support the counter and the filler next to it.
2018-12-26 19.36.00.jpg 2018-12-26 21.52.27.jpg 2018-12-26 21.52.37.jpg

One thing that had been bugging me about these cabinets is that they are standard size, so they've got some exposed joints that were quite noticeable, even with my perfect alignment of them. ;) I was thinking I may have to fill, sand, and repaint the face frames, but remembered that I had ordered a jar of the color matched fill/repair goo. Turns out it works and matches pretty well. It seems to be a petroleum wax based product, drys after several minutes not brittle. I say wax as it has a bit of that smell and can be buffed out and off of the original finish

This is a good example, the piece to the right of the sink is an 1 1/2" filler, then there is the 2" piece I added just below the sink, those joints have pretty much disappeared.
2018-12-26 21.53.03.jpg

So I have the last filler to mill out and install, 4 end panels, cut off all my shims and install the kick boards, and then put in some temporary counters for now. I'm waiting on some connectors for my lights, but may start installing those after those first projects are done.
 
Thanks guys. It's been another productive day, not sure tomorrow will be, but today was. ;)

Today I got the rest of the fillers finished.
2018-12-27 13.05.46.jpg

Also cut out and assembled an open cabinet to go next to the black cabinets. The inside will be painted the same color as the face trim. I used some extra filler material to make up its face frame.
2018-12-27 16.39.04.jpg 2018-12-27 16.39.13.jpg 2018-12-27 17.29.06.jpg 2018-12-27 20.33.13.jpg

I also got the pine marble installed.
2018-12-27 20.50.28.jpg 2018-12-27 20.50.49.jpg 2018-12-27 20.50.43.jpg

And finally got the dishwasher re-connected.
2018-12-27 20.51.00.jpg

Probably looks like the same view as before, but lots of updates...
2018-12-27 20.49.46.jpg

Tomorrow I need to get the kicker trim installed that covers all the gaps between the individual cabinets. then get the area around the kitchen window prepped for paint. I'm holding off on the end panes for the upper cabinets and the end under the glass cabinets until paint is done. My wife needs to go pick out her counters and the paint.
 
The 'temporary' plywood countertops remind me of my sister and her husband.

About ten years ago, I built them a set of base cabinets, and because they were going to get all new countertops in the kitchen, I made a 'temporary' top from MDF edged with oak. I finished it with several coats of garnet shellac and a couple coats of Arm-R-Seal. It kinda looked like leather - interestingly. It's been on there for ten years now. I noticed on Xmas Eve that it'd been painted. Brother in Law said, "yeah, it was getting beat up, so I turned it over and put a bunch of coats of brown enamel on it. Looks good, doesn't it?" I just shook my head, and bit my tongue...
 
Top