
glenn bradley
Member
- Messages
- 11,548
- Location
- SoCal
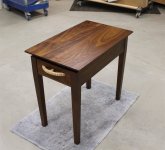
I settled on side hung for the drawer. The guides will have to be wide enough to offset the legs. Sounds like I better make a test drawer.
.jpg")
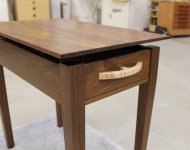
Yep, those are some wide guides. I usually use hard maple but happened to have a scrap of straight grained pecan in the bin.
.jpg")
I'll cut a 1/4" deep stopped-groove down each side of the drawer box. I mark the router table fence for my stopping points.
.jpg")
I will feed the drawer box part way one direction for one side and part way the other direction for the other. This lets me use the same reference edge to set the groove position. To assure things don't wander I add a second fence.
.jpg")
Test drawer is a success.
.jpg")
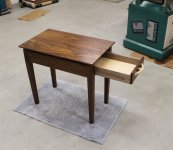
I have decided to go to a separate drawer box and false front style drawer. Getting in and around the internals got a little more fussy than I wanted to deal with. A false front drawer removed the challenges of my original design.
.jpg")
Time for the real stuff.
Yep, those are some wide guides. I usually use hard maple but happened to have a scrap of straight grained pecan in the bin.
I'll cut a 1/4" deep stopped-groove down each side of the drawer box. I mark the router table fence for my stopping points.
I will feed the drawer box part way one direction for one side and part way the other direction for the other. This lets me use the same reference edge to set the groove position. To assure things don't wander I add a second fence.
Test drawer is a success.
I have decided to go to a separate drawer box and false front style drawer. Getting in and around the internals got a little more fussy than I wanted to deal with. A false front drawer removed the challenges of my original design.
Time for the real stuff.
.jpg")
.jpg")
.jpg")
.jpg")
.jpg")
.jpg")
.jpg")
.jpg")
.jpg")
.jpg")
.jpg")
 ) it has a 38” drawer and your oversized runners may just be the ticket
  as always, great follow along and great project
.JPG")

.JPG")


")
