Wood texture in SU

Rennie Heuer

Moderator
Staff member
Messages
11,639
Location
Constantine, MI
I know this subject has been bandied about a few times. Forgive the resurrection.

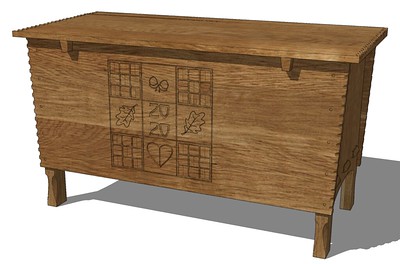
I see many of you using wood textures that look good but also have the grain running in the right direction. Now, before you refer me back to the basic "go to the texture menu" let me say that, yes, that works fine with the standard textures that come in SU. HOWEVER, I've been using akb-WoodSpecies and the texture menu is not available when working with them. So, there must be another source for wood textures, other than the flooring samples that come in SU, that can be more easily manipulated in SU. Come on guys, give up the secret.
 
I don't know if this is how others do it, but I found an image of a wood image (png or jpg) on google images and saved it to my pc.

I then opened my sketchup and clicked on a face to select it.
I clicked File>>Import, changed the type to the type of the saved image.
Clicked on my saved file, then clicked texture on the dialog box below, then clicked ok.
It imported my image to the selected surface and let me scale it.
When I hit enter, it filled the surface with the image.

I found it to be the wrong direction, so I right clicked on the surface, clicked edit under the texture menu. This brought up my photo editor and let me rotate/save it. When I closed the editor, it updated in sketchup. There is also some options to rotate under the position option of the context menu.

I think a lot of it comes down to sizing the photo correctly before importing it, then scaling it correctly on the import.

Even in this screenshot, the board is tiled 3 times, should have been much longer to make it scale around 10 times or so.
textureExample.png

@Dave Richards May have a better way of doing it, but that is what I've figured out.
 
If I apply a texture to a "Component", the Texture edit option does not appear. Opening the Component and applying the texture to a face allows editing and orientation.
 
Yup, it's not any different than working with the paint tool that adds the textures. I think the trick here is to import a few boards that match, or take pics of your own and mix them up a bit to add some realism to your model.
 
If I apply a texture to a "Component", the Texture edit option does not appear. Opening the Component and applying the texture to a face allows editing and orientation.
Ureka! :bliss: If I go back and reapply the akb-WoodSpeies material in this way I can access the texture and do the rotation.
 
Good work Darren. As you pointed out, you need to apply the texture to the face rather than the component wrapper.

Since the texture image is of finite size, it will necessarily repeat if it isn't as large as the face you are putting it on. When I import an image for a texture, I first draw a rectangle the size of the texture and apply it to the face of the rectangle. I also use images of whole boards like I show in front of the chest.


I made the rectangle larger so you can see the repetition. When I want/need to indicate that a larger piece is made up of several boards glued together, I dived the face with lines to limit the texture and then pick out different parts of my long "board" pretty much as you'd do in the shop. Those dividing lines drawn across the face are then hidden so it doesn't look like there are shadow lines because my glue joints didn't close up.

 
Last edited:
Top