John Bartley
Member
- Messages
- 923
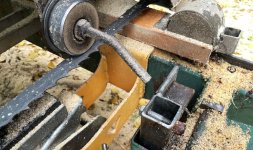
Congratulations on the first usable lumber from your new mill !! And, congrats (sort of ") ) on joining the backstop club. I have yet to join, but I'm sure that day is coming.
) on joining the backstop club. I have yet to join, but I'm sure that day is coming.
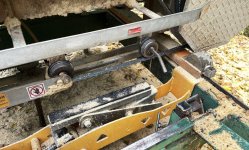
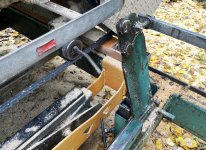
In my favour, and if it interests you I can send a photo .... on my mill, mounted in line with the backstops is a stop-dog that is about 1/16" lower than the band and stops the mill if the backstop is set higher than the band. I am sure it would be an easy retro-fit. While I have yet to join the backstop club, my stop-dogs have made contact many times .....
) on joining the backstop club. I have yet to join, but I'm sure that day is coming.In my favour, and if it interests you I can send a photo .... on my mill, mounted in line with the backstops is a stop-dog that is about 1/16" lower than the band and stops the mill if the backstop is set higher than the band. I am sure it would be an easy retro-fit. While I have yet to join the backstop club, my stop-dogs have made contact many times .....