Solid core door project

I mentioned in another thread that I'm just setting up a new shop. It is 28'x20' with 10' ceiling. I learned from my last shop in Oregon that you need lots of light, lots of 120v and 240v outlets, and plenty of storage. Well the the lights and wiring are in, the walls and floor are painted but now it's time for storage.

I read Tom Clark's post about building inexpensive cabinets and it got the "make sawdust" juices flowing. I have is this.... I've got a 80"x32"x1 3/4" solid core door and would like to use it for the top of a storage cabinet. Question, should I build to the size of the door at least the length or make it narrow say 25-25"? :huh:I plan on putting it next to the wall but never had a bench more than 24". I do have on 96"x24"x37" work bench it is tall so I don't have to bend over too much.:thumb: This bench would be to set some of my bench top tools on. Is the 32" just so much unusable space?:doh: Also would you cut down the length into smaller cabinets.

Looking for input so that I don't have to make it twice:D I'm thinking of it being about 28-29" tall.

Any advice?:dunno:

Thanks,

Royall

PS. found out that if you paint a floor gray epoxy with those sprinkles, lot of luck finding any small items dropped on it!:eek:

PSS. I'll post photos of the shop when I figure out how to attach on this forum.
 
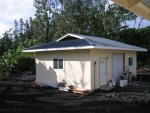
Finally got some shot of the shop. This is looking from the lanai of the house looking SW. Didn't turn out too bad for an old grease monkey:D You can see our first coconut tree we planted to the left. Everything you see that's not green is lava or lava covered with cinder. Biggest challenge here is keeping the jungle back!! Buy roundup type stuff in the 2.5 gallon jug. About 12 mile in the same direction is where the current lave flow is entering the ocean, quite spectacular to see!:thumb:
IMG_8137 (Small).jpg


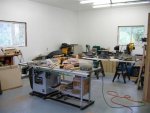
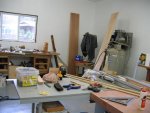
This is looking from the entry door in the NE looking SW. You can see the door in question on the saw horses with some of the tools I've been cleaning up from storage.
IMG_8130 (Small).jpg


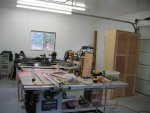
Looking from the SE to NW. In the corner is a small portable scafold that is being used a storage shelf until I get some storage built. Also in that same corner is where the sheet goods are for the time being. The tall cabinet is a utility storage unit I built for a lady to keep her dive equipment in. There is no back or right end as it is to go into an existing corner of her garage. She wanted it build as cheap as possible. :dunno:Used 3/4" A/C ply, 1/4" luan ply, and ripped fir 2x4's. Materials and hardware came to about 120 bucks.
IMG_8131 (Small).jpg


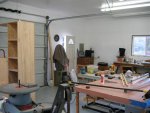
Looking NE to the door
IMG_8132 (Small).jpg


Another view looking at my "portable shelving unit";)
IMG_8133 (Small).jpg


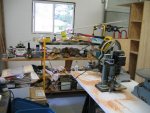
Looking at the SE corner. You see the compressor and the workbench that is still waiting on drawers. I had the same bench in Oregon and had put in a single shelf on full extension glides for assorted small power tools. This time there will be four wide drawers on full extension glides. That is the bench drill press under the drop cloth. It is on a temp. stand with casters until I figure out where it will live. The compressor is inside only until I get 3'x8' addition on the back of the shop. Can't do that until the county comes out and signs off on the building permt. The 240v is already stubbed to the outside of the wall. Eventually the dust collector will be there with the compressor too.
IMG_8134 (Small).jpg


Another view of the bench and computer.
IMG_8135 (Small).jpg


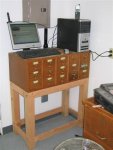
This is a shot of a library card file that I scored last summer. Finally put it on a stand made of some left over materials. The thing is heavy and will do just fine for hardware and other small parts. I may put my tool chest on top at a latter time but the computer will live there for a bit. I'll add a shelf to the bottom tonight.
IMG_8136 (Small).jpg

Sorry about the long post,:(

Royall:wave:
 
Wow - talk about wide open spaces!:eek:

That's a great looking shop Royall. I can see where you might need a few "storage solutions", but having all that elbow room has got to be nice.:thumb:
 
Warning Warning!!!

Royal is of the starting gate and heade for the finish line:D:thumb: one thing you should look into royal is some way of keepun the dust out of your computer,, ihave mine in aseprate room and it stillget dusty ,,helps if you keep the door closed.. but maybe a plastic cover or something cuz you got everything it takes to make lots of good saw dust nice shop there royal:thumb:
 
Thanks for the heads up Larry. It is an older unit that I stuck out there but it has been work better lately for some reason.....:type: I guess I'll stick a sack over it and see what mileage I get:D
Just finished lunch and it's 81 and a sunny day...;) guess it's time to make some cabinets!:thumb:

Still wish I could get some input on that door:dunno:
 
in my shop royal i made a bench that was 48" wide and 96" ong and i dont regret it one bit..so i would make ithe size of the door and have a over lap to clamp against i had 6" overhang on all four sides..the framework is just 2x6's and some 4x4 legs.. look up steve ashes post on my shop thread around jan of this year2008.. i will try to find it and post link
 
I believe it a handle for the tablesaw blast gate for his DC. Look his shop over, it's full of great ideas. Also your shop is looking good Royall :thumb:

Tom
 
Well after looking at Tom Clark's take on building shop cabinets several times I've decided to build a box for my door using his design.:thumb: His method is very simple and straight forward and strong looking. I'm going to extend it to 80" and put in a second set of support legs. That way I can have three sets of drawers to fill up.:D I'm building it the same length as the door and will add a 1/2" banding to make it look nice.

I started cutting last night but didn't get too far :(but will take some photos of the project as I start the assembly. Luckily I still have plenty of full extension drawer glides left over from building the kitchen cabinets. I will have to buy some 1/2" and 1/4" plywood down the road for about 12, drawers approximately 24" wide. That should take care of some of my shortage in storage for a bit.:thumb::thumb:

I've never had many drawers for storage in the past shop and I'm open to suggestions as to how many shallow VS deep drawers to use. I know this is a personal thing but your thoughts on size and what you are putting in them are MORE than welcome.:D
 
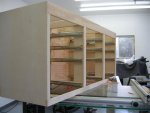
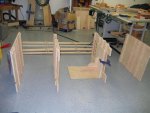
Well Wednesday night I got all the case components cut and numbered:thumb:. I tried to get a shot of some of this "Chinese" birch ply showing the voids and erratic layer of the plys but I couldn't get any clear shots.:huh: Thursday night I got all the sub-assemblies (ends, legs, and face frames) put together and it didn't take long after that it to get in assembled. Well, it's not all together, still need to put the back on and the supports for the top.:D Tomorrow (Saturday) heading into the orange box to get the materials for the drawers. For this case there will be 3 banks of drawers with 1) 4", 2) 6", and 1) 11 1/2" drawers in each bank.

IMG_8147 (Small).jpg


IMG_8149 (Small).jpg


IMG_8150 (Small).jpg
 
Made it to Hilo and back with the sheet goods for the drawers before it rained!:D I got the back on and the back edge routed over, the rest of the top supports, and mounted the 24 full extension glides. I had just enough glides left over to get the job done with one set left over to build a pull out shelf for baking sheets and racks for the kitchen.:thumb: Last night when I went to bed I couldn't go right to sleep:( and started thinking about the cabinet.:huh: I was laying out the cuts for the drawer sides and then realized that I didn't buy enough material and will come up about 1/3 sheet short on the 1/2" ply.:doh: Oh well, I'll cut and assemble until I run our and worry about the rest later.:D
Thanks for following along:wave:

IMG_8151 (Small).jpg

IMG_8153 (Small).jpg
 
Last edited:
Hi Royall

Good looking cabinets. I did the same thing with regards to material estimates. The draws take up quiet abit. What interested me initially was the fact that there seemed to be a very efficient use of material in this design. I never thought about all the material required in the draws.
Yours came out much better looking than mine. I tried to use some bits and pieces lying around my basement temp shop.

I see you also used the quality slides. I wish I had sprung for the more expensive ones. I used singles and had to shim them to get the draws to stay on the rollers. Took longer to mount the slides than making the draws. Thanks for the pictures. I will get some of mine and post as well when I am next in the shop.
 
Top