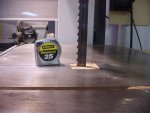
Bandsaw review (Steel City 18in)

Opps...

I meant to say SC is e-mailing me the letter they are sending to Taunton (FWW) registered mail. I will print it latter to-night or tomorrow as it is nothing they don't want the public to see and prefer they did!

Always in a hurry it seems.. ha.. ha...

JT.. sarge
 
...
Jim is e-mailing a Re-buttal letter written by SC to Taunton Press expressing their dis-pleasure with the way the review was conducted by what appears to be a Non-Machine saavy reviewer and the title of "Steel City 18" BS Has Some Flaws". It should not have been printed under the circumstances that it was!
...

Unfortunately the article print, graphics, font size, and location made sure everbody noticed the bogus claims, while you can be sure their rebuttal will be real dinky, real short, and real inconspicuous.
Gotta take a break now - that last word was too big & my head hurts now.:D
 
Last edited:
Well after my discussion on this board as well as the techs at SC...

I started with this...

Cnv0070.jpg


I removed the table to expose this...

Cnv0074.jpg


I loosened the 4 capscrews and shifted the casting tward the blade as far as it would go... approx 1/8in. There are 3 set screws that allow you to level or change the orientation of the trunnion casting. This would allow you to square the table to the blade in the direction of the blade beam (fore/aft) and side to side.

Tightened everything down, reinstalled the table and this is the result...

Cnv0075.jpg


all that remains is to run thru the setup for the table/fence and lookout pile of maple!! (ripping stock for a benchtop)
 
That aught to cut down on the sparks some. But that insert is easily a full blade kerf off center. Maybe you should write the FWW editors and let them know their reviewer missed that particular problem.:D
 
Evening Brett...

That's about where mine is directly off the pallet and it presents no problem. The blade clears insert sides nicely and I added the zero insert anyway. It's made of plastic. I also drilled 3 holes with a forstner on each side so what little dust ends up top table drops or gets sucked down by the vacuum from the DC port. Effort on your part but it relays to we know the saw even better after you accomplised it so your effort has attained value.

Here's the e-mail I mentioned concerning the review by Roland Johnson. JIm sent another e-mail concerned a blatant error RJ made on a Spindle Sander review in FWW Tools and Shops recently. RJ may be wood-worker but I highly question his know-ledge of machinery and IMO shouldn't be priinted as many are going to read his reviews and not have enough personal knowledge to question. In other words.. blind faith in what appears to be an expert based on the fact he was printed. He could be an expert?... but not on Machinery!
*********************************************************
Hello Sarge,


Here is the reply on the bandsaw review that Roland Johnson did. Let me know what you think of it.


Best Regards,


Jim Box
**********************************************************
Steel CityIn reference to Roland Johnson’s review of the Steel City 18” bandsaw in the February issue of Fine Woodworking magazine, I would like to clarify a few points regarding our saw:

First, Mr. Johnson stated that “the upper guide post flexed enough to allow the thrust bearings to flex out of alignment, which caused the blade to twist during resawing.” A few paragraphs later in the article, Mr. Johnson stated that “the upper blade guide mounting bracket was not at 90° to the blade, creating a twist in the blade between the upper and lower guides.” Our bandsaws are equipped with an adjustable guide-bar bracket. This bracket can be adjusted in any direction to align the guide bearings to the blade at a perfect 90° angle, which would have eliminated the problem Mr. Johnson describes. Such adjustments are the responsibility of the customer.

When we designed this saw, we added many new adjustment features to combat the common bandsaw problems that we observed in the marketplace. With these new adjustability features we forgot one thing, and that was to really clarify their functions in the manual. This has caused some confusion for end users who are trying to understand what is causing a particular symptom and how to correct it. For this we apologize. We are in the process of revising the manual and the new version should be posted on our website by mid-January.

Mr. Johnson also stated the saw table had a .012” crown in the middle of the table and a .024” disparity at the blade slot when the alignment pin was removed. This is to be expected and is by no means an indicator of poor quality control. The table will move when the alignment pin is removed, but once the alignment pin is re-inserted, the table surfaces will again line up perfectly.

It is important to understand that cast-iron tables will always have stress conditions at various points around their perimeters when they are assembled to machines. In the case of bandsaw tables, these stresses result when the trunnions are tightened. When we ship the saws from our factory, the table is shipped separately and must be installed by the customer. There are two aluminum trunnion quadrants mounted to the underside of the table that must mate up with the cast-iron trunnion cradles so that the table can tilt. If the mating surfaces do not mate together properly, the above described condition can result.

This is not a defect and the remedy is simple: Loosen the bolts holding the aluminum quadrants to the table, tighten the lock knobs, then re-tighten the quadrants. The cast-iron trunnion that supports the table are fully adjustable to the saw cabinet. This assures that the table can be set at a perfect 90° to the blade.

Mr. Johnson also noted that the thumbscrews securing the guides are too small. On this we agree and have since upgraded them to a larger size.

Although we try to set up the saws as accurately as possible at the factory, some fine tuning will generally be required once the unit is assembled. We regret it if our manual didn’t adequately outline the procedures required to perfectly tune the saw.

Best Regards,
Jim Box, Technical Supervisor
Tool Works
*********************************************************
Regards...

JT.. sarge
 
(Having a hard time navigating the reply function and wanted to quote sarge about TW 1" blade use in post # 13.) That was one of the most enlightened descriptions of blade dynamics I've seen yet. A couple of additional observations: 1, the reason you get better results with a narrower blade is that they allow for higher set angles, therefore the blade will crab better and 2, if you could get enough set angle out of a 1" blade to crab properly, it would give you a lot more thrust support than a 1/2" blade would; (provided you still could generate enough tension to prevent drifting and bowing) Pitch, or the number of TPI, dictates how fast your feed rate will be with every thing else being equal. I liked your analogy to racing between red lights in regard to machine dynamics. That's exactly what I'm experiencing. One of my next planned experiments is to hand-carve wider gullets into a 3/4" blade to see if I can get a 4 degree set angle. If so, I'm expecting to get a blade that cuts flat, smooth,and FAST. Film at 11:00

"Onward into the fog."
 
hi william(bill?) welcome to family woodworking!
let me get this straight, you`re planning to hand file a carbon blade (35 bucks tops) to get "better performance"? i`ve got a foley saw filer that i`ve set up (in the past) to refile blades........to me it`s not worth the trouble. sure the blade was "sharp" again, but it never cut as long as the factory sharpening and the set-up was a pita that took the better part of an hour. so for an hour of my time i got a substandard blade that required maintenance more often...............you`re purposing hand filing! why invest the time unless you`re just curious?
tod
 
Hi Todd. It's Bill. I'm not filing-I'll use a Dremel to cut a 1/16" slot into the base of each gullet to allow more room to bend each tooth into a wider set than the present gullet allows. They're hardened at the tips, as you know, so you only get so much bendment. Not enough to get the .175" kerf I would need to get a three or four degree set angle. The purpose is not to sharpen but to re-set. Standard TW 3/4" blades have a set angle of 1.86 degrees and you just can't keep them from bowing in 16" of Doug Fir rippage (at any tension) where the 1/2" 2TPI does fine. The 1/2" blade, however, tends to lean on the blade guides when fed too fast. I'm counting on the increased thrust support of the 3/4" blade to resist twisting from thrust (overfeed). My ultimate goal is to produce a video for my website showing a 16" x 36" flat, fast, unguided veneer rip without the benefit of guide blocks or pinch rollers at all. Gentlemen; place your bets....................................
 
bill, i just checked out your website.......cool! you`ve been playing the saw game for a coupla days;) ......i`ll be interested in seeing what you`re able to come up with....i`ve been running some timberwolf blades for cutting big timbers on my saw.....the performance is marginal:eek: ......but i`m hard on stuff. here`s a pic of what i`ve got on there now;
MVC-156S.JPG

i`ve got a few of these so if your idea works it may be worth dragging out the foley stuff and regrinding one of these to try it?
tod
 
Afternoon Bill...

Interesting read on what you have in the works. I'm always interested in any form of tinkering that might lead to a more efficient end result. I am currently running a 3/4" Woodslicer for both re-saw and ripping as that is the majority of what I do on that saw save cutting joints, especially tenons.

Just an experiment to see what will happen. I pretty much expect for it to do both, but I think that the added mileage with the ripping is going to dull the blade much quicker as the variable is an excellent re-sawer but lacks the true gullet space and pitch to be a great performer ripping.

I would love to have one blade to dedicate to that venue and leave on the saw as I have a 12" Jet that I keep a 1/4" on for curve cutting on narrower stock. Even though I can make a blade change and bearing adjustment on my Steel City 18" in under 4 minutes, a dedicated would still be ana excellent ticker to ride the fast lane.

Keep posted of the results as my fingers are crossed for ya...

Regards...

JT.. sarge
 
Assembly was very straight forward, there are a couple of details that could have been mentioned in the manual. (had I taken pictures/paid more attention at the show it would have helped) Specifically the orientation of the angle iron for the rear fence support and that the "goo" on the trunion mounts for the table was actually assembly grease (to save you from having to do it when installing the table). Actually, assembly consists of... uncrate everything, install the table, install the fence and rails and go thru set-up adjustments.

I did find two things that are annoying and will be calling after the holiday about... 1. blade clearance insert. This has to be modified (at least on the one shipped with mine) to clear the blade.

Thankfully, I put it in and was turning the wheels by hand and heard the set of the teeth making contact with it before I started it.

The next I didn't notice until I had been running it for a while and smelled something like a burnt belt. I opened the lower cabinet and saw some black 'soot' at the bottom... did some checking and found the culprit...

The wheel brush was smashed down against the tire. I broke out the wrenches to adjust it... one slight problem... it was already adjusted to the limit. For the time being I am going to live with it but it will be mentioned.

One more review, comment... I ordered a number of blades from suffolk (timberwolf) I installed one of the 1in blades (ordered 2 one of them as a spare)that I ordered. Setup as instructed (flutter test etc...) and the first 1in blade that I tried I could not get to settle down and run smooth. I was cranking on the tension to the point of hearing the motor change pitch. Backed off the tension some, shut it down switched blades and this one had no issue fluttering and getting back to stabil. I can still hear the weld as it hits the tires but it isnt nearly like the first blade. I am assuming there is a bad weld on the first blade that I tried resulting in unstability and noise? If this is the case... might suggest ordering in pairs in the future...

I still have a lot of learning to do with bandsaws and this bandsaw but with anything... it takes time. I have no doubt that this was the right decision for me at this point. Some minor annoyances but I am assuming that I would have critisizms of any bandsaw that I purchased.

Wow John?
When I put mine together I had none of those problems. I put it together and cranked it up. It ran smooth as glass. I was sort of surprised when I burned my way through my first piece of oak. :rofl:
I called them to see what I did wrong they told me to throw that blade away and get a good one. They said they left the blade making to the blade making folks. Not a bad concept in my way of thinking.
I put a 1/4" blade on it for now. That's the one I use most. I ordered 8 Timberwolf blades in different sizes when they had the buy five and get 20% off sale going on. It's a great saw. I think you will love it.

Here are my pictures of it for those interested.

http://www.dontee.sistmllc.com/bandsaw/index.html
Change pages at the top of each page.

Don
 
Do you still have this saw? I recently acquired a model #50250 that doesn't have a motor run capacitor. Motor specs are 240 vac, 10.8 amp, 60 hz, ph 1, 2 hp, 1720 rpm. Please help
 
Rick..
Brent has not been on this site since 2007. Not likely he will respond. Perhaps someone else has this saw or is motor literate and will chime in.
 
I thought I had responded yesterday on this, but must have forgot the submit button.

Does there happen to be a label on the motor for it's model number? We could probably calculate the size of capacitor, but we'd need to know if there is a centrifugal switch or not in the motor. You mention it not having the run capacitor, does that mean you still have the start capacitor on it?
 
Top