Pull Out SCMS Station.....?

Stu If you have the room add a hardwood edge to the gate & drill a 3/8 hole for a short dowel & add a turned handle to make it easier to open the gate.

Bart, I was thinking the same thing about the gate.... it would be a bit hard to open it with the system running with no way to really grip it. :( But with Stu's amazing talents I wouldn't be surprised if he built it with some springs and ball ball bearings inside for just that reason!:rofl::rofl:

 
Bart, I'll put a piece on the edge of the blast gate, to make it easier to grip, but I don't think I need an extension, it is not hard to get at.

I got a lot done so far today..........

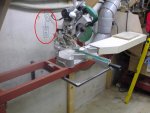
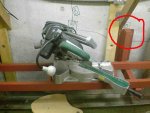
I started by building a frame for the pan under the saw, this will stay in place, and keep most of the dust, I hope, off the jointer..........
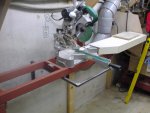
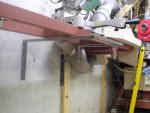
under_pan_frame_1.JPG under_pan_frame_2.JPG
I uses some lightweight tubing to build a frame to hold the pan, it is not very robust, but it does not have to be, it is fairly tight to the underside of the sliding table.

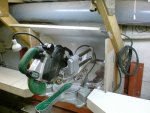
I then put a pan under the saw, it is just some sheet steel, and I used the aluminum tape to seal it off and cover any gaps........
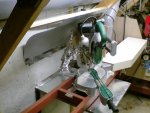
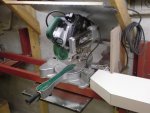
dc_surround_left.JPG dc_surround_right.JPG
The tape is actually quite smooth, but in the picture, each facet reflects light to make it looks very bumpy. :dunno:

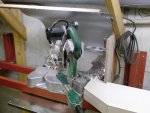
Here is some more details of the right side surround.......
dc_surround_right_45.JPG
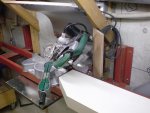
With the saw at a 45, there is lots of clearance, but when you put it to a double 45, it would interfere with the surround, so I put the last bit of the surround on a hinge..........
dc_surround_right_45_45.JPG
This way, I can do the double 45 cut with out anything hitting the saw.

I've yet to build the left side, that is next, should be easier than the right side, more room. Even with just the back and the right side done, it works well, the majority of the dust is collected, the pan might build up a bit, but all I have to do is slide out the saw table, and use a brush to push the dust towards the inlet.

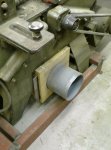
Once the surround is done, I have to look forward to solving the problem with the DC to the jointer, this is what I have now.......
jointer_inlet.JPG
........ certainly is going to need some reworking.

Cheers!
 
Hey Stu, is the pan front & back just a flat piece of metal, or does that metal just close in the front & back? It looks like you have the frame work under the saw creating a box that the chips fall into.

I have the idea for when I move to a bigger shop that there will be a funnel under the saw with the back edge coming up to make the curved back blast wall so the chips will fall down under the saw & behind the saw & on down to the slide gate & into the duct & be gone.
 
Last edited:
The frame work under the saw has a flat piece of sheet metal riveted to it, the inlet for the DC comes up into the flat piece of sheet metal. If you had a bunch of space under your DC, you could certainly make like a funnel and have gravity work for you on picking up the dust, that would certainly work, but I've only got a couple of inches to work with below the saw, so I'm doing the best I can.

Cheers!
 
Aw man, you covered up outlet "B". :eek:

View attachment 27954

:p

Looking good, Stu. :thumb:

Well, Vaughn, if you had been closely following this thread, you'd remember from post #41 (image reposted below) that Stu is using the electrified rail system just like the Tokyo subway and that outlet is thus redundant now. :rofl:

stu.third.rail.jpg

Very impressive Stu! Excellent use of space. I feel like a total wastrel of space when I see how efficient some of you folks here can be.
 
.................Very impressive Stu! Excellent use of space. I feel like a total wastrel of space when I see how efficient some of you folks here can be.

Thanks Mark, but it is not a case of "Can be" but "Must be" on the "use of space" issue :D

I got the saw station basically done......

surround_close_up.jpg
A close up of the "Surround", the wings on either sides are hinged so I can move them out of the way when I need to.
finished1.jpg finished3.jpg finished2.jpg
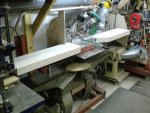
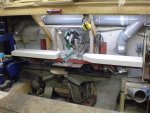
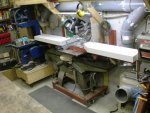
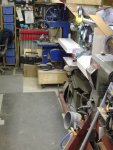
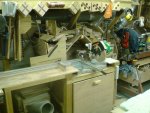
Here it is with both tables finished and installed. It works well, the vast majority of the dust is picked up by the DC, the little that falls on the table under, and behind the saw, can be easily swept to the DC when need be. Very little falls to the floor or onto the jointer. I know that some will, but I think that the compromise "between use of space" & "Function" is a success.

SN3D0049.jpg
Here the saw is folded away, so I don't jab myself in the ribs as I walk by :D

The only thing left to do, is put some kind of a stop block on the table, I'm debating what to do exactly, I do not think I'll be putting a "fence" on the tables. I think that a piece of "T-track" let into the top surface of the tables on both sides, with a sliding stop would be very effective..... :dunno:

Cheers!
 
Thanks guys, and yes, there is now room for the SawStop :thumb:

I got an hour in tonight, I should have gone to bed, but I had an idea, and it was burning a hole in my brain, and I know I'd be thinking and rethinking it instead of sleeping, so I just went ahead and gave it a go...........


I put the T-track on the back face of the table, and I built a stop for the station........
stop_block_1.JPG
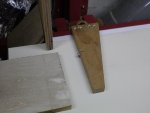
Here is the underside of the stop block, there is a bolt with a handle on it (you can't see it) and two chunks of 8mm drill rod I had, exactly the right size to just slide into the slot in the T-track:D

stop_block_2.JPG
This is how it fits into the T-track

stop_block_3.JPG stop_block_4.JPG
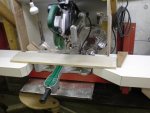
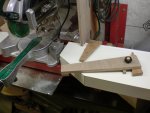
Here it is in place, the one screw there gives me a point to bump the wood up against, so I don't have to worry about sawdust build up etc.

The one obvious problem is if I want to cut smaller pieces than the space between the stop and the blade............. :doh:

I noodled it for a few and came up with an extension of sorts......

stop_block_5.JPG
Using the cut off from the stop, and another small block, plus a T-nut into the underside of the main stop block...........

stop_block_6.JPG
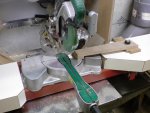
......... and there you have it, works well too..........

stop_block_7.JPG
Not a bad hour spent in the Dungeon I think :D

Cheers!
 
Hawaii reporting in.

I've been quietly following this thread with great interest. But now I have to say something. Sorry Stu, my friend.

Ok, I don't think it will work. Those weak torque box tables, that flimsy steel framework, (especially with that "electrified rail system" that Bart noticed). I'll never get off the gound (or,,,well, never get out-a-the ground?")

Seriously Stu, I like what you have done. If that setup doesn't last, then what the heck, we all better give up. Like they say, "Necessity is the mother of invention". You certainly have the necessity part, need ing all available space, and you sure are an inventor, inovator. I'm glad to be able to witness your creations. Someday I'm gonna be taking advantage of what you have done for my own stuff.

Thanks, and keep up the good work.

(Oh I wish I had a shop, I wish I had a shop)

Aloha, Tony
 
Last edited:
Tony, I totally commiserate with you. I understand how cold and snowy and generally miserable it is over there in Hawaii preventing you from, say, investing in an EZ-Smart and table to do cutting outside.

I'm one of those people who likes to have things set up just right before I start to actually do something, but slowly (some might even say I'm on geological time here :rofl: ) I am learning that sometimes you need to just jump in and start doing something. Be safe about things definitely, but if you totally screw up a project, well, they'll make more wood. Heck, most of the time you can either work around your new "feature" or at least salvage at least 75% of the not screwed up parts of the work. Best of all, if you screw up the looks of something for the shop, well, as long as it still works, you can proudly display the error to yourself as a lesson learned.

I'm not trying to jump on you, but just, well, sometimes you just gotta start even if the stars aren't all lined up. I need to remember this too more often than not yet and I'm sure I'm not the only one here.
 
Top