Let's see your TS switch safety upgrades

Keep the ideas coming guys! I'm reading with great interest.
I've been looking around as well and came across this thread:

http://www.sawmillcreek.org/showthread.php?t=83288&page=2
(scroll down to post #17). I'm not sure how rigid the PVC would be, but this does give you the ability to reach through the bar versus around a paddle.
Oh! This reminded me - I just looked it up - in Jim Tolpin's Table Saw Magic page 22 there is a diagram for a shut-off bar. Very simply put, it uses two "L" brackets mounted to the bottom of the fence rail and a "U" shape made from wood. The horizontal bar contacts the stop button. Not elegant, but it works!

Wes

http://books.google.com/books?id=BY...gZtH&sig=2n_nNXQUR02VBj6GOG6rkoa_BTk#PPA22,M1
 
Last edited:
This is coming from someone who doesn't even own a tablesaw, but I've been using the power strip for a power switch recently with the router table since I bought a new router for the table and have been thinking about upgrading to a dedicated larger format switch just for the router table. I'd need to invest in a whole new switch assembly instead of just fiddling with an existing switch. Would this approach work for you?

This might even have the added benefit of making the power cord more accessible for extra caution during blade changes.
 
Hi Jim - ...my saw is a right tilt....

You could mount the hinge on the front of the fence's bar, so that you could flip the paddle (board) completely up and out of the way of the tilt wheel.

Losing the pegboard, as Bart suggested, would be a help, too, but it looks like you may be storing your push sticks there.
 
On both my current and previous table saws I installed a real industrial magnetic starter with real industrial pushbuttons, including a mushroom pushbutton for the stop. The pushbutton station is mounted on the left end of my fence rail so that it is unobstructed. I can easily hit it with my leg to stop it. In fact, that's pretty much how I always stop it. Every once in a while I'll accidentally bump it and shut down the saw which is a small price to pay for the ease of shutting it down when I need to.
 
Keep the ideas coming guys! I'm reading with great interest.
I've been looking around as well and came across this thread:

http://www.sawmillcreek.org/showthread.php?t=83288&page=2
(scroll down to post #17). I'm not sure how rigid the PVC would be, but this does give you the ability to reach through the bar versus around a paddle.
First thing I noted was that this is also a right tilt saw and that the switch has been located to the right side of the cabinet. Food for thought.:huh:
 
This is coming from someone who doesn't even own a tablesaw, but I've been using the power strip for a power switch recently with the router table since I bought a new router for the table and have been thinking about upgrading to a dedicated larger format switch just for the router table. I'd need to invest in a whole new switch assembly instead of just fiddling with an existing switch. Would this approach work for you?

This might even have the added benefit of making the power cord more accessible for extra caution during blade changes.
Big issue here - first the saw is 220v - not too many power strips out there for 220.:D Second, the magnetic switch is by far safer than the simple toggle since, should the power be interrupted (like a power outage, breaker pops, etc) the saw will not start back up once the power is restored without again pressing the start button.

For safety, all my large tools have power drops from the ceiling with a locking connector at about eye level. very easy to reach and disconnect when doing maintenance or blade changes.:thumb:
 
You could mount the hinge on the front of the fence's bar, so that you could flip the paddle (board) completely up and out of the way of the tilt wheel.

Losing the pegboard, as Bart suggested, would be a help, too, but it looks like you may be storing your push sticks there.
Yes, that's where I hang push sticks & blocks, but I'd be willing to find a new home for them to provide an easier way to turn off the saw in an emergency.

On both my current and previous table saws I installed a real industrial magnetic starter with real industrial pushbuttons, including a mushroom pushbutton for the stop. The pushbutton station is mounted on the left end of my fence rail so that it is unobstructed. I can easily hit it with my leg to stop it. In fact, that's pretty much how I always stop it. Every once in a while I'll accidentally bump it and shut down the saw which is a small price to pay for the ease of shutting it down when I need to.
Got pictures? I'd be interested in seeing how you addressed this problem. The large mushroom switches are nice. Are they large enough for you to find it with you knee when you can't take your eyes off of something else?
 
First thing I noted was that this is also a right tilt saw and that the switch has been located to the right side of the cabinet. Food for thought.:huh:

That is the original position for the Grizzly switch on these saws.

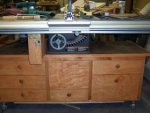
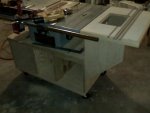
Here you go Rennie I built this using a borrowed portable saw, it has
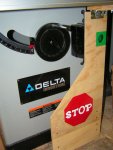
a dust chamber directly under the saw with a angled shelf front to back where the DC opening is. The blade storage is the bottom drawer on the right the rest of the drawers are storage for push sticks & wrenches & router table & bit stuff. When I got the Unisaw the guy I gave the saw to didn't want the cabinet so I kept it & the fence which is a real good fence system. I put a Ridgid fence on the saw. I have my Dad's 100 series Craftsman from about 1957 which the Craftsman fence will go on & the whole thing will go on this cabinet which has lockable casters. You'll note that the same board was used on this saw to shut it off that is now on my Unisaw waste not want not.
 

Attachments

  • 001 make a new cabinet for your contractors-saw.jpg
    001 make a new cabinet for your contractors-saw.jpg
    23.2 KB · Views: 45
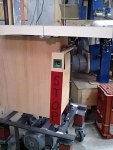
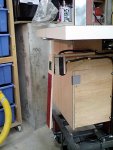
I have the same style as Bill's. Bought it off of ebay, but was made for the delta. Had to weld up a T bracket for mounting using one of the table extension bolts.
 

Attachments

  • IMG00259.jpg
    IMG00259.jpg
    64.8 KB · Views: 45
Last edited:
On both my current and previous table saws I installed a real industrial magnetic starter with real industrial pushbuttons, including a mushroom pushbutton for the stop. The pushbutton station is mounted on the left end of my fence rail so that it is unobstructed. I can easily hit it with my leg to stop it. In fact, that's pretty much how I always stop it. Every once in a while I'll accidentally bump it and shut down the saw which is a small price to pay for the ease of shutting it down when I need to.

Rennie, Matt has the same switch as my TS but he has a better description.:thumb: I even have the same problem of tuning the TS off by accident once in a while:rofl:
 
Here is what I have on the Phoenix, my 14" Bandsaw........

196knee_bump1.jpg 197knee_bump2.jpg

Not a tablesaw, but the idea is the same.

You can't see it, but there is a small block of wood that is just slightly smaller than the red "Off" button, so if you just touch the paddle, the machine turns off, and you have to really reach through the hole to turn the saw on, works great :thumb:
 
I can read and write Japanese!!!!!!!! I recognized that word "stop" on Stu's board!!!!!!!!!:dunno::huh::eek::wave::rolleyes::D:rofl::rofl:
Jim, excellent idea and Bart also!! :thumb:
Rennie, thanks for the line of thought, had been thinking for a while about the bandsaw at school and if something happened, kids could shut off without letting go. Great thread and perfect timing. Hope you got ideas, I sure did!:thumb:
 
Here is what I have on the Phoenix, my 14" Bandsaw........

View attachment 27802 View attachment 27803

Not a tablesaw, but the idea is the same.

You can't see it, but there is a small block of wood that is just slightly smaller than the red "Off" button, so if you just touch the paddle, the machine turns off, and you have to really reach through the hole to turn the saw on, works great :thumb:
Simple and effective - I like it!

I can read and write Japanese!!!!!!!! I recognized that word "stop" on Stu's board!!!!!!!!!:dunno::huh::eek::wave::rolleyes::D:rofl::rofl:
And here I was thinking it had been written in Canadian.:D:rofl:
Jim, excellent idea and Bart also!! :thumb:
Rennie, thanks for the line of thought, had been thinking for a while about the bandsaw at school and if something happened, kids could shut off without letting go. Great thread and perfect timing. Hope you got ideas, I sure did!:thumb:
You're welcome! Seems like a few of us were thinking along these lines. I know I got some good ideas out of this. Perhaps this weekend while the glue is drying on something else...... :)
 
Kinda what I had in mind, but without the cost of a new magnetic switch

On my bandsaw I was able to replace the faceplate/buttons with a new faceplate that had the large paddle. Something similar might be available from your saw or switch manufacturer. Much cheaper than the whole mag switch.

I had something like Jim's big paddle (but not as nice) on my old contractor saw. Seeing Jim's picture makes me think I might like to add something like this again despite already having the big "stop" paddle. I kinda miss that REALLY BIG paddle I used to have.

Here's one from the web:

tablesaw safety switch.jpg

And David Marks:

tablesaw safety switch 3.jpg
 
Last edited:
Here is what I have on the Phoenix, my 14" Bandsaw........

View attachment 27802 View attachment 27803

Stu,
I've had pretty much that same stop switch paddle on my TaiChi 14" bandsaw for about fifteen years. The paddle on mine is a piece of 3/8" PVC sheet. One of my old neighbors (in California) owned a sign shop, and I used to scrounge quite a bit of his scrap - especially the PVC and the MDO signboard. Made a lot of 'no cost' shop jigs and stuff from that. :D:D
 
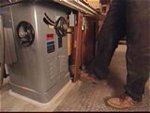
Mine is a piece of conduit that makes a "kick switch" that I can bump with my knee. It has a "finger" that pushes the off button.

The best part of it is I can shut the saw down no matter where I am at and still keep both hands on the workpiece.
 

Attachments

  • Table Saw.jpg
    Table Saw.jpg
    95.6 KB · Views: 68
Last edited:
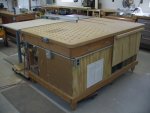
Daniel, thats a great switch, but I like what i see in the out feed table even more.

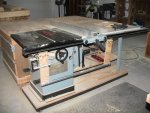
Could you post a few pics of that outfeed table of yours. I am looking to build one just like that since I notice you have a downdraft table incorporated into it.
Did you do it from a plan or own design. Thanks for putting up your picture.
 
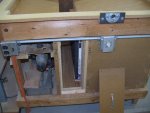
Sure, just give me a couple of days to take additional pictures. To really understand how it works, I will take some "internal pictures" of it.
 
Daniel, thats a great switch, but I like what i see in the out feed table even more.

Could you post a few pics of that outfeed table of yours. I am looking to build one just like that since I notice you have a downdraft table incorporated into it.
Did you do it from a plan or own design. Thanks for putting up your picture.

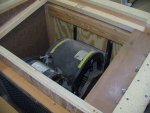
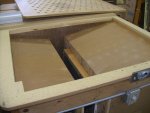
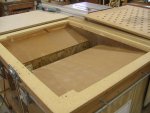
It is my design. The holes are 1" Dia. with a 1/4" round over on a 3" center to center staggered pattern. I can sand large items and if I am sanding small items, I place pieces of plywood over some of the holes to create greater suction. You can see the sloped surfaces that direct the sawdust toward the center area where the filters are.

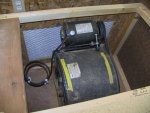
I have a small removable door for access to the filters. The first filter is a washable one to catch most everything and the second is a finer one to catch smaller particles. The blower blows the air out through the grill that is shown.

The fan is a salvaged squirrel cage from a furnace. It is wired through a timer switch so I can leave it on after I leave to help clean the shop air.

If you have any other questions, just ask.
 

Attachments

  • Table Mini - 10.jpg
    Table Mini - 10.jpg
    92.2 KB · Views: 30
  • Table Mini - 9.jpg
    Table Mini - 9.jpg
    85.3 KB · Views: 30
  • Table Mini - 7.jpg
    Table Mini - 7.jpg
    76.4 KB · Views: 30
  • Table Mini - 6.jpg
    Table Mini - 6.jpg
    71.5 KB · Views: 29
  • Table Mini - 5.jpg
    Table Mini - 5.jpg
    77.7 KB · Views: 31
  • Table Mini - 4.jpg
    Table Mini - 4.jpg
    73.6 KB · Views: 34
  • Table Mini - 3.jpg
    Table Mini - 3.jpg
    72.5 KB · Views: 43
  • Table Mini - 8.jpg
    Table Mini - 8.jpg
    81.1 KB · Views: 29
Top